DIYbrico | Discover, Create, Inspire

10 Creative Tissue Paper Crafts to Brighten Your Home
Discover 10 creative tissue paper crafts to brighten your home with fun, easy, and colorful DIY projects.

Tissue paper crafts are a fun way to add color and creativity to your home. Whether you’re looking for a weekend project or something quick and easy, these ideas will inspire you to get crafting. Plus, tissue paper is affordable and easy to find, so there’s no excuse not to try one (or all!) of these crafts.
Key Takeaways
- Tissue paper flowers are a timeless craft that adds charm to any setting.
- Pom-poms made from tissue paper are perfect for parties or simple decor.
- Tissue paper tassels can be used to create festive garlands or party accents.
- A tissue paper wreath is a welcoming and colorful addition to your front door.
- Butterflies crafted from tissue paper make whimsical decorations for any room.
1. Tissue Paper Flowers
Tissue paper flowers are a simple yet beautiful craft that you can make at home with just a few materials. They’re perfect for decorating parties, sprucing up a room, or even as a thoughtful handmade gift. The best part? They’re affordable and fully customizable!
Materials Needed:
- Colored tissue paper (any color you like)
- Scissors
- Pipe cleaners, floral wire, or twist ties
Steps to Create Tissue Paper Flowers:
- Start by cutting your tissue paper into rectangles or squares. You can stack 5-8 sheets together for fuller flowers.
- Layer the sheets neatly, then fold them accordion-style, just like you would when making a paper fan.
- Secure the center of the folded tissue with a pipe cleaner or twist tie. This acts as the stem.
- Trim the edges of the tissue paper to round them off or create a pointed shape, depending on the look you want.
- Carefully separate each layer of tissue paper, pulling them upward to form the petals. Fluff and adjust as needed.
Tissue paper flowers are a fantastic way to bring color and charm to your home without breaking the bank. Whether you prefer bold and bright blooms or soft pastels, the possibilities are endless.
For a fun twist, try using colored coffee filters instead of tissue paper. They add a unique texture and are just as easy to work with!
2. Tissue Paper Pom-Poms
Tissue paper pom-poms are a delightful way to add a pop of color and fun to your space. They’re perfect for parties, events, or even just sprucing up a room. And the best part? They’re super easy to make at home with just a few materials.
Materials Needed
- Tissue paper (8-10 sheets per pom-pom)
- Scissors
- String or floral wire
- Fishing line or ribbon for hanging
Step-by-Step Instructions
- Layer the Tissue Paper: Stack 8 to 10 sheets of tissue paper on top of each other. You can use all one color or mix and match for a more vibrant look.
- Accordion Fold: Fold the stacked tissue paper back and forth in an accordion style. Each fold should be about 1 to 1.5 inches wide.
- Secure the Center: Tie a piece of string or floral wire tightly around the center of the folded tissue paper. This will hold everything in place.
- Shape the Edges: Use scissors to trim the ends of the folded tissue paper into a rounded or pointed shape, depending on your desired look.
- Fluff It Up: Carefully separate each layer of tissue paper, pulling it toward the center to create a full, fluffy pom-pom.
- Hang and Enjoy: Attach a piece of fishing line or ribbon to the center and hang your pom-pom wherever you like.
Pro Tip: For a dramatic effect, make pom-poms in various sizes and hang them at different heights. It’s an easy way to create a stunning backdrop or centerpiece.
Tissue paper pom-poms are not only budget-friendly but also incredibly versatile. Use them to create a colorful DIY paper craft display that will impress your guests and brighten your home.
3. Tissue Paper Tassels
Tissue paper tassels are a fantastic way to add a playful and colorful touch to your home or party decor. They’re surprisingly simple to make and can be customized to fit any theme or color palette. Why buy expensive tassel garlands when you can craft your own at a fraction of the cost?
Steps to Make Tissue Paper Tassels
- Gather your materials: You’ll need tissue paper in your choice of colors, scissors, and some string or twine.
- Cut the tissue paper: Lay out a sheet of tissue paper and fold it in half lengthwise. Then, cut strips along the unfolded edge, stopping about an inch from the fold.
- Roll and twist: Carefully roll the tissue paper along the fold and twist the center to create a loop. This loop will allow you to string the tassels later.
- Repeat and assemble: Make several tassels in different colors, then string them together on your twine to create a garland.
Tissue paper tassels are versatile and can be used for everything from party backdrops to everyday room decor. They’re a quick and satisfying project that even beginners can master.
For more creative paper projects, check out these colorful crafts to brighten your weekend!
4. Tissue Paper Wreath
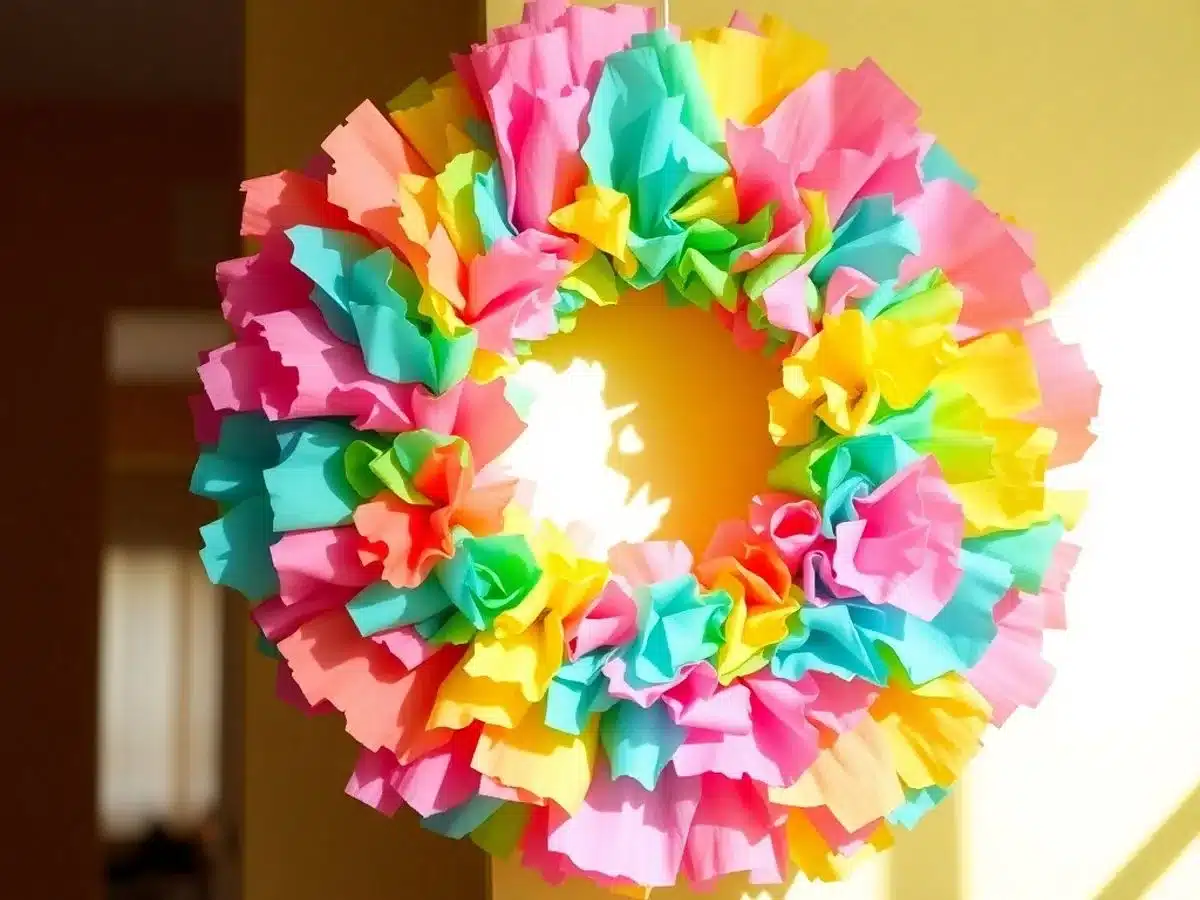
Creating a tissue paper wreath is a fun and budget-friendly way to add a pop of color and charm to your home. This craft is perfect for any season or holiday, as you can customize it with your favorite colors and embellishments.
Steps to Make a Tissue Paper Wreath
- Gather Your Materials: You’ll need a wreath form (foam, wire, or cardboard), tissue paper in your chosen colors, scissors, and glue or tape. Optional items include ribbons, faux flowers, or glitter for extra flair.
- Prepare the Tissue Paper: Cut the tissue paper into squares or strips, depending on the look you’re going for. Squares create a fluffy texture, while strips can be layered for a more dynamic effect.
- Attach the Tissue: Take each piece of tissue paper, crumple it slightly for volume, and glue or tape it onto the wreath form. Work in sections to ensure even coverage.
- Add Details: Once the base is covered, you can add embellishments like small bows, decorative beads, or even handwritten tags for a personal touch.
- Display Your Wreath: Hang it on your front door, above a mantel, or even on a wall to brighten up your space.
Tissue paper wreaths are an excellent way to repurpose leftover craft supplies while creating something beautiful for your home. They’re simple enough for beginners but can be elevated with creativity and attention to detail.
For more ideas on colorful paper crafts for adults, check out our exploration of creative projects that inspire imagination and fun.
5. Tissue Paper Lanterns

Tissue paper lanterns are a simple yet stunning way to add a warm, colorful glow to your living space or outdoor celebrations. They’re perfect for parties, holidays, or even just to brighten up a dull corner in your home. Here’s how you can make your own:
Materials Needed
- Tissue paper (variety of colors)
- Mod Podge or glue
- A balloon or paper lantern frame
- Brush or sponge for applying glue
- String or ribbon for hanging
Step-by-Step Instructions
- Prepare your base. Inflate a balloon or set up a paper lantern frame. This will act as the structure for your lantern.
- Cut the tissue paper. Tear or cut the tissue paper into strips or shapes, depending on the design you want. Random shapes give a mosaic effect, while strips create a layered look.
- Apply glue. Using a brush or sponge, apply a thin layer of Mod Podge or glue onto the balloon or frame.
- Attach the tissue paper. Press the tissue paper pieces onto the glued surface, overlapping slightly to avoid gaps. Add another layer of glue on top to secure the paper.
- Layer and dry. Continue layering tissue paper until the entire surface is covered. Allow it to dry completely.
- Pop the balloon (if using). Once everything is dry, carefully pop the balloon and remove it, leaving behind your tissue paper lantern.
- Add finishing touches. Attach a string or ribbon to hang your lantern, or place it over an LED light for a soft glow.
Tissue paper lanterns are a fantastic way to explore DIY paper decor that’s both affordable and beautiful. Let your creativity shine by experimenting with colors and patterns!
6. Tissue Paper Wall Art
Tissue paper wall art is an easy and affordable way to add a personal touch to your home. The best part? It’s completely customizable. Whether you’re into bold colors or subtle pastels, this craft lets you create something that reflects your style.
Steps to Create Tissue Paper Wall Art
- Plan Your Design: Start by sketching your idea on a sturdy piece of cardstock or canvas. Think about shapes, patterns, or even abstract designs.
- Cut the Tissue Paper: Tear or cut tissue paper into smaller pieces. You can go for neat shapes like squares or triangles or keep it organic with random tears.
- Add Texture: Crumple some of the tissue pieces to give your artwork a three-dimensional look.
- Attach the Tissue Paper: Use glue, Mod Podge, or double-sided tape to stick the pieces onto your base. Layering different colors can create a cool depth effect.
- Seal It: For a polished finish, apply a thin layer of Mod Podge or clear-drying glue over the top.
Tissue paper wall art is perfect for anyone looking to experiment with creativity without breaking the bank.
For a unique twist, try the bleeding tissue paper technique. This method uses water to create soft, blended colors that mimic watercolor effects. It’s a fun way to make your wall art stand out even more!
7. Tissue Paper Suncatchers
7. Tissue Paper Suncatchers
Making tissue paper suncatchers is such a fun and easy craft. These colorful creations add a bright and cheerful touch to your windows, letting the sunlight filter through in beautiful patterns. It’s a perfect project for kids and adults alike, especially on a rainy afternoon.
Materials Needed:
- Clear contact paper or wax paper
- Tissue paper in various colors
- Scissors
- A marker or pen for tracing shapes
- Optional: black cardstock for outlines
Steps to Create:
- Start by cutting the tissue paper into small squares or random shapes. The more colors, the better!
- If using black cardstock, cut out an outline of a design (like a flower, heart, or even a Christmas tree). Stick this to your contact paper.
- Lay the contact paper on the sticky side up. If using wax paper, you’ll need glue to stick the tissue paper.
- Arrange the tissue paper pieces within the design or spread them randomly for a mosaic effect.
- Once satisfied, cover the design with another layer of contact paper or wax paper to seal everything in.
- Trim any excess paper around the edges to clean it up.
This craft is so versatile—you can make seasonal designs like a Christmas tree suncatcher for the holidays or vibrant flowers for spring. The possibilities are endless!
8. Tissue Paper Mason Jars
Transforming mason jars with tissue paper is such a fun and easy way to add a splash of color to your home. Whether you’re using them as lanterns, vases, or decorative accents, these jars can fit into any season or event. The best part? You only need a few supplies to make them look stunning.
Materials Needed:
- Mason jars (any size)
- Tissue paper (variety of colors or patterns)
- Mod Podge or similar decoupage glue
- Foam brush or paintbrush
- Scissors
- Optional: beads, wire, or ribbon for extra embellishments
Step-by-Step Instructions:
- Clean your mason jar thoroughly to remove any dust or grease. Let it dry completely.
- Cut your tissue paper into strips, squares, or shapes—whatever design you’d like.
- Using the foam brush, apply a thin layer of Mod Podge to a section of the jar.
- Gently press the tissue paper onto the glued area, smoothing out wrinkles as you go.
- Repeat until the entire jar is covered. Overlap pieces for a layered, colorful effect.
- Once the jar is fully decorated, apply another thin layer of Mod Podge over the tissue paper to seal it. Let it dry completely.
- For an extra touch, add a beaded wire handle or tie a ribbon around the jar’s neck.
Creative Uses:
- Candle lanterns: Place a tea light or LED candle inside for a soft, colorful glow.
- Flower vases: Use them to hold fresh or faux flowers.
- Storage jars: Keep craft supplies or small trinkets in them for a decorative yet functional display.
Pro Tip: For a unique twist, try creating a faux stained glass effect by layering translucent tissue paper and applying Mod Podge. It’s perfect for catching sunlight when placed near a window.
With just a little effort, these tissue paper mason jars can brighten up any corner of your home or make for thoughtful handmade gifts.
9. Tissue Paper Garland
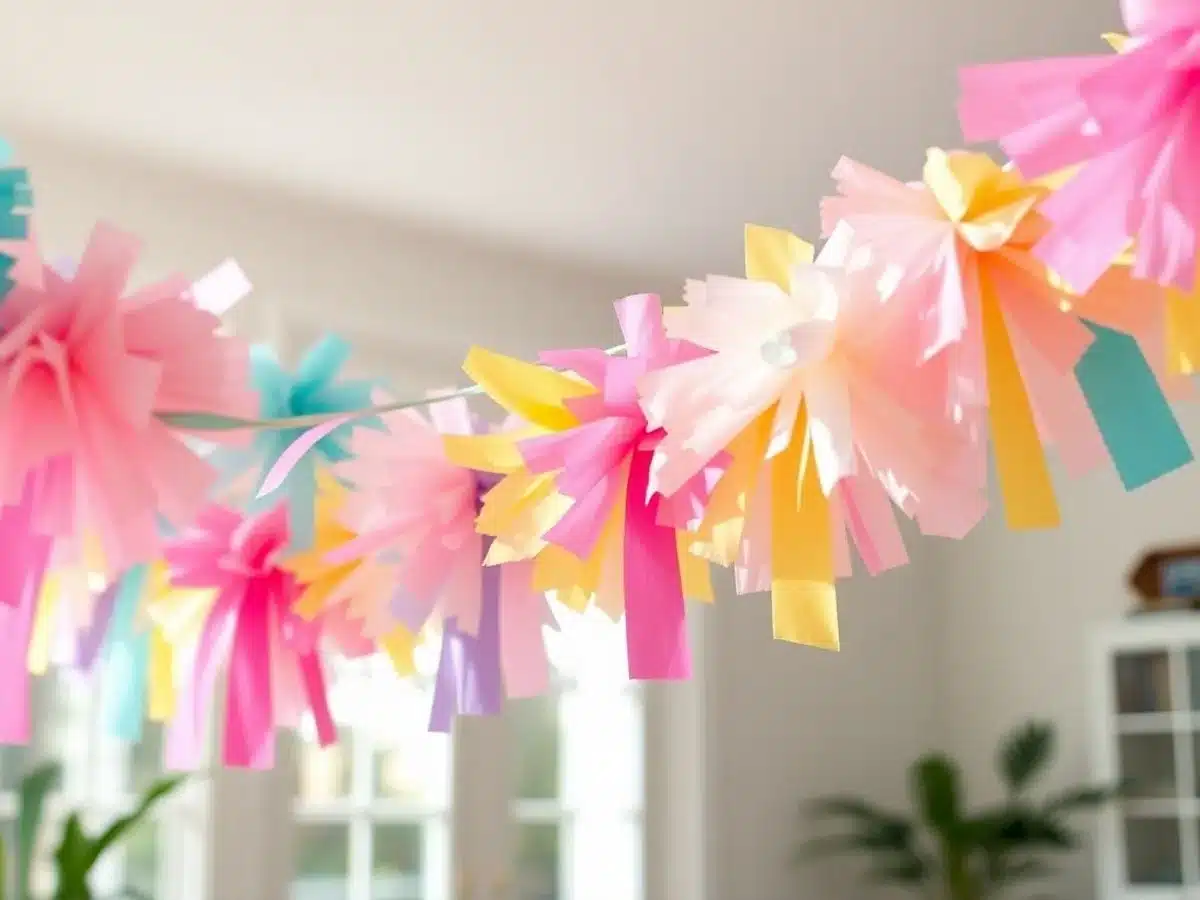
Tissue paper garlands are a simple yet stunning way to add a splash of color and charm to any space. Whether it’s for a party, a holiday, or just to liven up your living room, these garlands are endlessly customizable and surprisingly easy to make. With a few supplies and a little creativity, you can craft a garland that perfectly matches your theme or mood.
Materials You’ll Need:
- Tissue paper in your chosen colors
- Scissors
- String or twine
- Needle or hole punch (optional)
Steps to Create a Tissue Paper Garland:
- Cut Your Shapes: Decide on the shapes you’d like for your garland. Circles, triangles, and even hearts work well. Use scissors or a stencil to cut out uniform pieces from your tissue paper.
- Thread the Pieces: Use a needle to thread the shapes onto a piece of string or twine. If you don’t want to use a needle, you can punch small holes in the shapes and thread them through.
- Arrange and Space: Adjust the spacing between each piece as you go. You can cluster them together for a fuller look or spread them out for a minimalist vibe.
- Secure the Ends: Tie knots at the ends of the string to keep the pieces in place.
- Hang Your Garland: Find the perfect spot—walls, staircases, or even across a table—and let your garland shine!
Tissue paper garlands are not just decorations; they’re a way to bring personality and a touch of handmade charm to your space. They’re quick, affordable, and a lot of fun to make.
For more inspiration, you can explore 25 creative DIY paper garland ideas that include unique styles like accordion folds, paper geodes, and origami stars. These ideas can help you take your garland game to the next level!
10. Tissue Paper Butterflies
Tissue paper butterflies are a delightful craft that’s fun for all ages, and they bring a cheerful pop of color to any room. This project is simple enough for kids but still creative enough to engage adults. Here’s how you can make your own whimsical butterflies:
- Prepare Your Materials: Gather tissue paper in your favorite colors, pipe cleaners (chenille stems), and scissors. You’ll also need a flat surface to work on.
- Cut and Fold: Start by cutting the tissue paper into squares, about 4 inches on each side. Stack two or three squares together and fold them accordion-style from one side to the other.
- Secure the Center: Take a pipe cleaner and wrap it tightly around the center of the folded tissue. Twist the ends of the pipe cleaner to secure it, leaving enough length to create antennae.
- Shape the Wings: Fan out the folded tissue on each side of the pipe cleaner to form butterfly wings. Adjust the layers gently to add volume and shape.
- Add the Finishing Touches: Bend the ends of the pipe cleaner to form cute antennae. You can even add small embellishments like stickers or glitter to the wings for extra flair.
These tissue paper butterflies are perfect for decorating windows, walls, or even party tables. They’re lightweight and easy to hang, making them versatile for all kinds of occasions.
Looking for a fun summer activity for kids? Create adorable tissue paper butterflies and let their imaginations soar!
Wrapping It Up
So there you have it—10 fun and creative ways to use tissue paper to bring some charm into your home. Whether you’re crafting flowers, tassels, or lanterns, these projects are simple, affordable, and a great way to add a personal touch to your space. Plus, they’re perfect for all ages, so you can even make it a family activity. Grab some tissue paper, let your imagination run wild, and see what you can create. Happy crafting!
Frequently Asked Questions
What are some simple tools needed for tissue paper crafts?
You’ll need tissue paper, scissors, glue, and sometimes items like pipe cleaners, string, or Mod Podge for more advanced projects.
Can kids make tissue paper crafts?
Yes, tissue paper crafts are great for kids! Many projects, like suncatchers or flowers, are easy and safe for children to create.
How can I make tissue paper flowers more durable?
To make them last longer, you can spray a light coat of clear sealant or hairspray over the finished flowers.
Where can I find tissue paper for crafts?
Tissue paper is available at most craft stores, dollar stores, or online. It’s affordable and comes in many colors and patterns.
Are tissue paper crafts eco-friendly?
Tissue paper is biodegradable, making it an eco-friendly option. You can also reuse old tissue paper from gifts to reduce waste.
What’s the best way to store tissue paper crafts?
Store them in a dry, flat container to avoid crushing or tearing. Keep them away from moisture to maintain their shape.