DIYbrico | Discover, Create, Inspire

10 Fun and Easy Crafts for Kids with Paper to Spark Creativity
Explore 10 easy crafts for kids with paper to spark creativity and fun. Perfect for all ages and skill levels.

Looking for a fun and easy way to keep your kids entertained and creative? Paper crafts are the perfect solution! With just some paper, scissors, and glue, your little ones can dive into a world of imagination. These activities are enjoyable and help improve fine motor skills and hand-eye coordination. Whether it’s a rainy day or a lazy afternoon, these crafts will keep your kids busy and happy. Let’s explore 10 fun and easy crafts for kids with Paper that will spark creativity!
Key Takeaways
- Paper crafts are a simple and fun way to engage kids.
- You only need basic supplies like paper, scissors, and glue.
- Great for all ages and perfect for a rainy day activity.
- It helps develop fine motor skills and creativity.
- Encourages kids to use their imagination and have fun.
1. Easy Crafts for Kids with Paper – Paper Airplanes
Paper airplanes are more than just a simple craft; they’re a gateway to creativity and a bit of science. All you need is a piece of paper, and you’re ready to start folding.
How to Make a Basic Paper Airplane
- Fold the Paper: Start with a rectangular sheet of paper. Fold it in half lengthwise to create a center crease, then unfold it.
- Create the Nose: Fold the top two corners to the center crease, forming a triangle at the top.
- Shape the Body: Fold the triangle to meet the bottom edge, creating a straight edge.
- Form the Wings: Fold the paper in half again along the center crease. Then, fold each side down at a slight angle to form the wings.
- Adjust and Test: Make sure the wings are even, then give your airplane a test flight!
Folding paper airplanes isn’t just about having fun; it’s a way for kids to learn about balance and aerodynamics. Plus, it’s a great indoor activity for rainy days.
For more detailed instructions, check out this simple paper airplane guide. It’s a perfect way to start your paper crafting adventure.
2. Paper Flowers
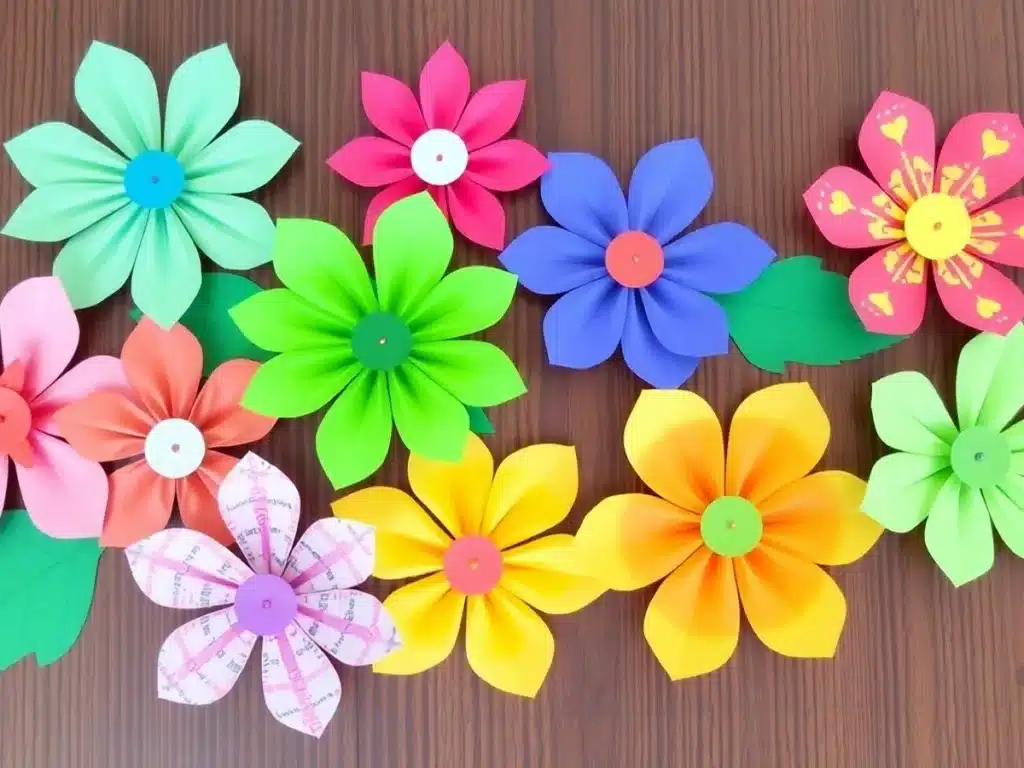
Creating paper flowers is a delightful way to bring color and creativity into any room. These flowers never wilt and can be customized to fit any decor. Here’s how to make your stunning paper flowers with just a few simple steps and materials.
Materials Needed
- Colored construction paper
- Scissors
- Glue or tape
- Pencil
- Green paper for stems (optional)
Steps to Create Paper Flowers
- Cut Your Shapes: Cut out flower shapes from your colored paper. You can make petals, circles, or spirals depending on the type of flower you’re aiming for.
- Add Texture: Fold, curl, or crumple the paper pieces to give your flowers some texture and dimension.
- Assemble the Flower: Glue or tape the paper pieces together. Layer them to create a full, blossoming flower.
- Create the Stem: If you want to add a stem, attach a piece of green paper to the back of your flower using glue or tape.
Paper flowers offer a chance to explore different shapes and colors, making each flower unique. Feel free to mix different colors and sizes to create a vibrant bouquet that reflects your personal style. This project not only enhances creativity but also provides a relaxing way to express creativity. Enjoy crafting your own paper garden!
3. Paper Collage Art
Creating a paper collage is like telling a story with images. It’s all about creativity and imagination. Here’s how you can dive into this fun activity:
- Gather Your Materials: Collect colorful paper, old magazines, newspapers, and even fabric scraps. Don’t forget your scissors and glue.
- Choose a Base: Pick a sturdy piece of paper or cardboard. This will be the canvas for your collage.
- Cut and Arrange: Cut out shapes, patterns, or images that catch your eye. Arrange them on your base to create a scene or abstract design.
- Experiment with Texture: Mix different textures to add depth. Use smooth magazine pages, rough fabric, or crumpled paper for variety.
- Glue It Down: Once you’re happy with the layout, glue everything in place. Press down firmly to make sure it sticks.
Tip: Don’t shy away from overlapping pieces. It adds a dynamic feel to your collage.
Paper collage art isn’t just about the final product; it’s a journey of self-expression and creativity. It’s an excellent way for kids to learn about college artists and their techniques, especially in an educational setting. Plus, it’s a fantastic way to recycle old materials into something new and beautiful.
4. Paper Chains
Creating paper chains is a classic craft that’s simple and fun for kids of all ages. These colorful decorations can brighten up any space, making them perfect for parties, bedrooms, or even as a countdown to special events.
Materials Needed
- Colored construction paper
- Scissors
- Glue stick or tape
Steps to Make Paper Chains
- Cut the Paper: Start by cutting your construction paper into strips. Aim for strips about an inch wide and six inches long, but feel free to experiment with different sizes.
- Create the First Link: Form one strip into a loop, securing the ends with glue or tape. This is your starting point.
- Add More Links: Thread a new strip through the loop you made, then secure its ends to form another loop. Keep repeating this process, linking one strip after another.
Creative Uses for Paper Chains
- Party Decorations: Hang them around the room for a festive vibe.
- Countdown Chains: Use them to count down to holidays or birthdays by removing one daily link.
- Room Decor: Drape them across windows or ceilings for a playful touch.
Paper chains are not just simple crafts; they also help kids learn about patterns and sequences while having a blast. Plus, they’re a great way to spend a rainy afternoon indoors.
For more creative paper crafts that encourage imagination, check out our collection of fun and easy projects. Let the crafting begin!
5. Paper Plate Animals
Getting Started
Making paper plate animals is a delightful and simple craft that kids adore. The transformation of a basic paper plate into a whimsical creature is magical and educational. Here’s how to get started:
- Gather Your Supplies: You’ll need paper plates, colored paper, glue, scissors, markers, and any fun extras like googly eyes or glitter.
- Choose Your Animal: Decide on which animal to create. Popular choices include lions, frogs, and elephants, but the sky’s the limit!
- Prepare the Plate: Color or paint the paper plate to match the animal’s body and let it dry.
Step-by-Step Guide
- Create the Features: Cut shapes for the animal’s features like ears, eyes, and whiskers from colored paper.
- Assemble the Animal: Glue these features onto the plate. Use markers to add details like stripes or spots.
- Add Final Touches: Attach extra elements like googly eyes or pipe cleaner whiskers to bring your animal to life.
Crafting these animals not only entertains kids but also helps them learn about different animals and their features. It’s a simple, engaging way to explore creativity.
Why Paper Plate Animals?
This craft is more than just making cute animal faces. It’s about using ordinary materials to create something imaginative and fun. Kids learn to follow instructions, improve their motor skills, and express themselves creatively. Plus, it’s a great way to spend quality time together, away from screens.
Try making rocking paper plate crabs using similar techniques for a playful twist. These crabs are easy to make and a great way to introduce kids to sea creatures.
With paper plate animal crafts, the possibilities are endless. Kids can create a whole menagerie of creatures, each with personality and charm. So grab some paper plates and let the crafting adventure begin!
Explore our paper plate art set designed for children aged 3-12 years, featuring 12 adorable animal patterns to spark creativity and educational play.
6. Sock Puppets
Transform those mismatched socks into delightful puppets that will entertain your kids for hours. This craft is fun and a fantastic way to encourage creativity and storytelling. Here’s how you can make your sock puppets:
Materials Needed
- Old socks (preferably colorful)
- Buttons or googly eyes for eyes
- Yarn or felt for hair
- Fabric glue or a needle and thread
- Markers or fabric paint for details
Steps to Create Sock Puppets
- Choose Your Sock: Pick a sock that has lost its pair. The more colorful, the better!
- Add Eyes: Glue on googly eyes or sew buttons for eyes. This gives your puppet a face.
- Create Hair: Cut yarn or felt into strips and attach them to the sock’s top for hair.
- Decorate: Use markers or fabric paint to draw a mouth and other facial features.
- Add Details: Get creative! Add ears, a nose, or even a tongue with extra fabric or felt.
Puppet Show Time
Once your sock puppets are ready, it’s time for a show! Encourage your kids to create a story and act it out with their new friends. This activity not only boosts their imagination but also helps in developing their social skills.
The joy of creating sock puppets lies not just in the craft itself but in the endless stories and adventures they inspire.
Sock puppets are a simple yet effective way to recycle old socks and spark creativity in children. So, dig through that sock drawer and let the puppet-making begin!
For more engaging activities that spark creativity in children, explore imaginative construction paper crafts that are perfect for a rainy day indoors.
7. Nature Collages
Nature Collages: A Creative Adventure
Nature collages are a delightful way to bring the great outdoors into your home. Kids will love gathering natural materials and turning them into a masterpiece. It’s a fantastic activity that combines art with a bit of exploration. Here’s how you can create your own nature collage:
- Gather Your Materials: Head outside and collect various natural items like leaves, flowers, twigs, and small stones. You can also use things like bark or seeds if you find them.
- Prepare Your Base: Choose a sturdy piece of cardboard or thick paper. This will support all the natural elements you’ll be using.
- Design Your Layout: Arrange your materials on the base before sticking anything down. Experiment with different combinations to see what looks best. Encourage kids to think about color, texture, and pattern.
- Start Gluing: Once you’re happy with the arrangement, begin gluing the pieces onto the base. Use a strong craft glue to ensure everything stays put.
- Add Final Touches: Consider adding elements like colored paper cutouts or small drawings to enhance the collage.
Nature collages are not just about creating art; they’re a wonderful way to engage with the environment and appreciate the beauty of natural materials.
Nature collages are perfect for a fun at-home activity that engages the whole family. Display your creations proudly on the wall and enjoy the touch of nature in your living space.
8. Pasta Jewelry
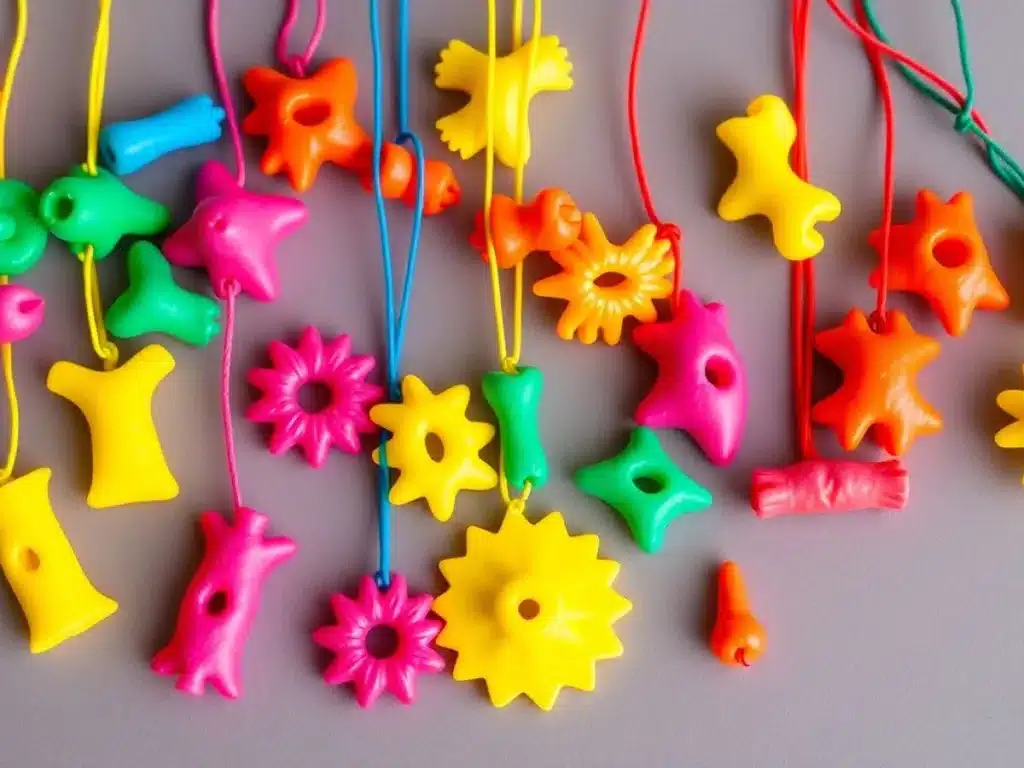
Creating pasta jewelry is a fantastic way to let kids express their creativity while crafting something they can wear. This activity involves turning ordinary pasta into colorful, fun and engaging accessories.
Materials Needed
- Various pasta shapes (like penne, macaroni, or wheels)
- Acrylic paints or food coloring
- Yarn or elastic cord
- Paintbrushes
- Bowls for mixing colors
Steps to Create Your Pasta Jewelry
- Prepare the Pasta: Start by selecting your pasta shapes. Penne and macaroni work well due to their holes, making them easy to string.
- Color the Pasta: Mix acrylic paint or food coloring with a bowl of water. Dip each piece of pasta into the colors and let them dry on a paper towel.
- String the Jewelry: Throw it onto yarn or elastic cord once the pasta is dry. Use yarn for necklaces or elastic for bracelets. Secure the ends with a knot.
Tips for Success
- Experiment with Colors: Try different color combinations for vibrant patterns.
- Add Beads: Mix in some beads between pasta pieces for extra flair.
- Personalize It: Encourage kids to create patterns or spell out their names using alphabet beads.
Making watercolor pasta jewelry is a delightful way for toddlers to unleash their creativity. They not only enjoy the process but also take pride in wearing their creations. This activity is perfect for a rainy day or a quiet afternoon at home.
9. Recycled Robots
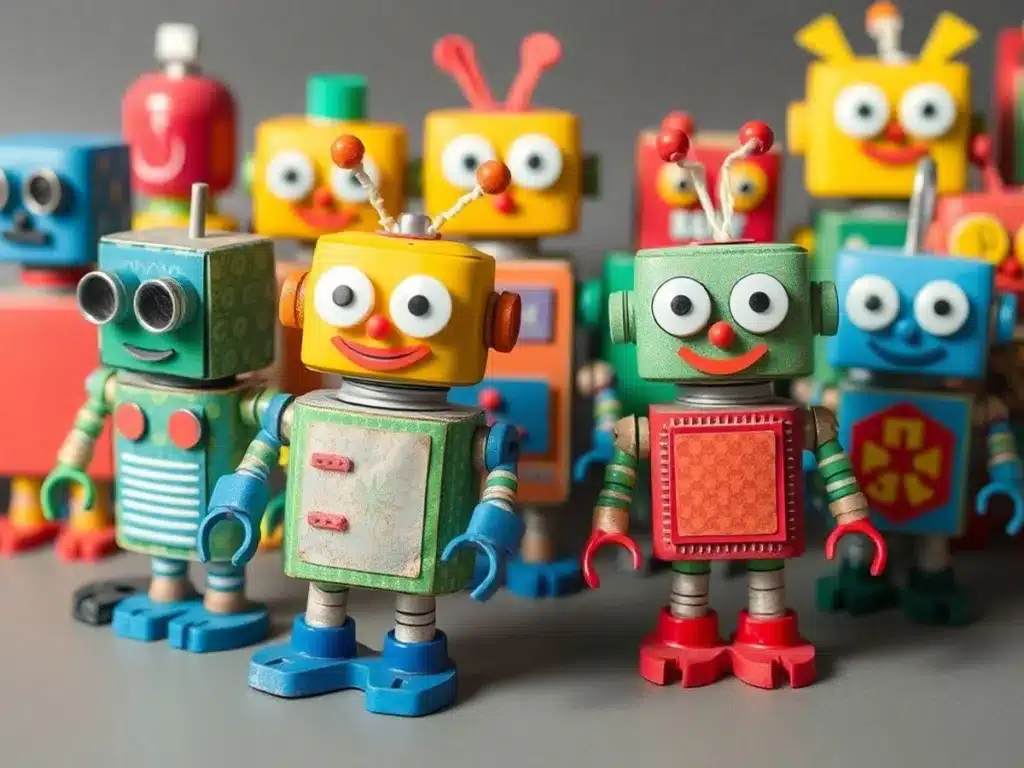
Get Creative with Recycled Robots
Kids can let their imaginations run wild by transforming everyday items into unique robot characters. This project sparks creativity and teaches the importance of recycling and reusing materials.
What You’ll Need:
- Empty cardboard tubes (like those from paper towels or toilet paper)
- Bottle caps
- Old buttons
- Aluminum foil
- Glue and tape
- Markers or paint
Step-by-Step Guide
- Gather Materials: Start by collecting various recyclable items around the house. Cardboard tubes, kitchen cardboard tubes, and bottle caps work great.
- Design Your Robot: Have the kids sketch out what they want their robot to look like. Encourage them to think about what each piece will represent.
- Assemble the Body: Use the cardboard tubes as the robot’s body. Attach bottle caps and buttons as eyes or knobs with glue or tape.
- Add Details: Wrap aluminum foil around parts of the robot to give it a metallic look. Use markers or paint to add color and personality.
- Final Touches: Let the robots dry completely. Once done, kids can play with their new creations or display them proudly.
Recycled robots are not just toys; they are a creative way to teach kids about sustainability. By using materials that would otherwise be thrown away, children learn the value of reusing and recycling in a fun and engaging way.
Tips for Success
- Safety First: Ensure that all materials used are safe for children. Supervise them when using glue or scissors.
- Encourage Creativity: There’s no right or wrong way to make a robot. Let the kids’ imaginations lead the way.
- Share Stories: After creating their robots, have the kids share stories about their robot’s adventures. This adds an extra layer of fun and creativity to the project.
Creating recycled robots is a fantastic way for kids to explore their creativity while learning about the importance of recycling. They can create something unique and special with just a few simple materials.
10. Paper Bag Puppets
Creating paper bag puppets is a delightful craft that combines creativity with storytelling. All you need are some simple materials and a little imagination to transform ordinary paper bags into colorful characters.
Materials Needed
- Paper bags (brown or white)
- Colored paper
- Markers or crayons
- Glue or tape
- Scissors
- Optional: yarn, pipe cleaners, googly eyes, and feathers for extra flair
Step-by-Step Guide
- Choose Your Character: Decide what kind of puppet you want to create. It could be an animal, a person, or even a fantastical creature. Let your imagination run wild!
- Decorate the Bag: Use markers or crayons to draw the puppet’s face on the bottom flap of the paper bag. This will be the puppet’s head.
- Add Features: Cut out shapes for eyes, nose, mouth, and other facial features from colored paper. Glue them onto the bag. For more fun, add googly eyes or yarn for hair.
- Create the Body: Use colored paper to design clothes or body parts. Wrap the paper around the bag and secure it with glue or tape.
- Add Extra Details: Use pipe cleaners for arms or legs, feathers for wings, or anything else that adds character to your puppet.
Tips for Success
- Encourage kids to mix and match materials to create unique puppets.
- Use non-toxic materials to ensure safety, especially for younger children.
- Supervise kids while using scissors to prevent accidents.
Crafting paper bag puppets is not just about creating a toy, but about sparking imagination and storytelling. It’s a fun way to engage children and help them develop their creative skills.
Once your puppets are ready, it’s time for a puppet show! Encourage children to create a story and bring their characters to life. This activity boosts creativity and helps kids develop narrative skills and confidence.
For more creative paper crafts for kids, explore projects that enhance fine motor skills and spark imagination. These crafts are a fantastic way for kids to express themselves and enjoy hours of creative fun.
Conclusion
Crafting with paper is such a simple yet rewarding activity for kids. It’s incredible how a few sheets of paper, some scissors, and a bit of glue can turn into hours of fun and creativity. These ten crafts are just the beginning. They offer a chance for kids to explore their imagination, improve their motor skills, and create something they can be proud of. Whether it’s a rainy day or a quiet afternoon, these projects are perfect for keeping little hands busy and minds engaged. So grab some paper and let the crafting adventures begin! Remember, the best part is seeing the joy and pride on their faces when they finish their masterpiece. Happy crafting!
Frequently Asked Questions
What are some easy paper crafts for kids?
Easy paper crafts for kids include making paper airplanes, paper flowers, and paper bag puppets. These activities require minimal materials and are great for sparking creativity.
What materials do I need for paper crafts?
For most paper crafts, you’ll need colored paper, scissors, glue, and markers. Additional materials might include googly eyes, stickers, and other embellishments.
How can paper crafts benefit children?
Paper crafts help improve fine motor skills, hand-eye coordination, and creativity. They also encourage kids to use their imagination and problem-solving skills.
Are paper crafts safe for young children?
Yes, paper crafts can be safe for young children, especially when using child-safe scissors and non-toxic glue. Always supervise young kids during crafting activities.
Can paper crafts be educational?
Absolutely! Paper crafts can teach children about shapes, colors, and following instructions. They also provide opportunities for storytelling and creative expression.
How do I encourage my child to enjoy paper crafts?
Encourage your child by providing various materials and letting them explore their creativity freely. Praise their efforts and display their creations to boost their confidence.