DIYbrico | Discover, Create, Inspire

10 Unique Woodworking Projects to Elevate Your Skills and Creativity
Explore 10 unique woodworking projects to boost your skills and creativity. Perfect for DIY enthusiasts!

Woodworking is more than just a hobby; it’s a journey to creating something unique with your own hands. Whether you’re a beginner or have been at it for years, there’s always a new project to tackle. From simple birdhouses to custom kitchen cabinets, the possibilities are endless. This list of ten unique woodworking projects is designed to challenge and inspire you, pushing your skills to new heights. Grab your tools, and let’s get started making something amazing!
Key Takeaways
- Woodworking offers endless creative possibilities for both beginners and pros.
- Simple projects like birdhouses can be a great starting point.
- Advanced projects like custom cabinets can enhance your home.
- Each project helps develop new skills and techniques.
- Woodworking can be both a relaxing and rewarding experience.
1. Simple Birdhouse
Introduction
Building a simple birdhouse is a fantastic way to dip your toes into woodworking. It’s a project that combines creativity with functionality and is perfect for beginners. Creating a birdhouse beautifies your garden and provides a cozy home for local birds.
Materials Needed
- Untreated wood (like cedar or pine)
- Nails or wood screws
- Sandpaper
- Non-toxic wood glue
- Saw
- Drill
- Paint or wood stain (optional)
Steps to Create Your Birdhouse
- Cut the Wood: Start by cutting your wood into the necessary pieces. You’ll need a back, front, two sides, a base, and a roof. Each piece should be cut to fit together snugly.
- Assemble the Walls: Use wood glue and nails to attach the sides to the back piece. Ensure everything is aligned correctly.
- Attach the Base: Secure the bottom piece to the structure with screws, ensuring it’s sturdy enough to hold the weight of small birds.
- Drill the Entrance: In the front piece, drill a hole large enough for your target bird species. A 1.5-inch diameter works well for many small birds.
- Fix the Roof: Attach the roof pieces, ensuring they slope to allow rain to run off.
- Sand and Finish: If desired, sand down any rough edges and apply a non-toxic finish.
Placement Tips
- Hang your birdhouse at least 5 feet off the ground.
- Choose a quiet spot away from heavy foot traffic.
- Ensure the entrance hole is facing away from prevailing winds.
Crafting a birdhouse is more than just a project; it’s a way to connect with nature and contribute to your local ecosystem.
For more creative ideas, consider exploring 15 creative DIY birdhouse plans to further customize your design.
2. Wooden Coasters
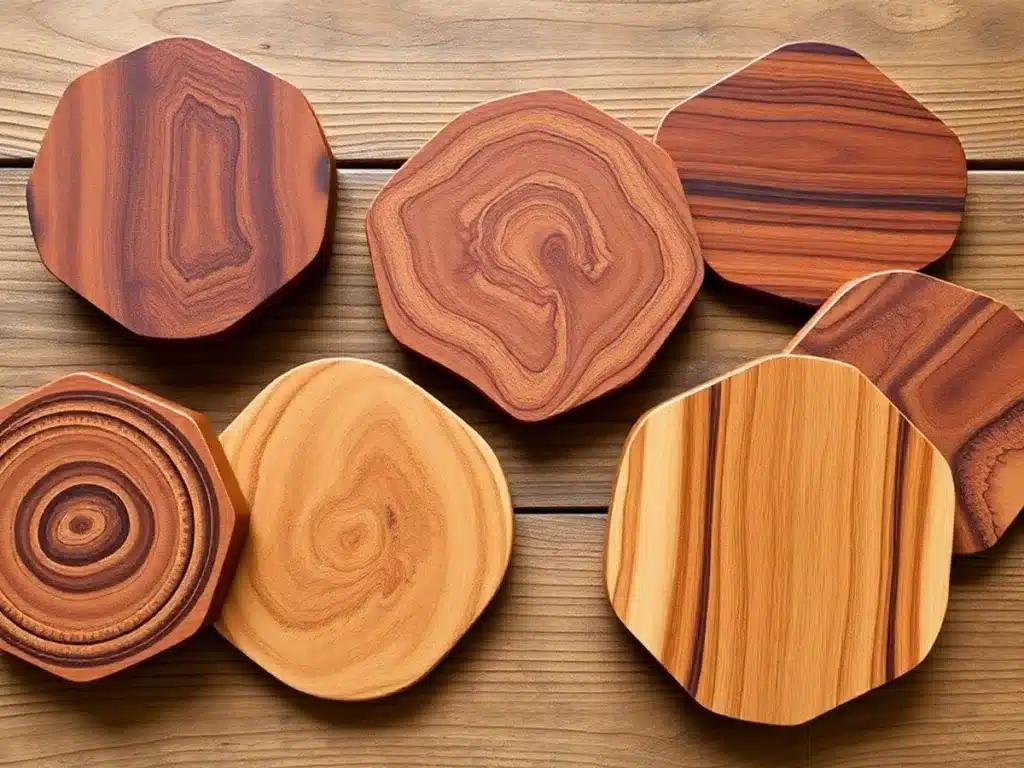
Creating beautiful and affordable Pottery Barn-inspired alphabet wood coasters can be a fun and rewarding project. Not only do these coasters add a personal touch to your home decor, but they also serve a practical purpose by protecting your furniture.
Why Make Wooden Coasters?
- Customization: You can design them to fit any style, whether it’s rustic, modern, or something entirely unique.
- Gift Potential: Handmade coasters make thoughtful gifts for friends and family.
- Skill Building: This project helps improve your woodworking skills, especially if you’re new to the craft.
Materials Needed
- Wood slices or planks
- Sandpaper
- Wood stain or paint
- Sealant
- Optional: wood burning tool, stencils
Steps to Create Your Coasters
- Select Your Wood: Choose wood slices or cut planks to your desired size. Ensure they are smooth and free of any cracks.
- Sanding: Smooth the surfaces using sandpaper, starting with a coarse grit and finishing with a fine grit.
- Design: Use stencils or a wood-burning tool to add designs or initials. Be creative!
- Finishing Touches: Apply a wood stain or paint, then seal with a protective finish to ensure durability.
- Final Assembly: Let everything dry thoroughly before using or gifting.
Wooden coasters are not just functional; they are a canvas for creativity, allowing you to express your personal style while crafting a useful item for your home.
3. Rustic Picture Frame
Crafting a rustic picture frame is a fantastic way to showcase your favourite memories while adding a touch of warmth to your home decor. The beauty of this project lies in its simplicity and the unique charm each frame brings. Whether you have a photo from a memorable trip or a family portrait, a rustic frame can make it stand out.
Materials Needed
- Reclaimed wood or barn wood
- Saw
- Sandpaper
- Wood glue or nails
- Measuring tape
- Picture hanging hardware
Steps to Create Your Frame
- Measure Your Photo: Start by measuring the photo’s dimensions you want to frame. This will guide you in cutting the wood to the right size.
- Cut the Wood: Cut the wood into four pieces using a saw. Two for the sides and two for the top and bottom.
- Sand the Edges: Sand down the edges of each wood piece to smooth out any rough spots.
- Assemble the Frame: Arrange the wood pieces to form a rectangle. Use wood glue or nails to secure them together.
- Finish the Frame: Attach picture hanging hardware to the back. You might also want to apply a wood finish for added protection and style.
A rustic picture frame not only holds a photograph but also brings a story to life, enhancing the emotion captured in the image.
Creating a rustic picture frame is not just about the final product; the process itself can be quite rewarding. It’s a perfect project for those who enjoy working with their hands and love the idea of turning something old into something beautiful. For more creative projects that spark imagination, consider exploring 10 creative paper crafts perfect for all ages.
4. Basic Bookshelf
Building a basic bookshelf is a fantastic project for anyone looking into woodworking. This project is perfect for beginners yet still offers the opportunity to create something truly useful and personal for your home. Here’s how you can get started.
Materials Needed
- Several wooden boards (choose your preferred wood type)
- Wood screws
- Wood glue
- Sandpaper
- Paint or wood stain (optional)
Tools Required
- Saw (hand saw or power saw)
- Drill
- Screwdriver
- Measuring tape
- Level
Steps to Build Your Bookshelf
- Measure and Cut: Start by measuring the dimensions of the space where you plan to place your bookshelf. Cut the wooden boards to size accordingly. Remember, precision is key to ensuring your bookshelf is stable.
- Assemble the Frame: Begin assembling the frame by attaching the sides to the top and bottom boards using wood screws and glue for extra strength.
- Add the Shelves: Decide on the number of shelves you want and space them evenly. Secure each shelf with screws and ensure they are level.
- Finish the Surface: Sand the entire bookshelf to smooth out any rough edges. If desired, apply a coat of paint or wood stain to match your home decor.
- Final Assembly: Once everything is dry, give your bookshelf a final check for stability and make any necessary adjustments.
Building your own bookshelf not only saves money but also allows you to personalize it to fit your exact needs and style. It’s a rewarding project that enhances both your skills and your living space.
For more detailed instructions and access to a variety of other woodworking plans, check out this guide. It’s packed with helpful tips and tricks to make your DIY projects a success.
5. Decorative Wall Hooks

Creating decorative wall hooks out of wood is a fun and practical project that adds both style and function to your home. These hooks are perfect for hanging coats, hats, bags, or even keys, making them a versatile addition to any room.
Materials Needed:
- Wood plank or board
- Decorative hooks
- Sandpaper
- Wood stain or paint
- Screws and wall anchors
Steps to Create Your Wall Hooks:
- Choose Your Wood: Start with a solid piece of wood, like oak or pine, that fits the space where you plan to hang your hooks. Sand it down to remove any rough spots.
- Design and Finish: Decide on the look you want. You might go for a rustic vibe with a dark stain or keep it simple with a coat of white paint.
- Attach Hooks: Evenly space your decorative hooks along the board. Use screws to secure them firmly.
- Mounting: Use wall anchors to attach your board to the wall, ensuring it can support the weight of whatever you plan to hang.
Wall hooks are not only useful but also a great way to express your personal style. Whether you’re aiming for a farmhouse look or a modern aesthetic, these hooks can be customized to fit any decor.
For a DIY coat rack crafted from scrap wood and black coat hooks, consider this simple project to enhance your farmhouse style and keep your entryway organized.
6. Coffee Table with Storage
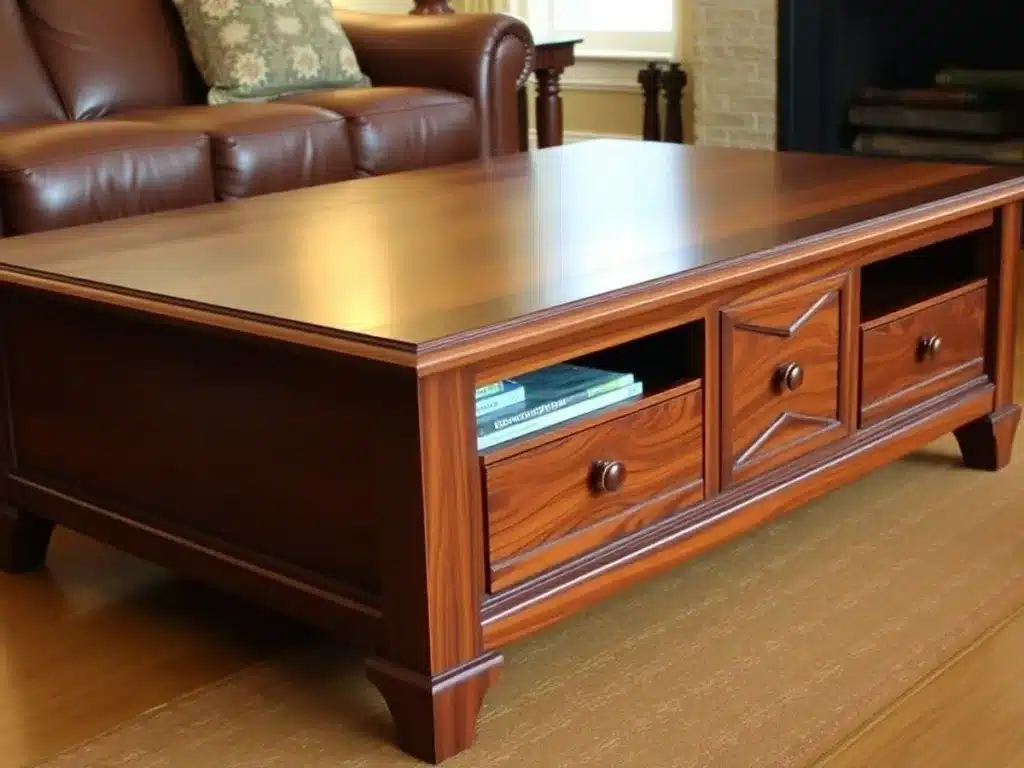
A coffee table with storage is a great addition to any living room. It’s not just a table; it’s a functional piece that helps you keep your space tidy. Imagine having a place for your books, remote controls, and even those cozy blankets you love to snuggle with.
Building Your Coffee Table
Here’s a simple guide to building your own coffee table with storage:
- Gather Your Materials: You’ll need wood, screws, a saw, and some wood glue. If you’re going for a more polished look, consider mahogany panels for their rich color and durability.
- Plan Your Design: Decide on the dimensions and style. Do you want drawers, shelves, or a combination? This will help you figure out the best way to utilize the storage space.
- Cut and Assemble: Measure twice, cut once. Assemble your pieces carefully, ensuring everything fits snugly.
- Finish with Style: Sand down any rough edges and apply a finish that matches your decor. You might want to add some hardware for a bit of flair.
Tips for Success
- Measure Your Space: Before you start, make sure your table will fit in your living room without overwhelming the space.
- Choose the Right Wood: Different woods have different strengths and aesthetics. Pick one that suits your needs and style.
- Consider Functionality: Consider what you’ll store and design your table accordingly.
A coffee table with storage not only helps keep your living room organized but also adds a touch of elegance. It’s a project that, once completed, you’ll be proud to show off to friends and family.
For a stunning option, consider a coffee table made from beautiful mahogany panels that hide spacious storage with heavy-duty drawers. This design elegantly combines function and style, making it a centrepiece in any home.
7. Adirondack Chair
Crafting an Adirondack chair is one of those woodworking projects that can be both challenging and super rewarding. These chairs are iconic, with their laid-back design and wide armrests that just scream “relaxation”. Perfect for a lazy afternoon in the backyard, they’re a staple in outdoor furniture. Here’s a quick guide to building one yourself.
Materials Needed
- Durable wood like cedar or teak
- Stainless steel screws
- Wood glue
- Sandpaper
- Outdoor wood finish
Steps to Build
- Cut the Wood: Start by cutting the wood into the necessary pieces. You’ll need slats for the seat, back, arms, and frame supports.
- Assemble the Frame: Begin by assembling the base frame. Make sure everything is aligned properly to ensure stability.
- Attach the Slats: Secure the seat and back slats to the frame. This is where the chair starts to take shape.
- Add the Armrests: Install the wide armrests, which are a signature feature of the Adirondack chair.
- Sand and Finish: Sand down any rough edges and apply a weather-resistant finish to protect the wood.
Building your own Adirondack chair not only gives you a comfortable place to sit but also a sense of accomplishment. It’s a project that combines functionality with a bit of personal flair.
Tips for Success
- Double-check all measurements before cutting.
- Use clamps to hold pieces in place while the glue dries.
- Consider adding a personal touch with paint or a custom stain.
Adirondack chairs are a great way to explore ten imaginative construction paper crafts that can inspire creativity and provide a relaxing spot to enjoy your handiwork. Whether you’re a seasoned woodworker or a beginner, this project is sure to be a hit in your outdoor space.
8. Wooden Serving Tray
Creating a wooden serving tray is a great project for both beginners and seasoned woodworkers. It’s a functional piece that adds a touch of elegance to any home. Whether you’re using it for serving breakfast in bed or as a centerpiece on your dining table, a well-made tray can enhance your hosting game.
Materials Needed
- Wood plank: Choose a type of wood that suits your style, such as oak, cherry, or walnut.
- Handles: Metal or wooden handles, depending on the look you’re going for.
- Wood glue and screws: For assembling the tray.
- Sandpaper: To smooth out the edges and surfaces.
- Finish: Oil, stain, or varnish to protect and enhance the wood.
Steps to Create a Wooden Serving Tray
- Cut the Wood: Start by cutting your wood plank to the desired size for your tray. A typical size might be 18×12 inches.
- Sand the Edges: Use sandpaper to smooth all edges and surfaces of the wood to prevent any splinters.
- Attach the Handles: Secure the handles on each side of the tray. Make sure they are aligned and tightly fastened.
- Apply Finish: Choose a finish like oil or varnish to protect the wood and bring out its natural beauty.
- Let It Dry: Allow the finish to dry completely before using the tray.
Crafting a wooden serving tray is not just about functionality; it’s about creating a piece that reflects your personal style and adds warmth to your home. With a bit of creativity and attention to detail, you can craft a tray that’s both beautiful and durable.
For those interested in a unique twist, consider incorporating wood and resin for a stunning effect. This technique involves using MAS Epoxies Table Top Pro epoxy resin to create a beautiful wood and resin serving tray. It’s a perfect way to add a modern touch to a classic wooden piece.
9. Wooden Jewelry Box
Crafting a wooden jewellery box is not just about creating a storage space; it’s about designing a piece of art that keeps your treasures safe. Imagine opening a box that you made yourself, with compartments tailored to your needs. This is what makes the project both rewarding and personal.
Steps to Create Your Wooden Jewelry Box
- Choose Your Wood: Start with selecting the right type of wood. Maple, cherry, or walnut are popular choices for their durability and beauty.
- Design and Plan: Sketch out your design. Decide on the size of the box and how many compartments you’ll need.
- Cut and Assemble: Carefully cut the pieces according to your design. Use wood glue and clamps to assemble the box.
- Sand and Finish: Sand down rough edges for a smooth finish. Apply a wood stain or varnish to enhance the natural grain.
- Add Hardware: Install hinges and a clasp to complete your box. Consider adding a soft lining inside to protect your jewellery.
Building a jewelry box is more than just a woodworking project; it’s a chance to create something uniquely yours that can be treasured for years.
For more creative crafting ideas that cater to all ages and skill levels, explore further into the world of woodworking and beyond. Whether you’re a beginner or a seasoned crafter, there’s always a new project waiting to ignite your imagination.
10. Custom Kitchen Cabinets
Creating custom kitchen cabinets is a fantastic way to upgrade your space while showcasing your woodworking skills. This project involves designing, measuring, and building cabinets that fit your kitchen perfectly. It’s a big project but totally doable with patience and the right tools. Here’s how you can get started:
Steps to Build Custom Kitchen Cabinets
- Plan Your Design: Start by sketching your kitchen layout. Consider the style and functionality you want. Do you need more drawers or shelves? What about the cabinet doors—do you prefer glass or solid wood?
- Gather Materials and Tools: You’ll need wood, screws, hinges, and handles. A tablesaw and a few simple tools are essential. Don’t forget safety gear like goggles and gloves.
- Measure and Cut: Accurate measurements are crucial. Measure twice, cut once! Cut your wood pieces for the cabinet frame, shelves, and doors.
- Assemble the Frame: Start by building the cabinet box. Use clamps to hold pieces in place and ensure everything is square.
- Install Shelves and Doors: Attach the shelves inside the cabinet and hang the doors. Make sure everything opens and closes smoothly.
- Finish and Install: Sand the surfaces and apply your chosen finish. Once dry, install the cabinets in your kitchen.
Custom kitchen cabinets not only enhance the look of your kitchen but also provide tailored storage solutions that meet your specific needs. The satisfaction of seeing your completed project makes all the effort worthwhile.
Tips for Success
- Take Your Time: Rushing can lead to mistakes. Work at a steady pace.
- Double-Check Measurements: Mistakes in measuring can cause big issues later.
- Use Quality Materials: Investing in good wood and hardware will pay off in durability.
- Seek Help: If you’re unsure about any step, don’t hesitate to ask a friend or consult a professional.
Building custom kitchen cabinets is a rewarding project that combines creativity and practicality. With careful planning and execution, you’ll have a kitchen that truly fits your style and needs.
Conclusion
So, there you have it, ten woodworking projects that can really push your skills and creativity. Whether you’re just starting out or have been at it for years, there’s always something new to learn and try. These projects aren’t just about making things; they’re about the joy of creating and the satisfaction of seeing your hard work come to life. So grab your tools, pick a project, and get started. Who knows, you might just surprise yourself with what you can create. Happy woodworking!
Frequently Asked Questions
What kind of wood should I use for my project?
It’s best to choose wood that matches your project’s needs. For outdoor projects, cedar or redwood is great because it resists weather. For indoor items, oak or pine are good choices.
How can I make sure my woodworking project is safe?
Always wear safety gear like goggles and gloves. Keep your work area clean, and make sure your tools are in good shape. Follow instructions carefully.
Do I need special tools for these projects?
You can start with basic tools like a saw, hammer, and measuring tape. As you get more into woodworking, you might want to add power tools like a drill or sander.
Are these woodworking projects expensive?
They can be budget-friendly if you plan carefully. Using reclaimed wood or buying materials during sales can help keep costs down.
Can kids help with these projects?
Yes, kids can help with simple tasks like sanding or painting but always supervise them closely to keep them safe.
How do I add my own style to these projects?
You can customize it with paint, stain, or by adding decorative hardware. Let your creativity shine!