DIYbrico | Discover, Create, Inspire

Create Your Own Crochet Dinosaur: A Step-by-Step Guide to Fun and Unique Patterns
Create a crochet dinosaur with our step-by-step guide. Perfect for unique, fun patterns. Get started today!

Ever thought about making your crochet dinosaur? It’s a fun project that lets you get creative with yarn and hooks. Whether you’re new to crochet or have been doing it for a while, this guide will help you create a unique and cuddly dinosaur. With some yarn, a hook, and patience, you’ll have a prehistoric buddy in no time.
Key Takeaways
- Learn to choose the right yarn and tools for your dinosaur project.
- Master basic and advanced crochet stitches to create texture and detail.
- Follow step-by-step instructions to crochet a dinosaur’s body and features.
- Explore creative variations to design unique dinosaur patterns.
- Troubleshoot common crochet challenges for a smooth crafting experience.
Choosing the Right Yarn and Tools for Your Crochet Dinosaur
Selecting the Perfect Yarn for Durability and Color
When you’re making a crochet dinosaur, picking the right yarn can make a huge difference in how your project turns out. Worsted weight yarn is often a favorite because it’s sturdy and comes in so many colors, perfect for capturing those dinosaur details. If you want your stitches to really pop, consider using cotton yarn, which gives great stitch definition. Plus, with cotton, you can easily wash your dinosaur without worrying about it losing shape.
Essential Crochet Hooks and Accessories
The crochet hook is your magic wand. For most dinosaur patterns, you’ll find yourself reaching for a hook between 3.5 mm and 5.0 mm. But remember, the hook size can change depending on how tight or loose you crochet. Besides the hook, you’ll need a few other essentials:
- Stuffing: Fiberfill is great for giving your dino its shape.
- Safety Eyes: These can add a lot of character, but if your dino is for a little one, you might want to stitch on the eyes instead.
- Stitch Markers: These help keep track of your rounds, especially when you’re dealing with complex patterns.
- Tapestry Needle: Perfect for sewing parts together and weaving in those pesky ends.
Understanding Yarn Weight and Hook Size
Getting the right yarn weight and hook size is like setting the foundation for your dinosaur. If you’re following a pattern, it will usually tell you what yarn weight and hook size to use. But here’s a quick tip: if you want a smaller dinosaur, go down a hook size; for a larger one, go up. Just keep in mind that changing the hook size might mean you’ll need more or less yarn. And don’t forget to make a gauge swatch if you’re concerned about the final size.
A little preparation goes a long way in making sure your dinosaur turns out just the way you imagined. With the right yarn and tools, you’re all set to start stitching up your prehistoric pal.
Mastering Basic Crochet Stitches for Dinosaur Patterns
Single Crochet and Double Crochet Techniques
When starting out on your crochet dinosaur adventure, single crochet (sc) and double crochet (dc) are your go-to stitches. These are the building blocks for most patterns. The single crochet is tight and dense, perfect for creating sturdy shapes, while the double crochet is taller and offers a looser texture, ideal for larger areas. To practice, make a swatch with both stitches, alternating rows to see how they differ in texture and height.
- Single Crochet (sc): Insert your hook, yarn over, pull through, yarn over again, and pull through both loops.
- Double Crochet (dc): Yarn over first, insert your hook, yarn over, pull through, yarn over again, pull through two loops, yarn over, and pull through the last two loops.
Creating Texture with the Moss Stitch
The moss stitch, or granite stitch, adds a delightful texture to your dinosaur. It’s a simple combination of single crochet and chain stitches, creating a lovely woven look.
- Row 1: Start with a foundation chain of even numbers. Single crochet in the fourth chain from the hook, chain one, skip one chain, single crochet in the next. Repeat from * to the end.
- Row 2: Turn your work, chain two, single crochet in the chain space, chain one. Repeat across.
This stitch is perfect for adding a unique texture to your dinosaur’s skin or belly.
Advanced Stitches: Herringbone and Beyond
Once you’re comfortable with the basics, it’s time to explore more advanced stitches like the herringbone. This stitch gives a beautiful slanted effect, adding a touch of sophistication to your project.
- Herringbone Double Crochet: Yarn over, insert hook into the stitch, yarn over and pull through the stitch and the first loop on the hook, yarn over and pull through one loop, yarn over and pull through the last two loops.
Exploring these advanced stitches can open up new design possibilities for your crochet dinosaur, making them truly one-of-a-kind creations.
Mastering these stitches will not only help you create stunning dinosaurs but also expand your crochet skills, preparing you for more complex projects. Let your imagination lead the way as you experiment with different stitches and techniques.
Step-by-Step Guide to Crocheting a Dinosaur Body
Starting with the Magic Circle Technique
To kick off your crochet dinosaur, you’ll begin with the magic circle. This technique is essential for creating a tight, seamless start to your dinosaur’s body. Here’s a quick rundown:
- Create a loop with your yarn, ensuring the working yarn crosses over the tail.
- Insert your crochet hook into the loop and draw up a loop of yarn.
- Yarn over again and pull through the loop on your hook to make your first chain.
- Crochet the required number of stitches into the loop—usually six single crochets for a small project.
- Pull the tail to tighten the circle, closing the center.
This method is favored in amigurumi projects because it leaves no gaps, giving your dinosaur a polished look.
Shaping the Dinosaur’s Body and Tail
Once your magic circle is ready, it’s time to shape the dinosaur’s body and tail. This involves working in continuous rounds, gradually increasing to form the body shape. Follow these steps:
- Increase Rounds: Add stitches evenly in each round to widen the body. For instance, if you start with six stitches, increase to twelve in the next round by adding a stitch after every original stitch.
- Maintain Rounds: Once you’ve reached the desired width, continue crocheting without increasing to lengthen the body.
- Decrease for Tail: To shape the tail, begin decreasing stitches. This is done by crocheting two stitches together at intervals.
Adding Legs and Arms for Realism
To make your dinosaur come alive, you’ll need to add legs and arms. These are usually made separately and then attached to the body.
- Crochet Limbs: Start each limb with a smaller magic circle. Increase to the desired size, then maintain the round to form the limb.
- Stuff and Shape: Lightly stuff each limb with fiberfill to give it form. Be careful not to overstuff, which can distort the shape.
- Attach to Body: Use a tapestry needle to sew the limbs onto the body. Position them carefully to ensure balance and realism.
Crafting a crochet dinosaur is not just about following a pattern—it’s about bringing a character to life with your hands. Enjoy the journey as much as the destination.
Designing Unique Features for Your Crochet Dinosaur
Crafting Spikes and Plates for a Stegosaurus
Creating those iconic spikes and plates on a Stegosaurus can be a fun challenge. Start by choosing a contrasting yarn color to make these features stand out. Here’s a simple way to crochet spikes:
- Chain a base length: Decide how tall you want your spikes, then chain that number.
- Single crochet back down: Work single crochet stitches back down the chain to form a triangle shape.
- Adjust the size: Vary the number of chains to create different spike sizes for added realism.
For the plates, use a similar method but make them wider and flatter. Attach them along the back of your dinosaur, and voila, your Stegosaurus is ready to impress!
Creating a Roaring T-Rex Mouth
A T-Rex without its fearsome mouth? Unthinkable! To crochet a mouth that really roars, consider using a bright red or pink yarn for the inside. Start by crocheting a half-circle for the lower jaw and a matching piece for the upper jaw. Add some white yarn for teeth, stitching them onto the edges of the jaws. This adds a fun, fierce look to your T-Rex.
Personalizing with Colors and Patterns
The beauty of crochet is in its customization. When it comes to your dinosaur, don’t shy away from bold colors and patterns. Whether you’re going for a classic green or a vibrant purple, the choice is yours. Consider using variegated yarn for a unique, textured look. You can even crochet stripes or polka dots by switching colors mid-row.
Let your imagination run wild as you explore these dinosaur amigurumi patterns, offering endless possibilities to make your creation truly unique.
Finishing Touches and Assembly of Your Crochet Dinosaur
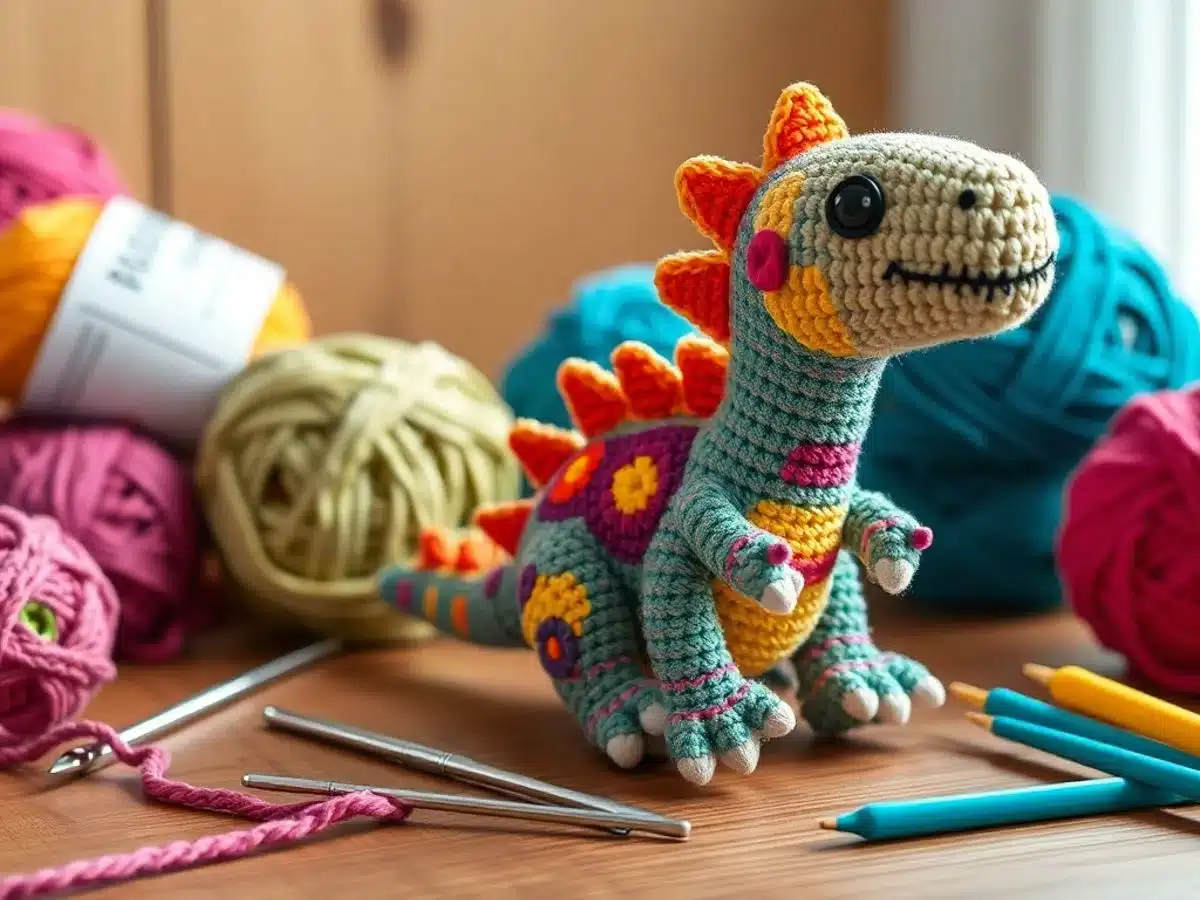
Sewing Parts Together Seamlessly
Now that all your dinosaur pieces are crocheted, it’s time to put them together. Align the parts carefully to ensure your dinosaur looks just right. Start by attaching the head to the body. Thread a yarn needle with a long piece of yarn, and whip stitch around the edges where the head meets the body. Make sure your stitches are tight and secure. Next, attach the limbs. Pin them in place first to check their position. Once satisfied, sew them on with the same technique. Lastly, any decorative parts like spikes or plates can be added. Remember, a little patience here goes a long way!
Adding Eyes and Facial Features
The eyes and face bring your dinosaur to life. You can use safety eyes, which are easy to install, or embroider the eyes with yarn. If using safety eyes, insert them before stuffing the head, following the package instructions. For embroidered eyes, use a contrasting yarn color to make them pop. Add a smile or nostrils using simple backstitch or satin stitch. Play around with expressions to give your dino personality.
Final Adjustments for a Professional Look
Once everything is sewn together, take a moment to look over your dinosaur. Are there any loose threads? Snip them off carefully. Check if any parts need a little more stuffing or adjustments. If your dinosaur seems a bit wobbly, add more stuffing to the body or limbs for stability. A well-stuffed dinosaur stands tall and proud! Finally, give your dinosaur a gentle fluff and reshape it if needed. Your handmade dinosaur is now ready to be displayed or gifted.
Exploring Creative Variations and Patterns
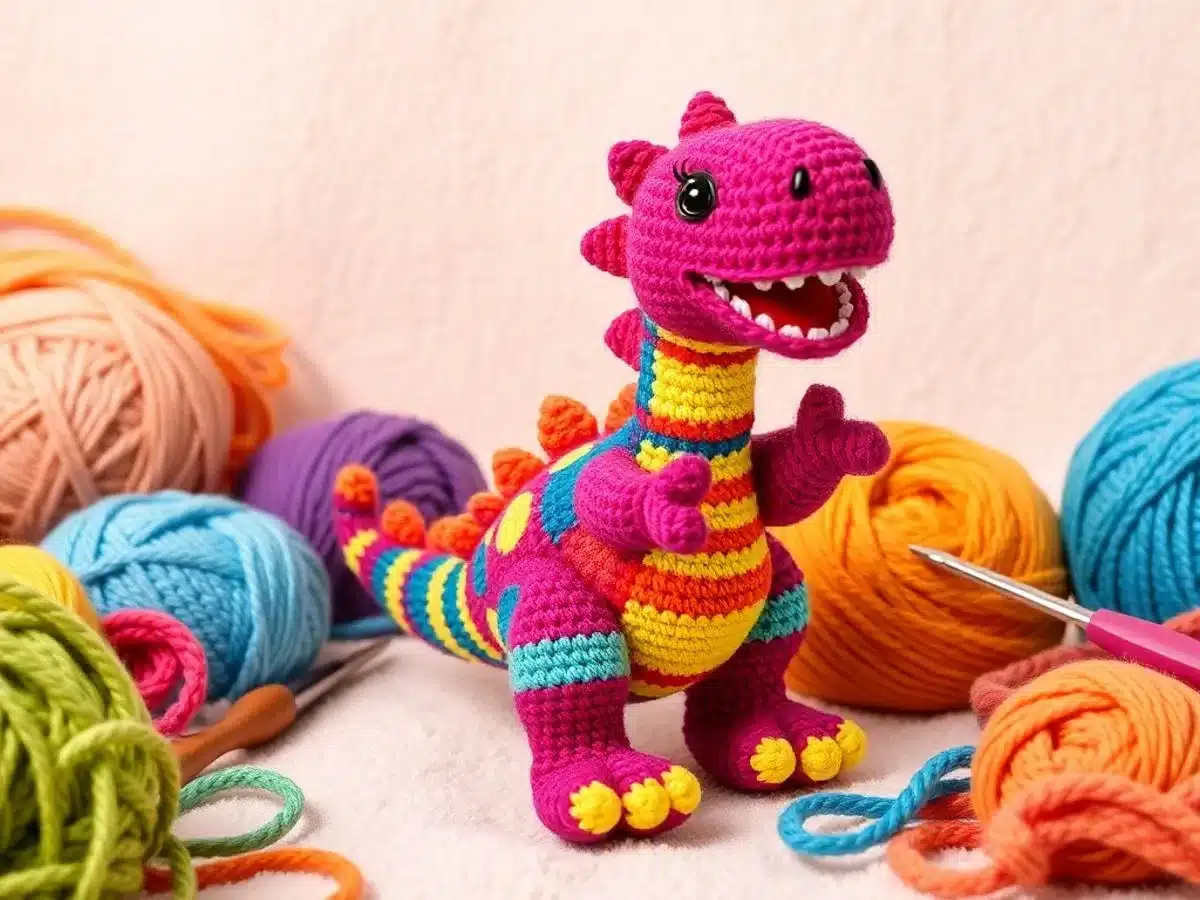
Experimenting with Different Dinosaur Species
Crocheting dinosaurs opens up a world of creativity. You can start with the classic adorable 30 cm crochet dinosaur and then let your imagination run wild. Why not try a Triceratops or a Velociraptor next? Each dinosaur species brings its own unique features and challenges. For instance, a Stegosaurus might have plates along its back, while a Brachiosaurus would require a long neck. This is where you can really let your creativity shine.
Incorporating Accessories and Props
Adding accessories to your crochet dinosaurs can make them even more fun and personalized. Imagine a tiny top hat or a bow tie for your T-Rex! Here are some ideas to get you started:
- Hats and Scarves: Give your dinosaur a cozy winter look.
- Bags and Backpacks: Perfect for a little explorer dinosaur.
- Glasses and Bowties: Add a touch of class or whimsy.
These additions can be as simple or as detailed as you like, depending on your skill level and patience.
Customizing Patterns for Gifts and Decor
Crochet dinosaurs make fantastic gifts and home decor items. When creating a gift, think about the recipient’s favorite colors or themes. You could even customize the dinosaur to match a child’s room decor. Consider these tips:
- Choose Colors Wisely: Match the dinosaur colors to the room or the recipient’s preferences.
- Add Personal Touches: Embroider the recipient’s name or a special date.
- Create a Set: Make a family of dinosaurs in different sizes and colors.
Tip: Customizing your crochet projects not only makes them unique but also adds a personal touch that recipients will cherish.
By exploring these variations and patterns, you can turn a simple crochet dinosaur into a masterpiece that reflects your personality and creativity. The possibilities are endless!
Troubleshooting Common Crochet Dinosaur Challenges
Fixing Uneven Stitches and Gaps
Uneven stitches and gaps can be a real headache when you’re trying to make your crochet dinosaur look neat. The key to avoiding these issues is maintaining consistent tension. If your stitches are too tight, your dinosaur might end up stiff and smaller than expected. Too loose, and it’ll look floppy. Try practicing on a small swatch to get a feel for the right tension. Also, using stitch markers can help you keep track of your rounds and ensure you’re not skipping any stitches.
Adjusting Tension for Consistency
Getting the tension just right takes practice. If your tension is inconsistent, your dinosaur might have areas that are tighter or looser, affecting its shape. To fix this, make sure you’re holding your yarn the same way throughout your project. You might also want to try different hooks to see if a different size helps. Remember, it’s okay to unravel a bit and redo sections if things aren’t looking right.
Overcoming Pattern Reading Difficulties
Reading crochet patterns can sometimes feel like deciphering a secret code. If you’re struggling, take a deep breath and break it down step by step. Look up any abbreviations or terms you’re not familiar with. It might also help to learn how to create Rori the Raptor using a free crochet pattern, which includes troubleshooting tips for common issues. Don’t hesitate to reach out to online communities or friends who crochet; they can offer tips and support.
Conclusion
So, there you have it! Making your own crochet dinosaur isn’t just a fun project, it’s a chance to let your creativity run wild. Whether you’re a beginner or a seasoned pro, these patterns offer something for everyone. From picking out the perfect yarn to mastering those tricky stitches, each step is a little adventure. And the best part? You end up with a one-of-a-kind dino buddy that’s sure to impress. So grab your hook, choose a pattern, and start crafting your prehistoric masterpiece today. Happy crocheting!
Frequently Asked Questions
What kind of yarn should I use for a crochet dinosaur?
Choose a durable yarn like worsted weight for sturdiness. Bright colors can make your dinosaur more fun and appealing.
How do I start crocheting a dinosaur?
Begin with basic stitches like single crochet. Use a magic circle to start most dinosaur patterns, as it helps create a neat, tight base.
What tools do I need to crochet a dinosaur?
You’ll need a crochet hook, yarn, stuffing, stitch markers, and a tapestry needle for sewing pieces together.
Can beginners crochet a dinosaur?
Yes, beginners can start with simple patterns. Look for designs labeled as beginner-friendly, which use basic stitches.
How can I fix mistakes in my crochet project?
If you spot a mistake, gently pull back the stitches to the error and redo that section. Use stitch markers to help keep track of your work.
What is the best way to add details like eyes or spikes?
For eyes, use safety eyes or embroider them. Spikes can be crocheted separately and sewn onto the dinosaur’s back.