DIYbrico | Discover, Create, Inspire

Creative and Fun Paper Plate Crafts for Kids: 10 Unique Ideas to Spark Imagination
Explore 10 fun paper plate crafts for kids to spark creativity and imagination. Perfect for indoor activities!

Table of Contents
Have you Ever stared at a pile of paper plates and wondered what to do with them? Well, you’re in luck! Paper plate crafts are a fantastic way to keep the kids entertained without breaking the bank. You can turn these everyday items into something magical with just a few supplies, like markers, paint, and some glue. Whether it’s a rainy day or you just need a creative outlet, these paper plate ideas will get the kids’ imaginations going. Let’s dive into some fun and unique crafts that will be a hit!
Key Takeaways
- Paper plate crafts are budget-friendly and easy to set up.
- Kids can create a variety of fun projects like animals and masks.
- These crafts help develop fine motor skills and creativity.
- Perfect for indoor activities on rainy days or quiet afternoons.
- Encourages kids to use their imagination and have fun.
1. Paper Plate Animals
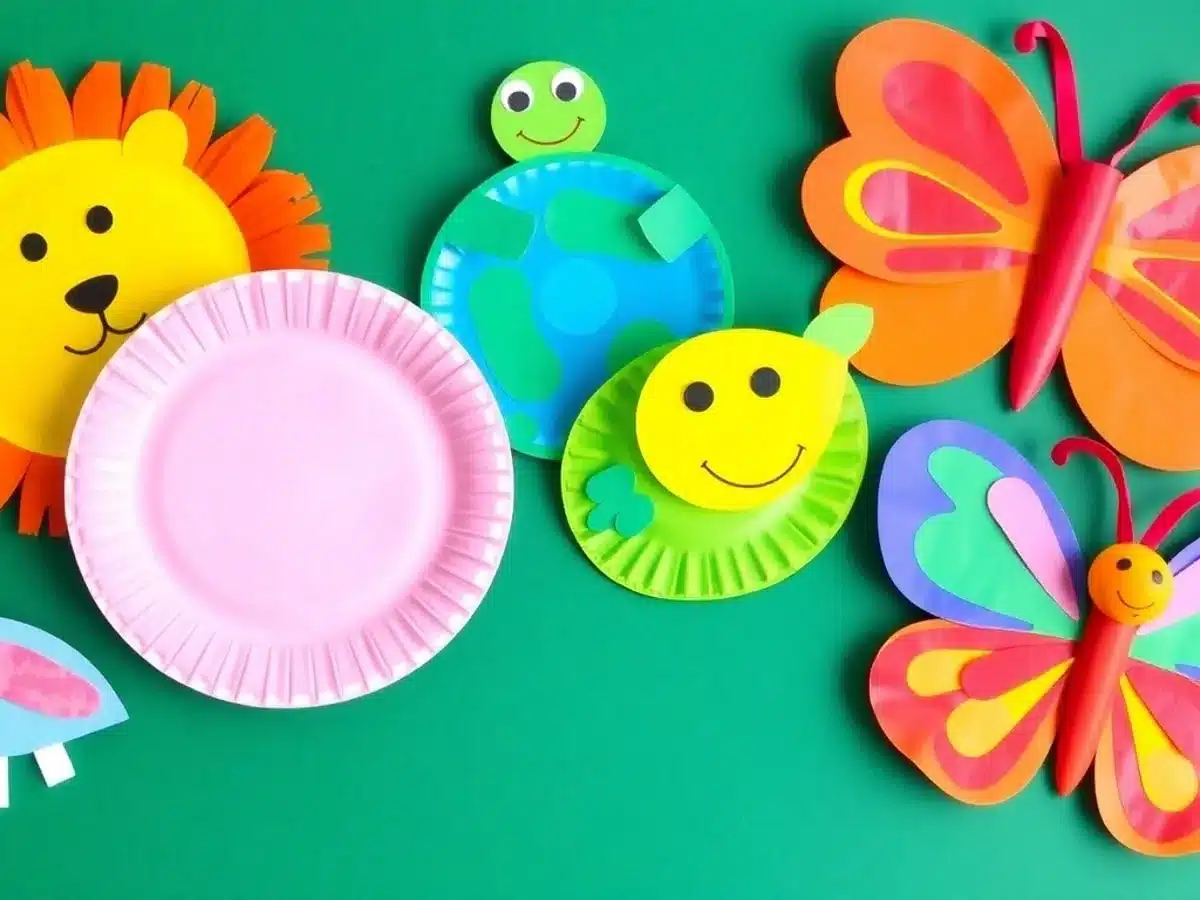
Paper plate crafts are a fantastic way to let kids’ imaginations run wild. You can transform ordinary paper plates into a zoo of creative creatures with just a few basic supplies. Whether it’s a ferocious lion or a gentle elephant, these crafts are both fun and educational. Let’s dive into some easy steps to create your very own paper plate animals.
Steps to Create Paper Plate Animals
- Gather Supplies: You’ll need paper plates, colored paper, scissors, glue, and some markers or crayons.
- Choose Your Animal: Decide which animal you’d like to create. This could be anything from a lion to a cute little fox.
- Cut and Paste Features: Cut out shapes for the animal’s features like ears, eyes, and noses from the colored paper. Glue them onto the paper plate.
- Add Details: Use markers or crayons to add extra details like fur, whiskers, or spots.
- Personalize: Encourage kids to add their own unique touches. Maybe your lion has a rainbow mane or your elephant has polka dots!
Crafting these animals not only keeps kids entertained but also helps them learn about different animals and their features. It’s a simple, engaging way to explore creativity.
For a fun twist, try making rocking paper plate crabs using similar techniques. These crabs are not only easy to make but also a great way to introduce kids to sea creatures.
With paper plate animal crafts, the possibilities are endless. Kids can create a whole menagerie of creatures, each with its own personality and charm. So grab some paper plates and let the crafting adventure begin!
2. Paper Plate Flowers
Creating paper plate flowers is a delightful way to bring a bit of springtime cheer indoors, no matter the season. Kids will love transforming simple paper plates into vibrant blooms that never wilt. It’s a great way to spend a rainy afternoon, sparking creativity while learning about nature.
Steps to Create Paper Plate Flowers
- Gather Your Materials: You’ll need paper plates, scissors, paint or markers, glue, and any additional decorations like glitter or stickers.
- Cut the Plate: Begin by cutting even slits around the edge of the paper plate to create petals. Aim for eight to ten petals for a balanced look.
- Shape the Petals: Gently bend the petals upward to give the flower dimension. You can also curl them slightly using a pencil for a more realistic effect.
- Decorate: Use paints or markers to color the petals. Encourage kids to explore different colors and patterns, perhaps mimicking real flowers or inventing their own.
- Assemble the Flower: Glue a circle of colored paper or a pom-pom in the center of the plate to complete the flower.
- Optional – Add a Stem: If you’d like, attach a green pipe cleaner or a strip of paper to the back of the plate as a stem.
Let your child’s imagination run wild with colors and shapes. The joy of crafting these flowers is in the endless possibilities and personal touches each child can add.
Paper plate flowers are not only fun to make but also make charming decorations for the home. They can be used to brighten up a room, make a unique gift, or even as part of a school project. Plus, it’s an easy and fun craft for children that requires minimal materials and supervision.
3. Paper Plate Masks
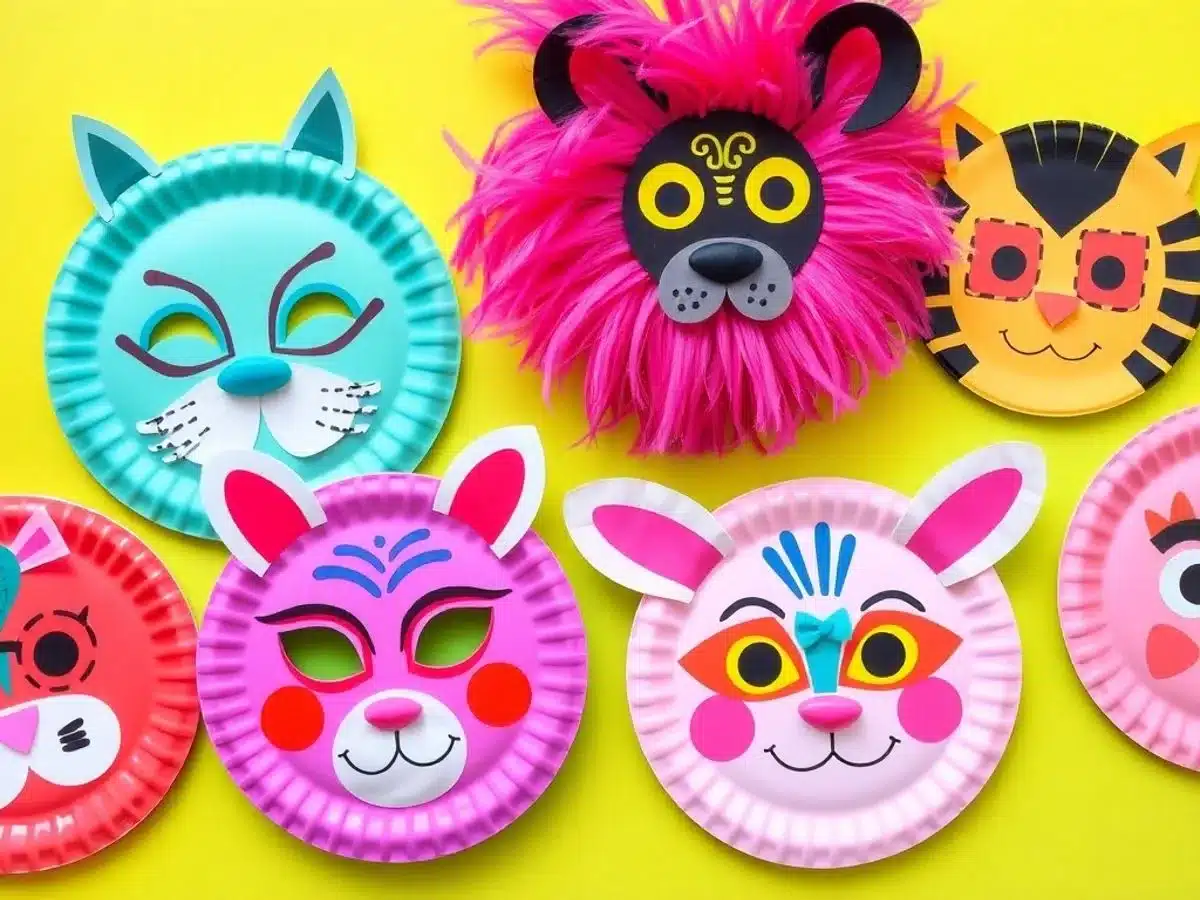
Crafting Paper Plate Masks
Creating paper plate masks is a fantastic way for kids to dive into a world of imagination. Whether it’s for a costume party or just an afternoon of fun, these masks are a hit with kids of all ages.
Why Paper Plate Masks?
- Cost-Effective: Paper plates are inexpensive and easily accessible.
- Simple Supplies: You only need basic art supplies like markers, paints, and glue.
- Endless Creativity: Kids can design masks of animals, superheroes, or even their favorite cartoon characters.
Step-by-Step Guide
- Gather Materials: Start with paper plates, scissors, markers, paint, glue, and elastic bands.
- Create the Base: Cut eye holes in the paper plate and trim to fit the face.
- Decorate: Let the kids use paints and markers to bring their masks to life.
- Attach the Band: Use an elastic band to secure the mask for wearing.
Paper plate masks are not only a fun craft but also a wonderful way to encourage children to express themselves and explore their creativity. With just a few materials, they can create a masterpiece that they can wear and show off.
Tips for Success
- Be Safe: Always supervise kids when using scissors.
- Encourage Imagination: Let them choose their own colors and designs.
- Add Extras: Feathers, stickers, and glitter can make masks even more exciting.
Making paper plate masks is more than just a craft; it’s an adventure in creativity. Kids love the freedom to design and decorate, and the result is a unique mask they can proudly wear. So grab those paper plates and let the fun begin!
4. Paper Plate Monsters
Unleash your kids’ creativity with paper plate monsters! This craft is perfect for Halloween or any day when your little ones feel like creating something fun and quirky. Paper plate monsters are all about imagination and personalization. Here’s how you can get started:
Materials Needed
- Paper plates
- Paints (various colors)
- Googly eyes
- Glue
- Colored paper
- Scissors
Steps to Create Your Monster
- Paint the Paper Plate: Let your kids choose their favorite colors and paint the entire paper plate. Allow it to dry completely before moving to the next step.
- Add Features: Cut out shapes from colored paper to make mouths, teeth, and horns. Glue them onto the plate.
- Googly Eyes: Stick googly eyes onto the plate. You can add as many as you want for a silly effect.
- Finishing Touches: Let the kids add any other details they like, such as glitter or stickers, to give their monster extra personality.
Crafting paper plate monsters is a fantastic way for kids to express themselves. It’s not just about the end result but the joy and creativity involved in the process.
For more eco-friendly crafts, consider transforming empty toilet paper rolls into creative crafts like monsters and rocket ships. These projects are not only fun but also promote recycling and imaginative play.
5. Paper Plate Sun
Brighten Your Day with a Paper Plate Sun
Creating a cheerful paper plate sun is a delightful way to bring a bit of sunshine indoors, no matter the weather outside. This craft is super easy and perfect for kids of all ages. With just a few supplies, your little ones can create a sunny masterpiece that’s sure to light up any room.
Materials Needed:
- Paper plate
- Yellow paint
- Paintbrush
- Scissors
- String
- Black marker
Steps to Create:
- Paint the Plate: Start by painting the entire surface of the paper plate with bright yellow paint. Let it dry completely.
- Add the Face: Once dry, use a black marker to draw a big, smiling face in the center of the plate.
- Cut the Rays: Cut small triangles around the edge of the plate to form the sun’s rays.
- Prepare for Hanging: Punch a hole at the top and thread a piece of string through it for easy hanging.
Let your kids’ creativity shine as they customize their sun with different facial expressions or even add some glitter for extra sparkle. This simple activity not only boosts their artistic skills but also adds a personal touch to your home decor.
Tips for Success:
- Use non-toxic paint and markers to ensure safety for all ages.
- Encourage your kids to experiment with different colors and designs.
- Display their creations proudly to boost their confidence and creativity.
Engaging in this craft is not just about making an adorable sun; it’s also about spending quality time together. Enjoy the process and celebrate the little moments of joy it brings!
6. Paper Plate Fish
Time to Make a Splash with Paper Plate Fish
Creating a paper plate fish is a fun and easy craft that lets kids explore their creativity while learning about marine life. With just a few supplies, your child can transform a plain paper plate into a colorful fish they’ll love.
Here’s what you’ll need:
- Paper plates
- Paints or markers
- Scissors
- Glue
- Googly eyes
- Construction paper
Steps to Create Your Fishy Friend
- Paint the Plate: Start by painting the paper plate in vibrant colors. Let your child choose their favourite shades to make their fish unique.
- Cut Out the Fins: Use construction paper to cut out fin shapes. You can make them as big or small as you like.
- Attach the Fins: Glue the fins to the back of the paper plate. Make sure they’re secure, so they don’t fall off.
- Add Googly Eyes: Stick on a pair of googly eyes to bring your fish to life.
- Decorate the Body: Use markers or more paint to add scales, stripes, or any other patterns your child imagines.
- Finish with a Smile: Draw or glue on a mouth to give your fish a friendly expression.
Crafting is not just about creating something beautiful; it’s about spending quality time with your little ones and watching their imaginations come to life.
For a detailed step-by-step guide on creating a paper plate fish, check out this tutorial. It’s packed with tips and tricks to make the process smooth and enjoyable.
Once your fish is complete, hang it up as part of an ocean-themed display or use it as a playful addition to your child’s room decor. This simple craft is not only delightful but also a great way to sneak in some learning about sea creatures!
7. Paper Plate Puppets
Creating paper plate puppets is an exciting way for kids to dive into the world of storytelling and performance. These puppets are not just crafts; they are gateways to imaginative play. Here’s a simple guide to get you started on making your own paper plate puppets:
- Gather Materials: You’ll need paper plates, markers, crayons, glue, scissors, and popsicle sticks. Optional decorations like yarn, feathers, or pipe cleaners can add flair.
- Design Your Characters: Let the kids draw or paint faces on the paper plates. They can create animals, people, or even fantasy creatures.
- Cut and Assemble: Carefully cut out features like eyes, noses, or mouths. Attach these features using glue. Secure a popsicle stick to the back of the plate to serve as a handle.
- Add Movable Parts: If desired, create movable arms or legs using additional paper pieces. Attach them with brads for flexibility.
- Put on a Show: Once the puppets are ready, it’s time for a puppet show! Encourage the kids to craft a story and bring their characters to life.
Paper plate puppets are a fantastic way to engage children in creative storytelling, allowing them to express emotions and invent scenarios freely. They can transform a simple craft project into a world of adventure and fun.
For a fun winter-themed activity, try making polar bear paper plate puppets, perfect for an arctic adventure story.
8. Paper Plate Rockets
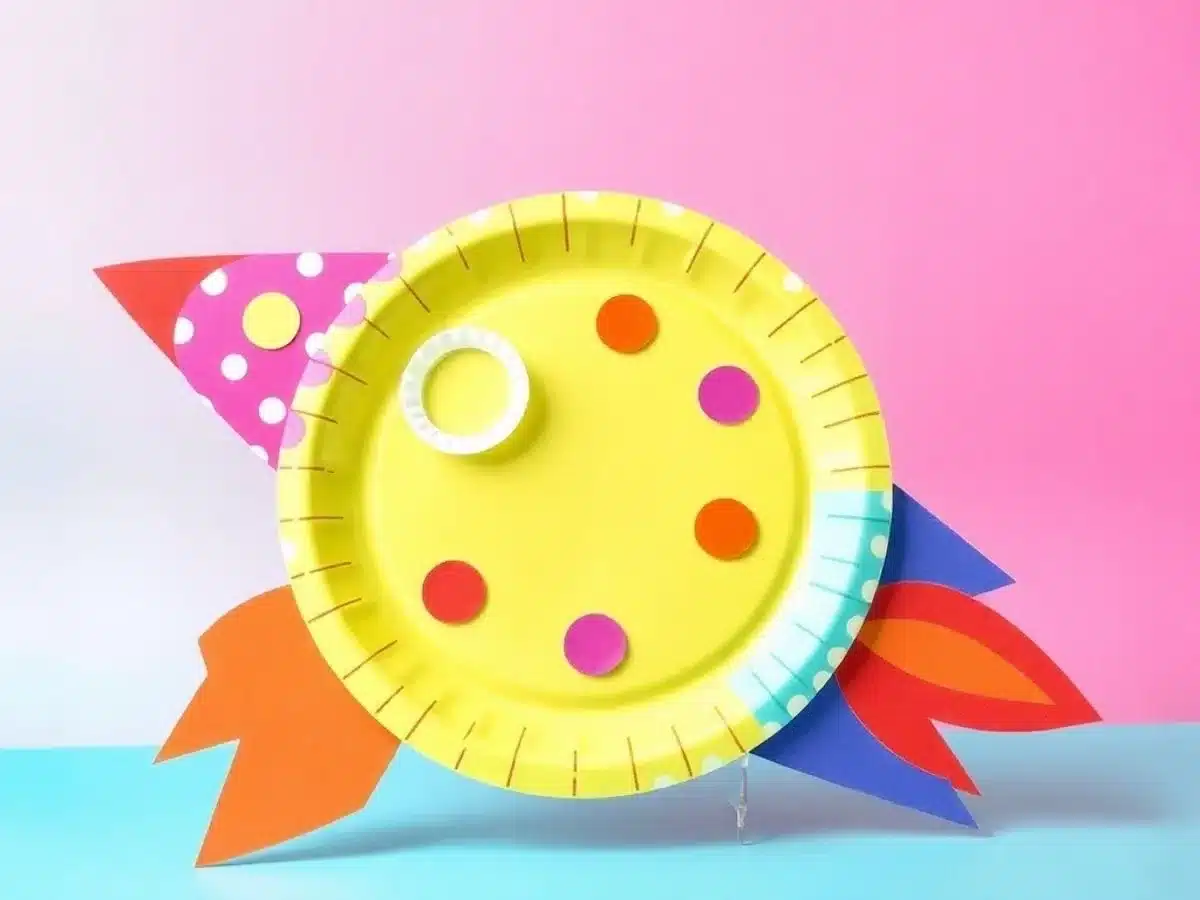
Blast Off with Paper Plate Rockets
Creating paper plate rockets is a fantastic way to encourage kids to explore their creativity and imagination. With just a few simple materials, they can craft their very own spacecraft ready for an intergalactic adventure.
Here’s what you’ll need:
- Paper plates
- Colored paper (red, yellow, blue)
- Scissors
- Glue or tape
- Markers or crayons
Step-by-Step Guide
- Cut the Rocket Body: Start by cutting a paper plate in half. This will form the main body of your rocket.
- Create the Nose Cone: Use colored paper to cut out a triangle shape and attach it to the top of the half plate. This will be the rocket’s nose cone.
- Add the Fins: Cut two small triangles from colored paper for the rocket fins. Glue these to the bottom sides of the rocket body.
- Decorate: Let the kids use markers or crayons to add windows, numbers, or any other designs to personalize their rockets.
- Attach Flames: For the final touch, cut strips of red and yellow paper to create flames. Glue these to the bottom of the rocket to make it look like it’s taking off.
Paper plate rockets are not just a craft; they’re a launchpad for young imaginations. Kids can create stories about their rockets traveling to distant planets and meeting alien friends.
For an extra special touch, consider using a rocket template and space background to give your craft a cosmic setting. This will make the activity even more engaging and fun for the kids.
9. Paper Plate Snowmen
Creating paper plate snowmen is a fantastic way to bring the magic of winter indoors without the chill. This craft is perfect for kids of all ages and doesn’t require a lot of materials. It’s a simple yet fun project that can be personalized in endless ways.
Materials Needed
- White paper plates
- Black construction paper
- Orange construction paper
- Glue stick
- Scissors
- Markers or crayons
- Optional: buttons, felt, glitter
Steps to Create Your Snowman
- Cut Out the Features: Start by cutting out eyes and buttons from the black construction paper. Use the orange paper to cut out a carrot-shaped nose.
- Assemble the Face: Glue the eyes and nose onto the paper plate. Draw a mouth using markers or crayons.
- Add the Buttons: Glue the black paper buttons down the middle of the plate.
- Personalize Your Snowman: Get creative! Add a scarf using felt or create a hat from construction paper. Sprinkle glitter for a frosty effect.
- Display Your Creation: Once dry, your snowman can be hung up or used as a festive table decoration.
Paper plate snowmen are not just crafts; they’re a way to explore creativity with your kids, offering a fun indoor activity that celebrates the winter season.
This project is not only a great way to keep kids entertained, but it also helps them develop fine motor skills and encourages imaginative play. So grab those plates and let the snowman-making begin!
10. Paper Plate Hedgehogs
Turning a simple paper plate into an adorable hedgehog is a delightful craft that kids will love. This activity is perfect for a rainy day or a fun weekend project. With just a few basic supplies, your little ones can create their own spiky friend to display proudly.
Materials Needed
- Paper plates (one per hedgehog)
- Brown and black paint or markers
- Scissors
- Glue or tape
- Googly eyes (optional)
Instructions
- Paint the Plate: Start by painting the back of the paper plate brown. This will be the body of your hedgehog.
- Cut the Spikes: Once the paint is dry, cut triangular shapes around the edge of the plate to form the hedgehog’s spikes.
- Add Details: Use black paint or markers to add a face to your hedgehog. Glue on googly eyes for a fun touch.
Crafting these hedgehogs is not just about creating something cute; it’s about letting kids explore their imagination and have fun with simple materials.
Creative Tips
- Let kids experiment with different colors for a unique hedgehog.
- Add some glitter to the spikes for a sparkly effect.
- Use printable designs to create charming hedgehog posters as a backdrop for your paper plate creations.
This craft is not only enjoyable but also helps in developing fine motor skills and creativity. Plus, these hedgehogs make for great decorations or gifts for your little ones.
Wrapping Up Our Paper Plate Adventure
So there you have it, ten awesome paper plate crafts that are sure to keep the kids busy and their imaginations running wild. Who knew a simple paper plate could turn into so many fun things? From animals to flowers, the possibilities are endless. Plus, it’s a great way to spend some quality time with the little ones without breaking the bank. So grab those paper plates and some glue, and let the creativity flow. Happy crafting!
Frequently Asked Questions
What are some easy paper plate crafts for kids?
Some simple paper plate crafts include making animal faces, creating flowers, and designing masks. These activities are fun and help kids use their imagination.
How can I make a paper plate animal?
To make a paper plate animal, paint or color the plate, then add features like eyes, ears, and whiskers using paper, markers, or other craft supplies.
What materials do I need for paper plate crafts?
You’ll need paper plates, glue, scissors, markers or crayons, and any additional decorations like googly eyes or pipe cleaners.
Can paper plate crafts be educational?
Yes, they can teach kids about colors, shapes, and animals while improving their fine motor skills and creativity.
Are paper plate crafts suitable for all ages?
Paper plate crafts can be adapted for different age groups, from toddlers to older kids, making them a versatile activity.
How can I make a paper plate mask?
Cut out eye holes in a paper plate, decorate it with colors and patterns, and attach a string or stick to wear it as a mask.