DIYbrico | Discover, Create, Inspire

10 Creative and Fun Paper Crafts to Spark Your Imagination
Explore 10 fun paper crafts to spark creativity, featuring origami, flowers, and more. Perfect for all ages!

Ever find yourself with a stack of paper and no clue what to do with it? Well, you’re in luck! Fun Paper crafts are a fun way to get creative without fancy tools. Whether you’re into folding, cutting, or gluing, there’s something for everyone. Plus, it’s a great way to spend time with kids or relax on your own. Let’s dive into some fantastic ideas that’ll get your imagination going!
Key Takeaways
- Paper crafts are a versatile and fun hobby that anyone can enjoy.
- You don’t need expensive materials to create beautiful paper crafts.
- These crafts are perfect for both kids and adults, making them a great family activity.
- Paper crafting can be a relaxing way to unwind and express creativity.
- There are endless possibilities with paper crafts, from origami to scrapbooking.
1. Fun Paper Crafts – Origami Animals
Origami animals are a delightful way to explore the art of paper folding. This ancient craft transforms simple sheets of paper into intricate creatures without the need for scissors or glue. Whether you’re a beginner or a seasoned folder, there’s always something new to learn in origami.
Start by choosing the right paper. Traditional origami paper is square and often colored on one side, making it perfect for creating vibrant animals. However, you can also use any paper you have at hand, as long as it’s not too thick.
To make your first origami animal, follow these simple steps:
- Select Your Animal: Decide which animal you want to create. Popular choices include cranes, frogs, and butterflies.
- Find a Tutorial: Look for a step-by-step guide or video. There are countless resources available for free online.
- Begin Folding: Start with basic folds and gradually move to more complex ones. Practice makes perfect!
- Add Details: Once you’ve mastered the basic shape, you can add details like eyes or patterns using markers.
Origami isn’t just about folding paper; it’s a journey of patience and creativity. As you fold, you’ll find a sense of calm and focus, making it a great way to unwind after a busy day.
Folding origami animals can be a meditative practice, allowing you to escape the hustle and bustle of everyday life.
Ready to explore more? Explore the world of paper crafts with ten creative projects that ignite imagination and discover the endless possibilities that paper offers.
2. Colorful Paper Flowers
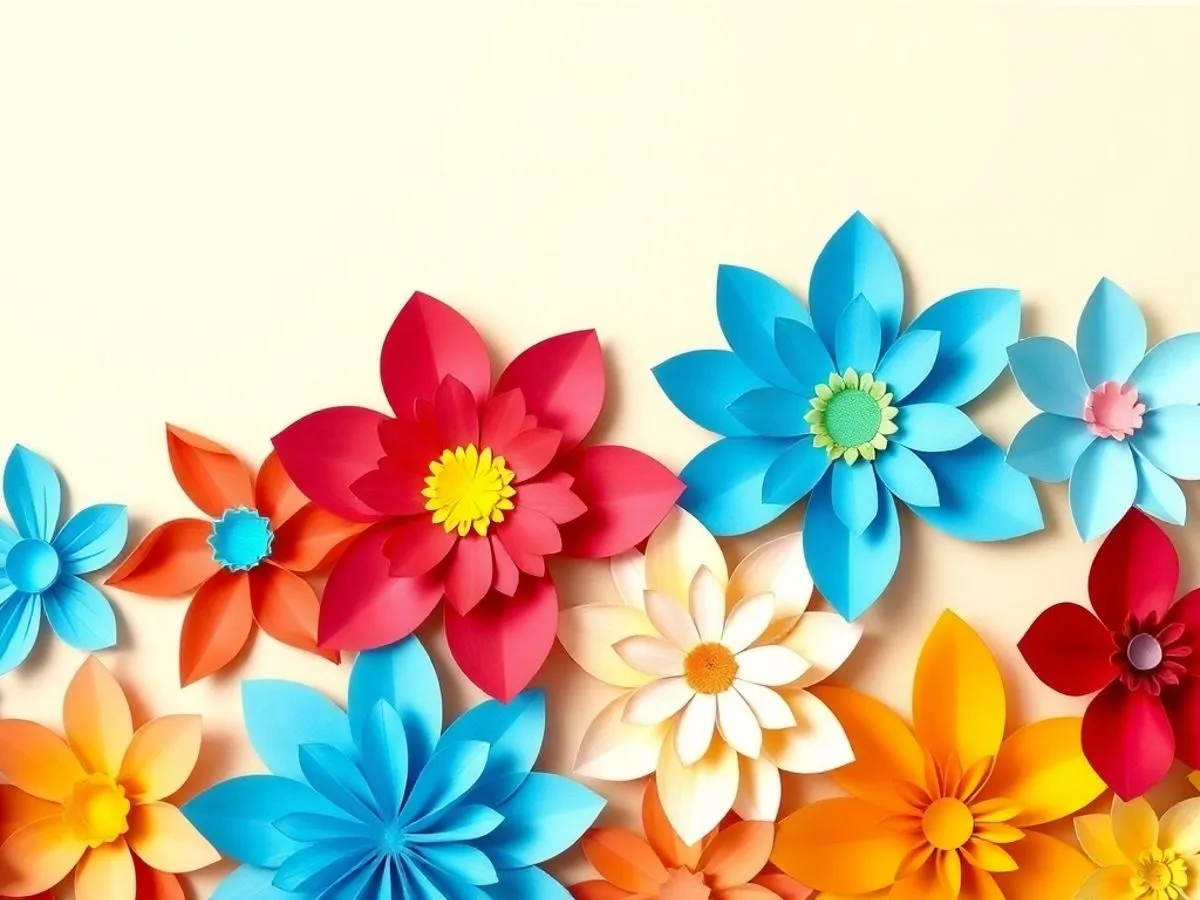
Creating paper flowers is a delightful craft that adds a splash of color to any space. These vibrant blooms never wilt and can be customized to suit any decor or occasion. Whether you’re looking to brighten up your living room or craft a unique gift, paper flowers are the way to go.
Materials Needed:
- Colored paper (origami paper works great)
- Scissors
- Glue or tape
- Optional: Green paper for stems
Step-by-Step Guide:
- Choose Your Paper: Start by selecting your favorite colors. Bright colors can add a cheerful touch, while pastels can create a more subtle look.
- Cut the Shapes: Depending on the flower type you’re aiming for, cut out petal shapes. You can go for circles, ovals, or even heart shapes.
- Add Texture: Fold or curl the petals to give them a more natural and three-dimensional look.
- Assemble the Flower: Layer your petals, gluing them one by one. You can overlap them slightly for a fuller appearance.
- Create the Stem: If you want your flower to stand, attach a green paper strip to the back as a stem.
Crafting paper flowers is not just about creating decor; it’s about exploring creativity and bringing a touch of nature indoors without the upkeep.
Tips for Personalization:
- Experiment with different petal shapes and sizes.
- Mix and match colors for a vibrant bouquet.
- Use patterned paper for an extra pop.
Paper flowers are a fantastic way to ignite children’s imagination. They can learn about different flower shapes and colors while having fun crafting. These flowers can also be a thoughtful handmade gift for friends or family. So, grab your materials and let your creativity blossom!
3. DIY Greeting Cards
Creating your own greeting cards is a wonderful way to add a personal touch to any occasion. Whether it’s a birthday, holiday, or just a simple ‘thinking of you’ note, a handmade card speaks volumes. Plus, it’s a fun and creative activity that doesn’t require a lot of materials.
Getting Started
- Choose Your Paper: Start with some cardstock or any sturdy paper. You can find these at craft stores, and they come in all sorts of colors and textures.
- Pick a Theme: Think about the occasion and what kind of message you want to convey. This will guide your design choices.
- Gather Your Supplies: You’ll need scissors, glue, markers, and maybe some decorative items like stickers or washi tape.
Designing the Card
- Front Design: This is where you can get really creative. Draw, paint, or even collage different elements to make your card stand out.
- Inside Message: Write a heartfelt note. It doesn’t have to be long, just something that shows you care.
Adding Personal Touches
- Use Photos: Adding a small photo can make the card even more special.
- Decorative Elements: Use ribbons or buttons for a 3D effect.
Making greeting cards is not just about the end product but also about the joy of creating something unique. It’s a chance to express your creativity and make someone feel special.
Creating your own cards can be a fulfilling experience. It’s a simple yet meaningful way to show someone you care. Plus, it’s a great way to engage kids in creative paper crafts, letting their imagination run wild while making something beautiful.
4. Paper Collages
Creating paper collages is like painting with paper. It’s all about piecing together different textures and colors to tell a story or express an idea. Whether you’re a seasoned artist or just starting out, paper collages offer a fun, hands-on way to explore your creativity.
Getting Started with Paper Collages
- Gather Your Materials: Start by collecting a variety of papers. Old magazines, newspapers, and colored paper are great choices. You might even want to experiment with different textures, like tissue paper or cardboard.
- Plan Your Design: Think about what you want to create. Is it an abstract piece, a landscape, or maybe a portrait? Sketch out your idea if it helps.
- Cut and Arrange: Begin cutting out shapes and images that fit your theme. Don’t be afraid to layer them. Overlapping pieces can add depth and interest to your collage.
- Glue It Down: Once you’re happy with the arrangement, start gluing the pieces onto a base paper or canvas. Work from the background to the foreground to keep everything in place.
- Add Finishing Touches: Consider adding extra details like paint, markers, or even glitter for a bit of sparkle.
Paper collages are not just crafts; they are a gateway to endless possibilities. With a bit of imagination, simple pieces of paper can transform into a masterpiece.
For those looking to add a unique touch to their collages, try incorporating crackle papers made with Tri-Art and Kroma. This technique adds an intriguing texture and can make your artwork stand out even more.
5. Scrapbooking
Scrapbooking is like a personal time capsule, where you get to preserve memories in your own unique style. It’s a fun and creative way to keep those special moments alive, all while having a blast crafting.
Getting Started
- Gather Your Photos: Start by picking out some of your favorite photos whether it’s family trips, birthdays, or just those random snaps that make you smile.
- Choose a Theme: Think about the vibe you want your scrapbook to have. Is it going to be all about summer adventures or maybe a holiday season special?
- Pick Your Supplies: You’ll need a scrapbook album, some colorful paper, stickers, and any other embellishments that catch your eye.
Layout and Design
- Plan Your Pages: Before you start sticking things down, lay out your photos and decorations to see how they fit together.
- Mix and Match: Don’t be afraid to mix different textures and colors. Ribbons, buttons, and washi tape can add a lot of character.
- Add Captions: Write little notes or captions next to your photos. It’s a great way to remember the stories behind the pictures.
Finishing Touches
- Final Review: Once everything is in place, take a step back and look at your work. Make sure everything is secure and looks just right.
- Protect Your Pages: Consider using page protectors to keep your scrapbook looking fresh for years to come.
Scrapbooking is more than just a craft; it’s a way to relive your memories and share your story with others. Each page is a piece of your life, captured forever.
So, grab those old ticket stubs, postcards, and photos, and let’s get scrapping! It’s a wonderful way to spend an afternoon, and you’ll end up with a keepsake that you can cherish forever.
6. Decorative Paper Garlands
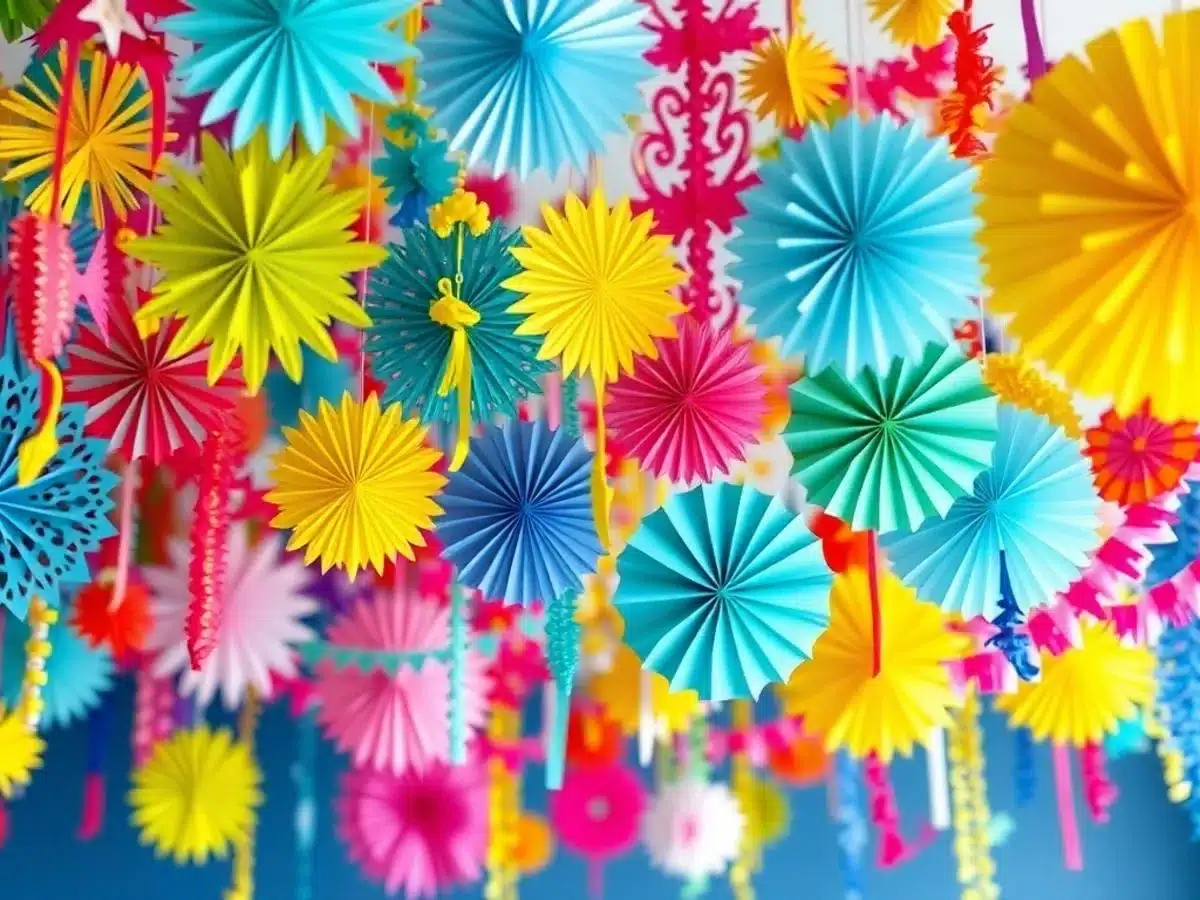
Decorative paper garlands are a charming way to add a splash of color and whimsy to any room or event. Whether you’re planning a birthday bash, a cozy holiday gathering, or just want to brighten up your living space, these garlands offer a delightful touch that’s both easy and fun to create.
Getting Started
Creating paper garlands can be as simple or as intricate as you like. Here’s a basic guide to get you started:
- Choose Your Paper: Start with colorful craft paper or even recycled materials like old magazines or newspapers.
- Cut Out Shapes: Use scissors or a craft punch to cut out shapes. Circles, stars, and hearts are popular choices.
- Assemble the Garland: Thread the shapes onto a string or yarn. You can use a needle or just tape them directly onto the string.
Creative Ideas for Paper Garlands
- Seasonal Themes: Tailor your garlands to the seasons. Think snowflakes for winter, leaves for fall, and flowers for spring.
- Personalized Messages: Add letters to spell out names or messages for special occasions.
- Mix and Match: Combine different shapes and colors for a vibrant, eclectic look.
Tip: For a more durable garland, consider laminating your paper shapes before assembly.
Why Make Paper Garlands?
- Budget-Friendly: Most of the materials are inexpensive or can be found around the house.
- Easy to Customize: Perfect for any theme or occasion.
- Fun for All Ages: A great project for kids and adults alike.
Decorative paper garlands are not just about beautifying a space; they’re about engaging in a relaxing hobby that lets you express your creativity. So grab some paper, scissors, and string, and let your imagination run wild!
7. Paper Mache Creations
Get Your Hands Messy with Paper Mache
Paper mache is one of those crafts that lets you dive in and get your hands a little sticky. It’s a fun and creative way to make sculptures and other 3D objects. The best part? You only need a few basic materials to get started.
Materials Needed:
- Newspaper or any scrap paper
- Flour or glue
- Water
- A brush
- Paint (optional for finishing touches)
Steps to Create a Paper Mache Masterpiece:
- Prepare the Paste: Mix flour and water in a 1:2 ratio to make a paste that’s not too thick. Adjust as needed to get the right consistency.
- Tear the Paper: Rip your paper into strips. Don’t worry about making them perfect; rough edges help them blend better.
- Build the Base: Start with a mold or shape, like a balloon or an old box, to form the base of your creation.
- Apply the Layers: Dip the paper strips into the paste and layer them over your base. Smooth them out as you go.
- Dry and Decorate: Once it’s dry, paint your creation to add some flair.
Paper mache is a great way to turn old newspapers into something beautiful. It’s a relaxing process that lets you express your creativity without any pressure.
For an exciting project, consider making paper mache lanterns. They add a cozy touch to any room and are surprisingly simple to make. Just make sure to adjust the paste consistency to get the best results.
8. Printable Coloring Pages
Who doesn’t love coloring? It’s not just for kids anymore. Printable coloring pages have become a favorite for adults, too, offering a relaxing way to unwind after a long day. The beauty of printable coloring pages is that they’re accessible to everyone. With a quick search, you can find endless designs to suit any mood or preference.
Here’s a quick guide to get you started:
- Choose Your Theme: Whether you’re into nature, abstract designs, or whimsical creatures, there’s something out there for you. Discover a vast collection of 10,000 free coloring pages that cater to both kids and adults.
- Gather Your Materials: You don’t need much. Just a good set of colored pencils, markers, or even watercolors if you’re feeling adventurous.
- Print and Enjoy: Most pages are designed to be printer-friendly. Just hit print, and you’re ready to go.
Coloring isn’t just about filling in spaces. It’s about expressing yourself and finding joy in the process. Let your imagination run wild!
So, next time you need a break, grab a coloring page and let the stress melt away. Happy coloring!
9. Thoughtful Gift Boxes
Crafting your own gift boxes is a delightful way to add a personal touch to any present. Not only do these handmade boxes make your gifts stand out, but they also show the recipient how much you care. Creating a custom gift box is easier than you might think. Here’s a simple guide to get you started:
- Choose Your Materials: Start with sturdy paper or lightweight cardboard. This will ensure your box is durable enough to hold your gift.
- Measure and Cut: Decide on the size of your box. Use a ruler to measure and mark your paper, then cut out the shape.
- Fold and Assemble: Fold along the lines and assemble your box. Use glue or double-sided tape to secure the edges.
- Decorate: Now for the fun part! Decorate your box with ribbons, stickers, or even hand-drawn designs.
A well-crafted gift box not only holds a present but also becomes a part of the gift itself.
These steps make it easy to create beautiful, thoughtful gift boxes that leave a lasting impression, whether it’s for a birthday, anniversary, or just because your handmade box will surely be appreciated.
10. Fun Mini Notebooks
Who doesn’t love a cute notebook? Especially when it’s handmade! Crafting your own mini notebooks is not just fun, but it’s also a great way to use up those paper scraps you have lying around. These tiny notebooks are perfect for jotting down quick notes, doodling, or even as a thoughtful gift for a friend.
Materials Needed
- Assorted paper scraps
- Cardstock for cover
- Needle and thread or stapler
- Scissors
- Ruler
Steps to Create Your Mini Notebook
- Gather Your Paper: Start by collecting your paper scraps. Mix and match colors and patterns to make your notebook unique.
- Cut to Size: Decide on the size of your notebook. Use a ruler to measure and cut your paper and cardstock to the desired size.
- Assemble Pages: Stack your paper neatly. Ensure they are aligned correctly.
- Bind the Notebook: Use a needle and thread to sew the pages together along the spine, or simply staple them if you prefer.
- Attach the Cover: Fold the cardstock in half and attach it to your stack of paper, forming the cover. Trim any excess edges for a clean look.
These mini notebooks are not just practical, they can also be a creative outlet for expressing your personal style. Experiment with different paper types and binding methods to find what you enjoy most.
Tips for Personalization
- Decorate the cover with stickers or stamps.
- Use colored thread for a pop of color on the spine.
- Add a pocket inside the cover for extra notes or small keepsakes.
Creating mini notebooks is a simple yet rewarding craft that lets you explore your creativity while making something useful. Plus, it’s a fantastic way to recycle paper that might otherwise go to waste. So grab your supplies and start crafting your own collection of mini notebooks today!
Conclusion
So there you have it, ten paper crafts that are sure to get your creative juices flowing. Whether you’re folding origami, making colorful flowers, or crafting a heartfelt card, there’s something for everyone. These projects are perfect for a rainy day or just when you need a little break from the usual routine. Plus, they’re a great way to spend time with family or friends, sharing laughs and creating memories. So grab your paper, scissors, and glue, and let your imagination run wild. Happy crafting!
Frequently Asked Questions
What is origami, and how do I start?
Origami is the art of folding paper into different shapes and figures. To start, all you need is a square piece of paper and a guide or tutorial to follow. Begin with simple designs like a crane or frog, and practice to improve your skills.
How can I make a paper flower?
To make a paper flower, you’ll need colored paper, scissors, and glue. Cut petal shapes from the paper, layer them, and glue them together to form a flower. You can add a stem using green paper or a straw.
What materials do I need for scrapbooking?
For scrapbooking, gather photos, decorative paper, scissors, glue, stickers, and any other embellishments you like. You can also use ticket stubs or postcards to make your scrapbook more personal.
Can I create my own greeting cards?
Yes, you can easily make your own greeting cards. Choose a theme, decorate with drawings or stickers, and write a personal message inside. Handmade cards add a special touch to any occasion.
What is paper mache, and how do I use it?
Paper mache is a crafting technique that involves covering a form with layers of paper and adhesive. Mix flour and water to make a paste, dip strips of paper into the paste, and apply them to a mold. Once dry, paint and decorate your creation.
How do I make a mini notebook from paper?
To make a mini notebook, gather some paper scraps, fold them in half, and staple or sew along the fold to bind them. Decorate the cover with drawings or stickers to personalize your notebook.