DIYbrico | Discover, Create, Inspire

10 Fun and Easy Paper Crafts for Kids to Spark Creativity
Explore 10 easy paper crafts for kids to spark creativity. Perfect for fun, learning, and imaginative play!

Looking for a fun way to keep your kids entertained and creative? Paper crafts are the way to go! They’re super easy, don’t need a lot of stuff, and are perfect for kids of all ages. Whether it’s a rainy day or just some free time, dive into these crafts that spark imagination and creativity. From aeroplanes to puppets, these projects are simple and enjoyable. Let’s get started with these 10 fun and easy paper crafts for kids!
Key Takeaways
- Paper crafts are a great way to keep kids entertained and creative.
- You only need basic supplies like paper, scissors, and glue.
- These activities are suitable for kids of all ages.
- Perfect for indoor activities on rainy days.
- Helps in developing fine motor skills.
1. Paper Airplanes

Paper aeroplanes are a timeless craft that kids love. You can create something that flies with just a simple piece of paper! It’s not just fun but also a sneaky way to teach kids about physics. Here’s a step-by-step guide to making a basic paper aeroplane:
- Start with a rectangular sheet of paper. Fold it in half lengthwise to make a crease.
- Unfold the paper and fold the top corners to meet the centre crease, forming a triangle shape.
- Fold the triangle down so the top edges align with the bottom.
- Fold the paper in half along the centre crease, keeping the triangle on the outside.
- Fold the wings down at an angle that suits your flying style.
- Adjust the wings to make sure they’re even, and then give it a toss to see how it flies!
Paper airplanes are more than just a craft. They offer a fun way to explore concepts like balance and symmetry. Plus, it’s a great activity for a rainy day indoors.
Check out this simple paper aeroplane tutorial for a more detailed guide on creating the perfect paper aeroplane. It easily walks you through each step, ensuring your plane is ready for takeoff!
2. Paper Flowers
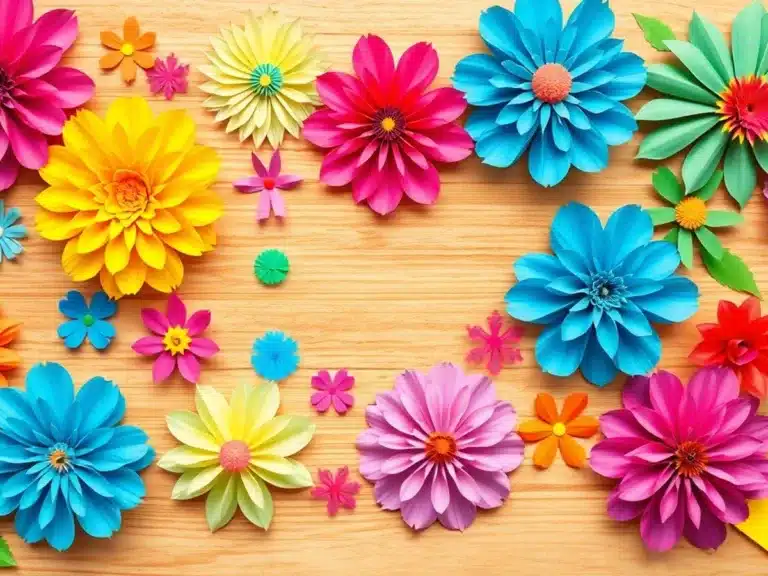
Paper flowers are a delightful craft that lets kids explore their creativity while bringing a splash of color to any room. These flowers never wilt, making them a perfect everlasting decoration. Here’s how you can create your own paper flowers with just a few materials.
Materials Needed:
- Colored paper (various shades for petals and green for stems)
- Scissors
- Glue or tape
- Pencil or a curling tool
- Optional: Floral wire for stems
Steps to Create Paper Flowers:
- Cut Your Shapes: Cut petal shapes from your colored paper. You can go for classic petal shapes like ovals or get creative with spirals and circles.
- Add Texture: To give your petals a more realistic look, fold, curl, or crumple them. This adds a lovely dimension to your flowers.
- Assemble the Flower: Begin layering the petals, starting from the outside and working your way in. Use glue or tape to secure them.
- Attach the Stem: If you want a stem, attach a piece of green paper or floral wire to the back of your flower using tape or glue.
Crafting paper flowers is more than just a fun activity—it’s a way to express creativity and explore different shapes and colors.
Tips for Success:
- Experiment with different paper types, like crepe or tissue, for varied textures.
- Try combining different sizes and colors for a more dynamic arrangement.
- Use a pencil to curl the edges of the petals for a more natural look.
Whether you’re crafting alone or with friends, making these flowers is a delightful way to spend an afternoon. Ready to explore more paper crafts? Discover creative paper crafts that inspire imagination and creativity.
3. Paper Collage Art
Creating paper collage art is an awesome way for kids to dive into creativity. It’s all about snipping and sticking bits and pieces to make something totally new. Here’s a step-by-step guide to get your little ones started:
- Gather Your Supplies: You’ll need a bunch of materials like colored paper, old magazines, newspapers, and fabric scraps. Don’t forget scissors and glue—these are your best friends for this craft.
- Choose Your Canvas: Start with a sturdy piece of cardboard or thick paper. This will be the base that holds everything together.
- Snip and Arrange: Let your kid go wild with cutting out shapes, pictures, or patterns they love. Encourage them to play around with arranging these cutouts on the canvas. They can create a scene, a story, or just an abstract design.
- Add Texture: Mixing different textures can really make the collage pop. Try using crumpled paper, smooth magazine pages, or even some rough fabric.
- Glue It Down: Once everything is in place, it’s time to glue it all down. Make sure they press down firmly so everything sticks.
Remember, collage art is all about freedom and expression. There’s no right or wrong way to do it. Encourage your child to layer pieces and explore different compositions.
Creating paper collage art is not just about crafting; it’s an excellent way for kids to express themselves and tell stories visually. Plus, using old magazines and newspapers for this craft is a great way to recycle and reuse materials.
4. Paper Chains
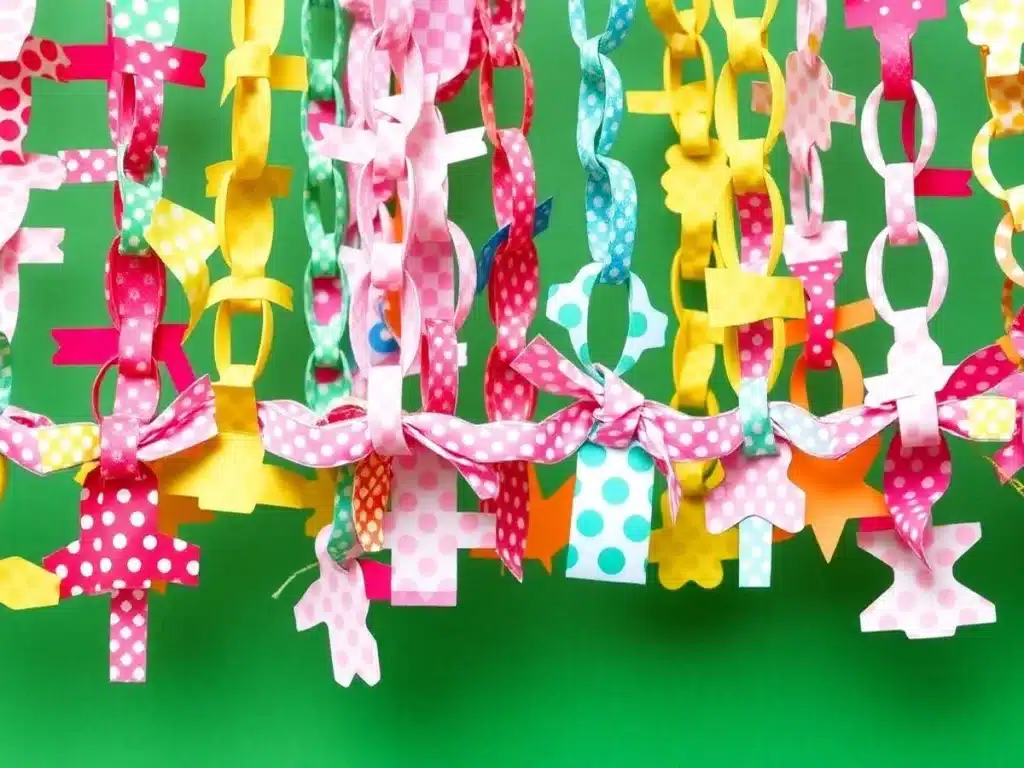
Crafting Colorful Paper Chains
Paper chains are a simple yet delightful craft that can brighten up any space. Kids love making these because they can play with colors and patterns. Plus, it’s a great way to keep them busy on a rainy day.
Materials Needed:
- Construction paper in various colors
- Scissors
- Glue stick or tape
Steps to Create Your Paper Chain:
- Cut the Strips: Start by cutting your construction paper into strips. Aim for each strip to be about an inch wide and six inches long. Don’t worry if they’re not perfect!
- Make the First Loop: Take one strip, form a loop, and secure the ends with glue or tape. This is your starting point.
- Add More Links: Slide the next strip through the loop you just made, then secure it into a loop. Continue adding strips and alternating colors for a vibrant look.
Making paper chains is not just a fun activity; it helps kids learn about patterns and sequencing. Plus, it’s a great way to spend some quality time together.
Creative Uses for Paper Chains:
- Party Decorations: Hang them around the room for a festive vibe.
- Countdown Chains: Use them to count down to special events by removing one link each day.
- Room Decor: Drape them around windows or from the ceiling for a playful touch.
For more ideas on how to ignite your child’s creativity, explore these engaging construction paper crafts. They’re perfect for sparking imaginative play and developing fine motor skills.
5. Paper Plate Animals
Creating paper plate animals is a delightful activity that kids adore. You can transform simple paper plates into a menagerie of imaginative creatures with just a few materials. This craft is fun and a fantastic way to develop fine motor skills and creativity.
Getting Started
To kick things off, gather your supplies: paper plates, colored paper, scissors, glue, and markers. You might also want to have some googly eyes, glitter, or pipe cleaners on hand for extra flair.
Step-by-Step Guide
- Choose Your Animal: Decide which animal you’d like to create. Whether it’s a roaring lion or a playful panda, the choice is yours.
- Prepare the Plate: Use markers or paint to color the paper plate to match your chosen animal. Let it dry completely before moving on.
- Create the Features: Cut out shapes from colored paper for the animal’s features like ears, eyes, and noses.
- Assemble the Animal: Glue the features onto the plate. Use markers to add details like spots or stripes.
- Add Final Touches: Attach extras like googly eyes or pipe cleaner whiskers to bring your animal to life.
Crafting these animals not only entertains kids but also educates them about different animals and their characteristics. It’s a simple, engaging way to explore creativity.
Try making rocking paper plate crabs using similar techniques for a whimsical twist. These crabs are not only easy to make but also introduce kids to sea creatures in a fun way.
With paper plate animal crafts, the possibilities are endless. Kids can create a whole zoo of creatures, each with its own personality and charm. So grab some paper plates and let the crafting adventure begin!
Explore more creative paper crafts that ignite imagination and creativity, perfect for all ages.
6. Sock Puppets
Turn those lonely, mismatched socks into delightful sock puppets that will keep your kids entertained for hours. This craft is fun and a fantastic way to encourage creativity and storytelling. Here’s how you can make your own sock puppets:
Materials Needed
- Old socks (preferably colorful)
- Buttons or googly eyes for eyes
- Yarn or felt for hair
- Fabric glue or a needle and thread
- Markers or fabric paint for details
Steps to Create Sock Puppets
- Choose Your Sock: Pick a sock that has lost its pair. The more colorful, the better!
- Add Eyes: Glue on googly eyes or sew buttons for eyes. This gives your puppet a face.
- Create Hair: Cut yarn or felt into strips and attach them to the sock’s top for hair.
- Decorate: Use markers or fabric paint to draw a mouth and other facial features.
- Add Details: Get creative! Add ears, a nose, or even a tongue with extra fabric or felt.
The joy of creating sock puppets lies not just in the craft itself but in the endless stories and adventures they inspire.
Once your sock puppets are ready, it’s time for a show! Encourage your kids to create a story and act it out with their new friends. This activity not only boosts their imagination but also helps in developing their social skills.
Sock puppets are a simple yet effective way to recycle old socks and spark creativity in children. So, dig through that sock drawer and let the puppet-making begin!
Check out our paper plate crafts for fun craft ideas, perfect for engaging kids in creativity and learning.
7. Nature Collages
Creating nature collages is a wonderful way for kids to connect with the great outdoors and let their imaginations run wild. This craft is all about collecting and arranging natural elements into beautiful compositions.
Steps to Create a Nature Collage:
- Gather Materials: Head outside and collect various natural items like leaves, twigs, pebbles, and flowers. Encourage kids to explore different textures and colors.
- Choose a Base: Use a sturdy piece of cardboard or thick paper as the base for your collage. This will hold all the natural elements together.
- Arrange Your Finds: Let your child arrange the items on the base. They can create patterns or scenes, and there’s no wrong way to do it.
- Glue it Down: Once satisfied with the arrangement, help them glue everything in place. Make sure to press down firmly so the pieces stick well.
Nature collages not only enhance creativity but also offer a chance to appreciate the beauty of the natural world. Kids learn to see art in everyday objects and develop a deeper connection with nature.
Nature collages are a fantastic activity for a sunny day in the park or even a rainy afternoon indoors. They provide a hands-on way for kids to explore and celebrate the environment around them. Plus, it’s a great opportunity to teach kids about the importance of nature and sustainability. For more creative paper crafts, these projects can spark endless possibilities and fun.
8. Pasta Jewelry
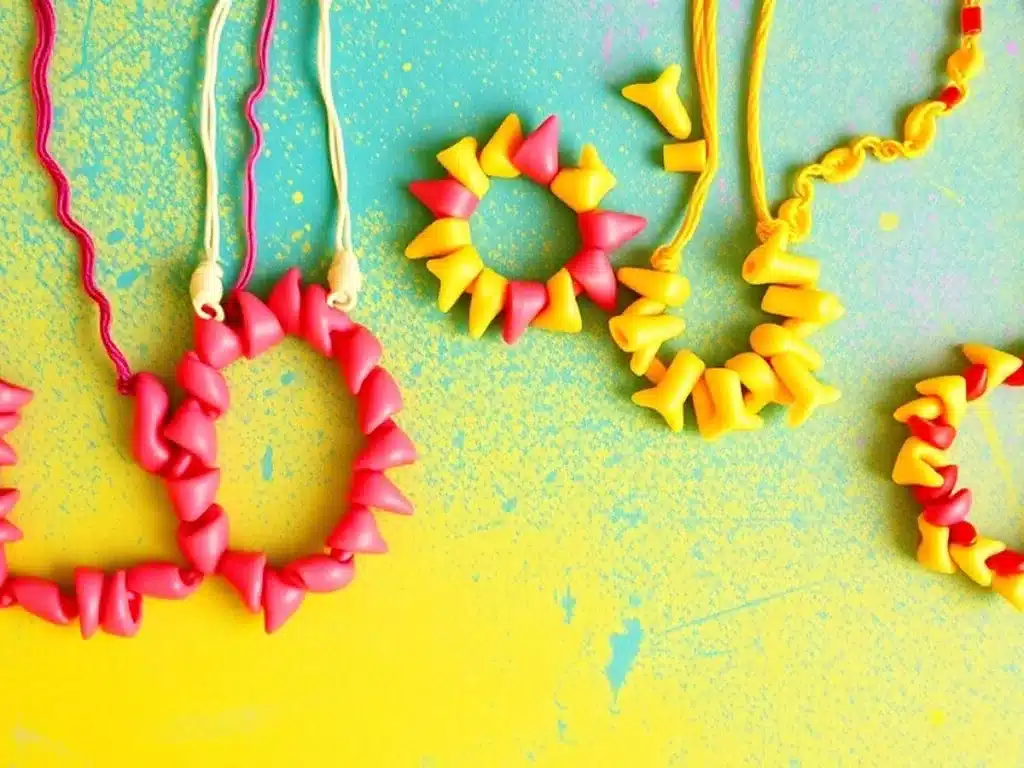
Creating Colorful Pasta Jewelry
Making pasta jewellery is a delightful craft that kids adore. It’s simple, colorful, and a great way for children to express their creativity. Transforming everyday pasta into wearable art is not only fun but also an educational experience.
Materials Needed
- Various shapes of pasta (penne, macaroni, etc.)
- Acrylic paints or food coloring
- Yarn or elastic thread
- Paintbrushes
- Bowls for mixing colors
Steps to Create Your Pasta Jewelry
- Prepare the Pasta: Start by selecting your favourite pasta shapes. Penne and macaroni work well because they have holes for threading.
- Color the Pasta: Use acrylic paints or mix food coloring with water in bowls. Dip the pasta into the colors and let them dry on a paper towel.
- String the Jewelry: Once the pasta is dry, it’s time to string them. Use yarn for necklaces or elastic thread for bracelets. Make sure to tie a secure knot at the end.
Tips for Success
- Experiment with Colors: Try combining different colors to create vibrant patterns.
- Add Beads: Mix in some beads between pasta pieces for an extra flair.
- Personalize It: Encourage kids to create patterns or spell out their names with alphabet beads.
Letting kids make pasta jewelry is like opening a door to a world of imagination. They can design something unique and wear it proudly, showcasing their artistic talent.
Learning techniques like the magic ring crochet can be a great next step for those interested in expanding their crafting skills. It offers a smooth start for various projects, making it ideal for creating round designs.
9. Recycled Robots
Building Your Own Recycled Robot
Creating a recycled robot is an excellent way to mix creativity with sustainability. Kids will love turning everyday items into something new and exciting. The best part? You probably have everything you need at home already!
Materials Needed:
- Empty boxes (cereal boxes, shoe boxes, etc.)
- Bottle caps
- Old buttons
- Aluminium foil
- Glue and tape
- Markers or paint
Steps to Create Your Robot:
- Choose a Base: Start with a sturdy box as the body of your robot.
- Add a Head: Use a smaller box or a bottle for the head.
- Attach Arms and Legs: Get creative with tubes or smaller boxes for limbs.
- Decorate: Use bottle caps for eyes, buttons for control panels, and aluminium foil for a shiny finish.
- Personalize: Let the kids add their own touches with markers or paint.
Crafting robots from recycled materials isn’t just fun—it’s a great lesson in resourcefulness and environmental care.
Recycled robots offer a fantastic way for kids to learn about the importance of recycling while having a blast. Plus, it’s a perfect group activity for a rainy day or a weekend project. Gather all those bits and bobs lying around and see what kind of robot your kids can create!
10. Paper Bag Puppets
Creating paper bag puppets is a delightful craft that lets kids bring their imagination to life. They can transform a plain paper bag into a lively character for endless storytelling fun with just a few simple materials. Here’s how you can get started.
Materials Needed
- Paper bags
- Colored paper
- Markers or crayons
- Glue or tape
- Scissors
- Optional: yarn, feathers, or pipe cleaners for extra decoration
Steps to Create Your Puppet
- Choose a Character: Decide what kind of puppet you want to make. It could be an animal, a superhero, or even a mythical creature.
- Design the Face: Use colored paper to cut out eyes, a nose, and a mouth. You can also draw them directly onto the bag with markers or crayons.
- Attach Features: Glue or tape the facial features onto the paper bag. Make sure everything is secure.
- Add Details: Use yarn for hair, feathers for wings, or pipe cleaners for whiskers. Let your creativity flow to give your puppet its unique personality.
- Dress Your Puppet: Cut out clothes or accessories from colored paper and attach them to the bag.
Puppet Show Time
Once your paper bag puppet is complete, it’s time to put on a show! Encourage your child to create and perform a story using their new puppet. This activity not only boosts creativity but also helps with developing language and social skills.
Crafting paper bag puppets is not just about making a toy; it’s about sparking imagination and creating stories that can be shared and enjoyed.
For more adorable paper crafts that are easy to make, explore our collection of creative ideas, perfect for kids and adults alike.
Conclusion
Wrapping up our paper crafting adventure, it’s clear that these simple projects can turn any day into a creative journey. Whether it’s folding a paper aeroplane or crafting a colourful collage, these activities are more than just fun—they’re a chance for kids to explore their imagination and learn new skills. So next time you’re looking for something to do with the little ones, grab some paper and scissors and let the crafting begin. Who knows, you might just discover a new favourite hobby together. Happy crafting!
Frequently Asked Questions
What are some simple paper crafts for kids?
Some easy paper crafts include making paper aeroplanes, creating colourful paper flowers, and designing paper bag puppets.
Why are paper crafts beneficial for children?
Paper crafts help kids develop fine motor skills, boost creativity, and provide a fun way to express themselves.
What materials do I need for basic paper crafts?
You’ll need paper, scissors, glue, and some markers or crayons. Optional items include googly eyes, stickers, and colored paper.
How can I ensure safety while crafting with children?
Always supervise kids while they craft, use child-safe scissors, and choose non-toxic materials like glue and markers.
Can paper crafts be educational for kids?
Yes, paper crafts can teach kids about shapes, colours, and even basic engineering concepts like aerodynamics with paper aeroplanes.
What age group is suitable for paper crafting?
Paper crafts are great for kids of all ages, but choosing projects that match their skill level and provide appropriate supervision is best.