DIYbrico | Discover, Create, Inspire

10 Unique Advanced Woodworking Projects to Elevate Your Skills
Explore 10 advanced woodworking projects to challenge your skills and creativity. Perfect for seasoned woodworkers.

Do you have a knack for woodworking and are ready to step it up a notch? Whether you’re a seasoned pro or love the smell of sawdust, taking on a new challenge can be just the ticket. We’re diving into ten unique advanced woodworking projects that’ll test your skills and give you some seriously cool stuff to show off. These projects are all about creativity and precision, from crafting a sleek wooden canoe to designing your rolltop desk. So, grab your tools, precise some space, and start on something amazing.
Key Takeaways
- Tackle projects like custom kitchen cabinets to test your precision and design skills.
- Building a handmade wooden canoe is a rewarding challenge for those who love the water.
- Create a rolltop desk for a blend of functionality and traditional design.
- Craft a wooden jewelry box to showcase your fine detailing abilities.
- Design a live edge dining table for a rustic yet modern centerpiece.
Custom Kitchen Cabinets
Creating custom kitchen cabinets is a project that challenges even seasoned woodworkers. This isn’t just about putting together some shelves; it’s about crafting a piece that fits perfectly in your home, both in function and style.
Key Steps:
- Planning and Design: Start by measuring your kitchen space meticulously. Sketch out your design, considering both aesthetics and functionality. Decide on the style, whether it’s modern, rustic, or something entirely unique.
- Material Selection: Choose high-quality wood that suits your design. Maple, oak, and cherry are popular choices for their durability and beauty.
- Precision Cutting and Assembly: Use precise measurements to cut your wood. Joinery techniques like dovetails or dowels ensure a strong and lasting build.
- Finishing Touches: Sand the surfaces smooth, apply a stain or paint that complements your kitchen, and install hardware that enhances your design.
Tackling custom kitchen cabinets is not just about skill, but patience and attention to detail. Each piece you create becomes a testament to your craftsmanship.
For those who are new to woodworking, starting with simple woodworking projects can be a great way to build your skills before diving into more complex tasks like cabinetry. This step-by-step approach helps in understanding the basics while gradually moving towards intricate designs.Handmade Wooden Canoe

Building a handmade wooden canoe is not just a project; it’s a journey into the heart of craftsmanship. This endeavor is a true test of your woodworking skills, blending artistry with precision to create a vessel that is both beautiful and functional. Whether you’re a seasoned woodworker or looking to challenge yourself, crafting a canoe from wood offers a rewarding experience that culminates in a stunning watercraft.
Key Steps to Building Your Canoe
- Select the Right Wood: The choice of wood is crucial. Cedar is a popular choice due to its light weight and resistance to water. Mahogany and oak are also excellent options, offering durability and a classic look.
- Design and Planning: Before you start cutting, sketch out your design. Decide on the length and shape of your canoe, keeping in mind how you’ll use it—whether for calm lakes or more adventurous waters.
- Frame Construction: Begin by constructing the frame, which will serve as the skeleton of your canoe. Precision is key here; any errors can affect the final shape and performance.
- Planking and Assembly: Attach the planks to the frame, ensuring each piece fits snugly. This step requires patience and attention to detail to avoid gaps that could compromise the canoe’s integrity.
- Waterproofing and Finishing: Once assembled, waterproof your canoe using marine-grade varnish or epoxy. This will protect the wood from water damage and enhance its natural beauty.
Crafting a wooden canoe is more than just building a boat; it’s about creating something with your own hands that will carry you on new adventures. The satisfaction of paddling in a vessel you’ve built yourself is unparalleled.
For those interested in exploring more innovative woodworking projects, this canoe project is just the beginning. Each stroke of the paddle will remind you of the dedication and skill poured into this unique creation.
Rolltop Desk
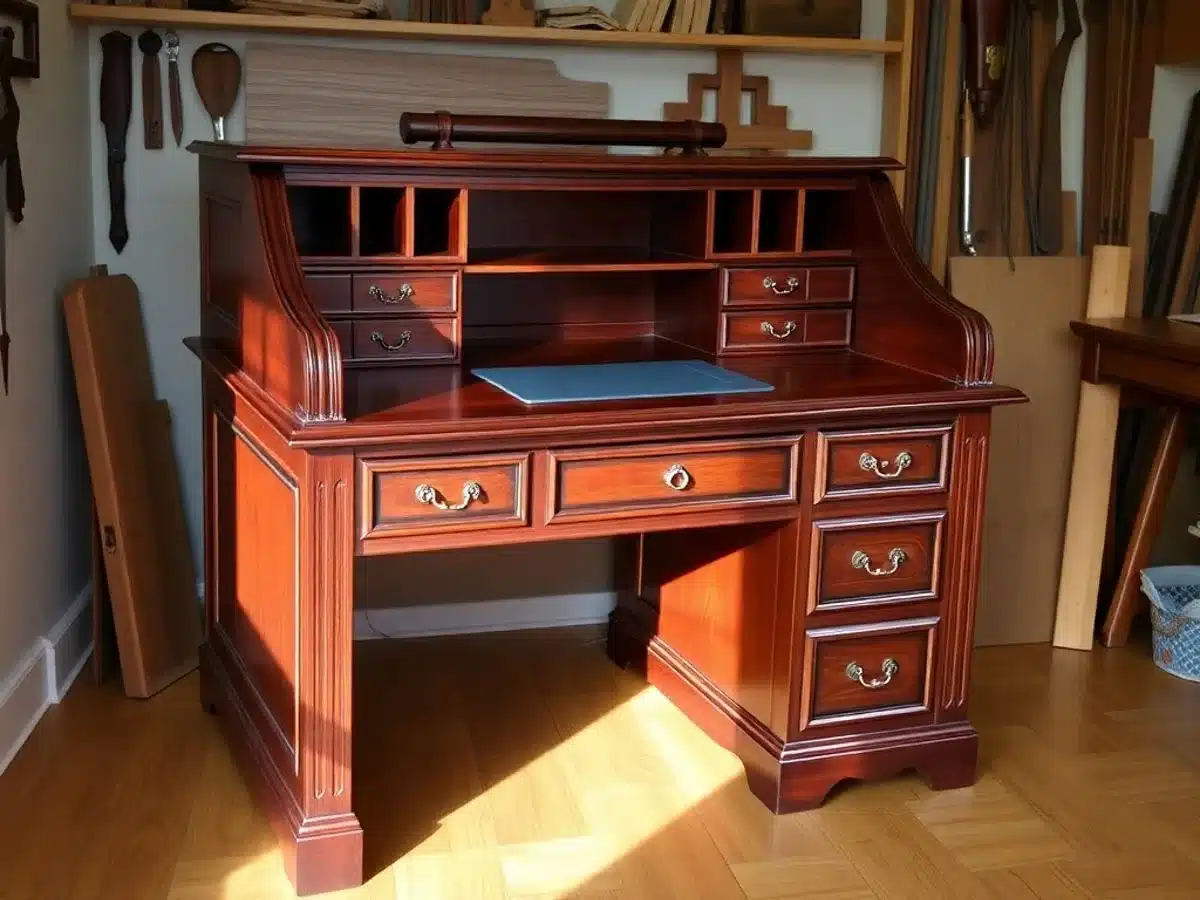
Creating a rolltop desk is not for the faint of heart, but the payoff is huge. This classic piece of furniture combines elegance with practicality, featuring the iconic tambour-style cover that rolls down to hide away clutter. Building a rolltop desk is a testament to your woodworking skills and patience.
Key Steps to Crafting Your Rolltop Desk
- Design and Planning: Start by sketching your design. Consider the dimensions, the type of wood, and the style of the tambour cover. This stage is crucial as it sets the foundation for the entire project.
- Selecting Materials: Choose high-quality hardwoods like oak or cherry for durability and a rich finish. Ensure your wood is well-seasoned to prevent warping.
- Creating the Tambour Cover: This is the hallmark of the rolltop desk. Crafting the tambour involves cutting thin slats of wood and joining them with a flexible backing so they can roll smoothly.
- Assembling the Desk: Use precise joinery techniques to ensure a stable structure. Mortise and tenon joints are often used for their strength.
- Finishing Touches: Sand the entire desk for a smooth surface, then apply your chosen finish to protect the wood and enhance its natural beauty.
Building a rolltop desk is like assembling a puzzle. Each piece must fit perfectly to create a seamless and functional masterpiece.
For those looking to refinish a rolltop desk or add a unique touch, there are countless ways to personalize it, from custom drawer handles to intricate carvings. This project not only results in a stunning piece of furniture but also a rewarding experience that showcases your dedication and skill.
Wooden Jewelry Box
Crafting a wooden jewelry box is a project that not only tests your woodworking skills but also results in a beautiful and functional piece. This is a chance to create something truly unique and personal. Whether you’re gifting it or keeping it for yourself, a handmade jewelry box can be a cherished item for years.
Why Make a Jewelry Box?
- Personalized Design: Tailor the box to fit your style, whether it’s classic, ornate, or minimalist.
- Skill Development: This project requires precision and attention to detail, helping to improve your craftsmanship.
- Practical Use: Organize and protect your jewelry in a stylish manner.
Steps to Build Your Jewelry Box
- Choose Your Wood: Opt for a wood type that complements your design. Popular choices include cherry, walnut, and maple.
- Design the Layout: Sketch a design that includes compartments for different types of jewelry.
- Cut and Assemble: Using your design, cut the pieces and assemble them carefully.
- Finish with Care: Sand and finish the box to enhance its beauty and protect the wood.
Building a jewelry box is more than just a woodworking project; it’s a way to create a personalized work of art that holds sentimental value.
For those just starting out, consider exploring beginner-friendly woodworking crafts for inspiration and guidance on simpler projects before tackling a jewelry box.
Live Edge Dining Table
Creating a live edge dining table is a rewarding challenge for any woodworker looking to showcase the natural beauty of wood. These tables highlight the organic lines of the wood, offering a unique and rustic appeal. Crafting a live edge table requires careful planning and precision, but the result is a stunning centerpiece for any dining room.
Getting Started
- Select Your Wood: Start by choosing the type of wood you want to work with. Popular choices include walnut, oak, and maple. Each wood type has its own unique grain and color, which will affect the final look of your table.
- Prepare the Slab: Once you’ve selected your wood, you’ll need to prepare the slab. This involves trimming any unwanted bark and sanding the surface to a smooth finish. Be sure to preserve the natural edge as much as possible.
- Design the Base: The base of your table should complement the slab’s natural beauty. You can choose from a variety of styles, such as trestle, pedestal, or metal legs.
Tips for Success
- Precision is Key: Mark your measurements carefully and ensure all cuts are precise. This will help maintain clean lines and a professional look.
- Finish with Care: Apply a finish that enhances the wood’s natural grain. Options include oil, varnish, or epoxy resin for a glossy finish.
- Experiment with Styles: Consider incorporating different materials like glass or metal for a modern twist.
Building a live edge dining table is not just about creating furniture; it’s about crafting a piece of art that reflects nature’s beauty and your personal style.
Earning Potential
Live edge dining tables can be quite lucrative. A basic table made from pine might cost around $80-$120 to build and could sell for $180-$250. More intricate designs using premium woods like black walnut can command prices upwards of $1,800. The key is in the craftsmanship and the unique features you incorporate, which can significantly increase the table’s value.
Woodworking Bench
Creating a woodworking bench is more than just assembling a table; it’s about building a solid foundation for all your future projects. This bench is the heart of any woodshop, providing a stable surface for cutting, assembling, and finishing. A well-crafted woodworking bench can significantly enhance your efficiency and precision.
Key Features to Consider
- Sturdy Construction: Your bench needs to withstand heavy use. Opt for robust materials like hardwood or steel to ensure durability.
- Size and Height: Consider the space in your workshop and your comfort. The bench should be large enough to accommodate your projects but not so big that it dominates the space.
- Vise and Clamps: Integrate a vise and multiple clamp options. These tools are essential for holding workpieces securely.
Building Steps
- Plan and Design: Sketch out your bench, considering dimensions and features based on your needs.
- Select Materials: Choose high-quality wood or metal for the frame and top.
- Cut and Assemble: Follow your design to cut pieces to size and assemble them securely.
- Add Features: Install vises, dog holes, and storage compartments.
- Finish: Sand and seal the surface to protect it and ensure smooth work.
Building your own woodworking bench is a rewarding project that blends functionality with personal craftsmanship. It’s an opportunity to tailor your workspace to fit your unique style and requirements.
Maintenance Tips
- Regular Cleaning: Keep the surface free of dust and debris to ensure smooth operation.
- Check for Wear: Periodically inspect for any loose joints or worn surfaces and make repairs as needed.
- Oil Moving Parts: Ensure any mechanical components like vises are well-oiled to maintain functionality.
Wooden Rocking Chair
Building a wooden rocking chair is a classic woodworking project that combines both function and style. Crafting a rocking chair requires patience and precision, but the end result is a timeless piece of furniture that offers comfort and relaxation.
Steps to Create a Wooden Rocking Chair
- Design and Plan: Start by sketching your design or finding a plan that suits your style. Consider the chair’s dimensions, the curvature of the rockers, and the type of wood you’ll use.
- Select Your Wood: Choose a hardwood like oak or maple for durability. These woods not only provide strength but also have a beautiful grain that enhances the chair’s appearance.
- Cut and Shape the Pieces: Use a saw to cut the wood into the necessary pieces according to your plan. Shaping the rockers is critical, as they determine the chair’s balance and smooth rocking motion.
- Assemble the Chair: Begin by assembling the frame, attaching the legs, seat, and backrest. Ensure all joints are secure using wood glue and screws.
- Attach the Rockers: Carefully attach the curved rockers to the base of the legs. Test the chair’s stability and adjust if necessary.
- Finish the Chair: Sand the entire chair to smooth out any rough edges. Apply a finish or stain to protect the wood and enhance its natural beauty.
Taking on the challenge of building a rocking chair is more than just a woodworking task; it’s about creating a piece that will cradle you through countless relaxing moments. Each curve and joint is a testament to your skill and patience.
Whether you’re a seasoned woodworker or looking to tackle an advanced project, a wooden rocking chair is a rewarding endeavor that combines craftsmanship with comfort. Once completed, it becomes not just a chair, but a cherished part of your home.
Garden Shed
Building a garden shed is a fantastic way to enhance your backyard and create a functional space for storing tools, equipment, and more. This project challenges your skills and creativity, offering a rewarding experience as you see your hard work come to life.
Planning Your Shed
Before you start, think about the size and purpose of your shed. Will it be a simple storage space, or do you plan to use it as a workshop or potting area? Make a list of your needs to guide your design.
Selecting Materials
- Wood Type: Choose durable woods like cedar or redwood that can withstand the elements.
- Roofing: Consider metal sheets or shingles for a weather-resistant roof.
- Flooring: Opt for pressure-treated lumber for the floor to prevent rot and decay.
Building Steps
- Foundation: Start with a solid foundation. Concrete blocks or a gravel pad work well.
- Framing: Construct the frame using quality lumber, ensuring everything is level and square.
- Walls and Roof: Install walls and roof, adding windows or skylights if desired.
- Finishing Touches: Paint or stain the exterior to match your home’s aesthetic.
Building a garden shed isn’t just about creating a storage space; it’s about crafting a personal retreat in your backyard. Imagine a place where you can escape, tinker, and enjoy some peace and quiet.
Whether you’re storing garden tools or creating a cozy workshop, a garden shed is a versatile addition to any backyard. It’s also a great way to engage in woodworking projects for kids, encouraging creativity and hands-on learning.
Decorative Wall Clock

Creating a decorative wall clock is a fantastic way to combine functionality with artistic flair. These clocks not only tell time but also serve as a statement piece in any room.
Materials Needed
- Wood: Choose a type of wood that matches your decor, such as oak, walnut, or reclaimed wood.
- Clock mechanism: These can be purchased online or at craft stores.
- Sandpaper: For smoothing out the wood surface.
- Paint or stain: To finish your clock and match your room’s style.
- Brushes or rags: For applying paint or stain.
Steps to Create Your Clock
- Select Your Wood: Pick a piece of wood that suits your style. For a rustic look, consider using regular lumber with a distressed finish.
- Cut and Sand: Cut the wood to your desired clock shape, whether it be round, square, or a unique design. Sand the edges and surface until smooth.
- Drill the Center Hole: Ensure the hole is perfectly centered for the clock mechanism.
- Paint or Stain: Apply your chosen finish. Let it dry completely.
- Attach the Clock Mechanism: Follow the instructions that come with your clock kit to install the mechanism and hands.
- Add Numbers or Markers: Use paint, stickers, or small nails for the clock numbers or markers.
- Hang It Up: Choose a spot where your clock will be both functional and a focal point.
Want to add a unique touch to your home? A decorative wall clock is not just a timepiece, but a piece of art that reflects your personal style and creativity. With the right materials and a bit of patience, you can craft a clock that becomes a cherished part of your home decor.
Crafting a decorative wall clock is a rewarding project that showcases your woodworking skills and creativity. Whether you go for a modern, minimalist look or a more traditional style, this project is sure to impress.
Conclusion
So, there you have it—ten woodworking projects that aren’t just about making stuff, but about pushing your skills to a whole new level. Whether you’re crafting a sleek canoe or building custom cabinets, each project is a chance to learn something new and maybe even surprise yourself with what you can do. It’s not just about the finished piece; it’s about the journey, the sawdust, and the satisfaction of creating something with your own hands. So grab your tools, pick a project, and get started. Who knows? You might just find your next favorite hobby.
Frequently Asked Questions
What are some essential tools for woodworking?
To get started in woodworking, you’ll need some basic tools like a saw, hammer, measuring tape, and chisels. As you advance, you might want to add power tools like a drill and a sander.
How can I ensure safety while woodworking?
Always wear safety gear such as goggles, gloves, and ear protection. Keep your workspace clean and organized, and make sure to follow all safety instructions for your tools.
Can beginners try these advanced woodworking projects?
While these projects are challenging, beginners can try them with patience and practice. Start with simpler tasks and gradually work your way up as you gain confidence and skill.
What is the best wood to use for furniture making?
Hardwoods like oak, maple, and cherry are popular for furniture because they are durable and have a beautiful finish. However, the best choice depends on your project needs and budget.
How do I add a personal touch to my woodworking projects?
You can personalize your projects by choosing unique wood grains, adding custom carvings, or applying different finishes and stains to make your piece stand out.
Are there budget-friendly ways to complete woodworking projects?
Yes, you can save money by using reclaimed wood, shopping for sales on materials, and starting with smaller projects that require fewer resources.