DIYbrico | Discover, Create, Inspire

Unleash Your Creativity with These 8 Cool Woodworking Projects for 2025
Explore 10 cool woodworking projects for 2025 to unleash creativity and enhance your skills. Perfect for DIY lovers!

Have you ever thought about diving into woodworking? It’s a cool way to express creativity and make something awesome. Whether you’re a total beginner or have some experience, there’s always a new project to try. Let’s explore 10 cool woodworking projects for 2025 that can get your creative juices flowing.
Key Takeaways
- Woodworking is a great way to express creativity and make useful items.
- These projects range from easy to challenging, so there’s something for everyone.
- You can use these projects to decorate your home or make gifts.
- Some projects can be completed on the weekend, while others may take longer.
- Always prioritize safety when working with tools and materials.
1. Floating Shelves
Floating shelves are a fantastic way to add storage and style to any room without occupying floor space. They’re perfect for showcasing your favourite books, photos, or collectables. Plus, the clean lines of floating shelves can give your room a modern touch.
Why Choose Floating Shelves?
- Space-Saving: Ideal for small apartments or rooms where floor space is limited.
- Versatile Design: Can be used in any room, from the living room to the bathroom.
- Customizable: Available in various materials, sizes, and finishes to match your decor.
Materials and Tools Needed
Before you start, gather these materials:
- Solid wood (like oak or pine)
- Wall anchors
- Brackets and screws
- Level and measuring tape
- Drill and screwdriver
Step-by-Step Guide
- Plan Your Layout: Decide where you want your shelves. Use a level to ensure they’re straight.
- Measure and Cut: Cut your wood to the desired length. Sand any rough edges.
- Install Brackets: Use a drill to attach brackets to the wall, ensuring they are level and secure.
- Mount the Shelves: Slide the shelves onto the brackets and secure them with screws.
- Style Your Shelves: Add your favourite items, but be mindful of the weight limit.
Floating shelves are more than just storage; they’re a way to express your personal style while keeping your space organized.
For a detailed step-by-step guide on creating floating shelves, check out our comprehensive tutorial that walks you through the building and installation process.
2. Slab Coffee Table

Creating a slab coffee table is a fantastic way to bring a touch of nature into your living space. These tables highlight the raw beauty of wood, with all its knots and grain patterns. A slab coffee table can become the centrepiece of your room, drawing all eyes with its rustic charm.
Why Choose a Slab Coffee Table?
- Natural Beauty: Each table is unique because no two pieces of wood are identical.
- Versatile Design: Fits well in both modern and traditional settings.
- Durable: Solid wood construction ensures longevity.
Steps to Build Your Own
- Select Your Slab: Choose a wood slab that fits your style, whether you prefer a smooth finish or a rough, live edge.
- Prepare the Slab: Sand the surface to remove any rough spots and bring out the grain.
- Finish the Surface: Apply a clear coat or stain to protect the wood and enhance its color.
- Add Legs: Attach legs that complement the table’s style; hairpin legs can add a modern touch.
- Final Touches: Inspect the table for any final adjustments or touch-ups.
A slab coffee table isn’t just furniture; it’s a statement piece that tells a story of the tree it came from.
For those who enjoy paper crafts, exploring imaginative paper crafts can be a delightful way to complement your woodworking projects, adding a splash of creativity to your home decor.
3. Wooden Lamps
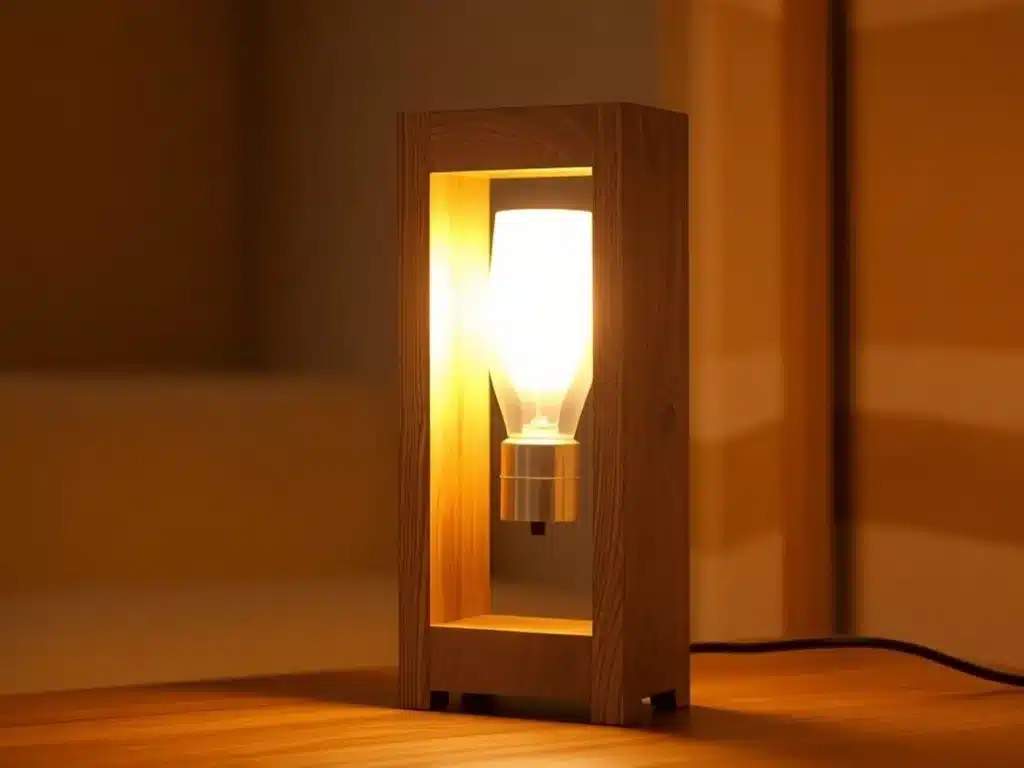
Wooden lamps are more than just a light source; they’re a statement piece that can transform any room with their warm, rustic charm. These lamps are highly sought after, blending functionality with a touch of artistry. Here’s a closer look at why wooden lamps are a standout project for 2025.
Why Wooden Lamps?
- Versatile Designs: From simple geometric shapes to intricate, artistic designs, wooden lamps offer endless possibilities for creativity. You can choose to keep it minimalistic or go all out with elaborate patterns.
- Eco-Friendly: Using reclaimed wood or sustainable materials, wooden lamps are an eco-conscious choice, appealing to environmentally aware consumers.
- Customizable: Personalize your lamp with different finishes and colors, and even incorporate mixed materials like metal or glass for a unique touch.
Crafting Your Wooden Lamp
- Plan Your Design: Start with a sketch or a digital design. Decide on the size, shape, and features you want to include.
- Select Materials: Choose the type of wood based on your design and budget. Hardwoods like oak or walnut provide durability, while softer woods like pine offer ease of carving.
- Cut and Assemble: Use precision tools to cut the wood pieces according to your design. Assemble them carefully, ensuring stability and safety.
- Finish and Polish: Sand the surface smooth and apply a finish that complements your design. This could be a natural oil, stain, or a clear varnish.
- Add Electrical Components: Safely install the wiring and bulb holder. Consider energy-efficient LED bulbs to enhance the lamp’s eco-friendly appeal.
Crafting a wooden lamp is not just about creating a light source; it’s about crafting a piece of art that adds warmth and character to any space.
Selling Your Wooden Lamps
Wooden lamps are a profitable woodworking project due to their unique appeal and functionality. They fit seamlessly into various decor styles, making them a popular choice for both modern and traditional homes. Whether you’re a seasoned woodworker or a beginner, wooden lamps offer a rewarding project that can also become a lucrative venture.
4. Geometric Wood Art
Creating geometric wood art is a fantastic way to bring a modern touch to any room. These pieces are not just art; they’re conversation starters. Whether you’re a seasoned woodworker or just dipping your toes into the craft, geometric designs offer endless possibilities.
Getting Started with Geometric Wood Art
Before you dive in, sketch your design on paper. Consider using different wood types or stains to add depth and contrast. This step is crucial as it helps visualize the final piece and ensures everything fits together perfectly.
Tools and Materials
- Various wood species (e.g., oak, walnut, pine)
- Wood glue and clamps
- Saw (a mitre saw is ideal for precise angles)
- Sandpaper or a sander
- Wood stain or paint (optional)
Crafting Process
- Design and Cut: Cut your wood pieces according to your design. Precision is key, especially with angles.
- Assemble: Arrange your pieces on a flat surface. Use wood glue to secure them and clamps to hold everything in place as it dries.
- Finish: Once dry, sand the surface for smoothness. Apply a stain or paint if desired to enhance the visual appeal.
Geometric wood art is a blend of creativity and precision. It transforms simple wooden pieces into a masterpiece that can redefine your living space.
For more creative DIY projects, you might want to explore fun paper plate crafts for kids that can inspire both children and adults alike.
5. Custom Cutting Boards
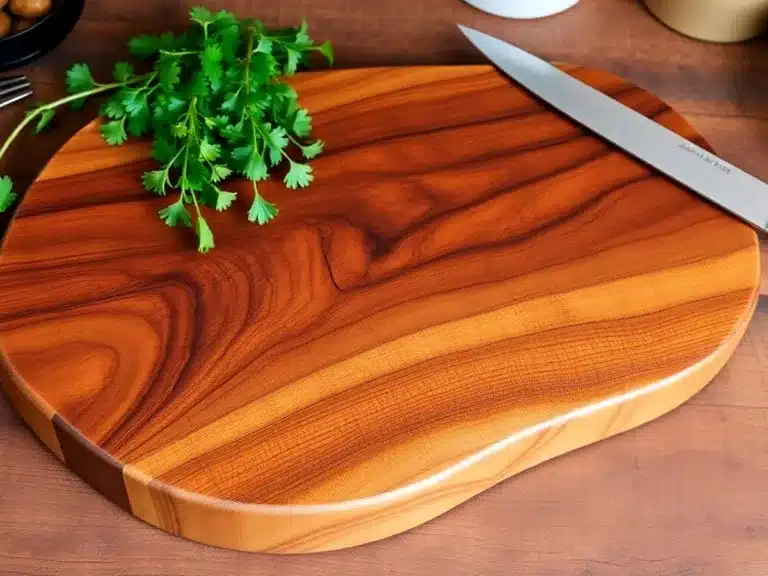
Crafting your own cutting boards is a fantastic way to add a personal touch to your kitchen. These aren’t just functional tools but a canvas for your imagination. You can make them in various shapes, sizes, and styles to suit your taste. The best part? They double as beautiful kitchen decor.
Steps to Create Your Own Custom Cutting Board
- Choose Your Wood: Opt for hardwoods like maple, walnut, or cherry. They’re durable and have a lovely grain.
- Design Your Board: Sketch out your design. Will it be a simple rectangle or something more creative?
- Cut and Shape: Use a saw to cut your wood to the desired shape. Sand the edges for a smooth finish.
- Personalize: Add personal touches like engravings or inlays. This is where you can really let your creativity shine.
- Finish: Apply a food-safe oil to protect the wood and bring out its natural beauty.
Making a cutting board is a blend of practicality and art. It’s about turning a piece of wood into something both useful and beautiful.
Why Custom Cutting Boards?
- Gift-Worthy: A personalized cutting board makes a thoughtful gift for weddings, housewarmings, or holidays.
- Unique Decor: They add a rustic charm to your kitchen, making it more inviting.
- Market Appeal: If you want to sell, custom cutting boards are a hit at craft fairs and online shops.
Incorporating custom elements like engravings can turn a simple cutting board into a cherished keepsake. Just like creative paper crafts can transform ordinary materials into extraordinary art, your cutting board can become a masterpiece in your kitchen.
6. Wooden Toys
Wooden toys are a delightful throwback to simpler times, yet they remain popular today for their durability and timeless appeal. Crafting wooden toys can be a rewarding project that brings joy to both the maker and the recipient. Here’s a closer look at why these toys are a fantastic woodworking project:
- Nostalgic Charm: Wooden toys, like classic cars or dollhouses, evoke a sense of nostalgia. They remind us of the past when toys were built to last and passed down through generations.
- Durability: Unlike plastic toys, wooden toys can withstand rough play. They don’t break easily, making them ideal for children who love to play hard.
- Safety: Wood is a natural material, and when finished with non-toxic paints and sealants, these toys become a safe option for kids.
Crafting Your Own Wooden Toys
Creating wooden toys can be as simple or complex as you want. Here are some ideas to get you started:
- Simple Cars: Start with basic shapes and wheels. These great beginner projects can be customized with paint or wood stains.
- Animal Figures: Carve out small animal shapes that can be used for play or decoration.
- Puzzles: Wooden puzzles are both a toy and a brain teaser. You can design them to be as easy or challenging as desired.
Wooden toys aren’t just playthings; they’re a way to connect with the past and create something meaningful and lasting. The process of crafting them can be as enjoyable as the toys themselves, offering a chance to unwind and let your creativity flow.
For those interested in exploring more creative avenues, consider construction paper crafts to inspire creativity in children. These activities are perfect for rainy days and help develop fine motor skills while providing endless fun.
7. Secret Compartment Box
Creating a secret compartment box is like crafting a mystery in wood. This project is perfect for those who love a bit of intrigue and a challenge. Imagine a box that looks ordinary but has a hidden space to stash away your treasures. It’s a clever blend of art and engineering.
Why Build a Secret Compartment Box?
- Security with Style: Keep your valuables safe with a touch of elegance.
- Conversation Starter: A great piece to show off to friends and family.
- Skill Development: Perfect for honing your woodworking skills.
Materials Needed
- Hardwood (like oak or walnut)
- Wood glue
- Sandpaper (various grits)
- Hinges
- Magnetic locks or puzzle mechanisms
Steps to Create Your Box
- Design Your Box: Sketch out your box design. Decide where the secret compartment will be.
- Cut the Wood: Use a table saw to cut the pieces for your box. Make sure to include the pieces for the hidden compartment.
- Assemble the Box: Glue the sides together, leaving the top open for the compartment.
- Install the Secret Mechanism: Add magnetic locks or a puzzle mechanism to keep the compartment secure.
- Finish and Sand: Sand the box until smooth and apply a finish of your choice.
Crafting a secret compartment box is not just about hiding things; it’s about the joy of creating something unique and personal.
Tips for Success
- Ensure all parts fit snugly to avoid gaps.
- Test the secret mechanism several times to ensure it works smoothly.
- Customize the design to reflect your personal style.
Building a secret compartment box is a rewarding project combining creativity and functionality. Whether it’s for storing jewellery, important documents, or just for fun, this project will surely impress.
8. Wooden Smartphone Amplifier
Crafting a Wooden Smartphone Amplifier
Building a wooden smartphone amplifier is a fantastic woodworking project that blends creativity and practicality. Imagine boosting the sound of your phone without any wires or batteries—just pure acoustic magic. This project is perfect for both beginners and seasoned woodworkers looking for a quick yet satisfying challenge.
Why Make One?
- Eco-Friendly: No need for electricity or batteries, making it a green choice.
- Portable: Lightweight and easy to carry, perfect for picnics or small gatherings.
- Stylish: Adds a rustic charm to your home decor.
Materials You’ll Need
- A block of hardwood (like oak or walnut)
- Sandpaper (various grits)
- Wood finish or oil
- Basic woodworking tools (saw, drill, chisel)
Step-by-Step Guide
- Design Your Amplifier: Sketch a simple design. The key is a hollow chamber that will naturally amplify the sound. Think about the size and shape that will best suit your needs.
- Cut the Wood: Using a saw, cut your wood block to the desired dimensions. Make sure it’s big enough to hold your smartphone.
- Hollow Out the Chamber: Carefully chisel a hollow space inside your block. This will act as the sound chamber. Be precise to avoid cracking the wood.
- Drill the Slot: Create a slot on top of the block where your smartphone will sit. Ensure it’s snug but not too tight.
- Smooth the Edges: Sand down all surfaces until smooth. Start with a coarse grit and work to finer grits for a polished finish.
- Apply the Finish: Use a wood finish or oil to protect the wood and bring out its natural beauty.
The beauty of this project lies in its simplicity and functionality. It’s not just about amplifying sound; it’s about creating something useful with your own hands.
Tips for Success
- Experiment with different wood types to see how they affect the sound.
- Consider adding decorative elements like carvings or engravings.
- Test the sound quality in different rooms to find the best acoustic spot.
If you’re into recycling and eco-friendly projects, you might also enjoy transforming empty toilet paper rolls into creative crafts. It’s a great way to engage in fun activities while promoting sustainability.
Wrapping Up Your Woodworking Journey
So there you have it, eight cool woodworking projects to dive into this year. Whether you’re a seasoned pro or just starting out, these projects offer some of everything. From practical pieces like shelves and cutting boards to more creative endeavours like geometric art and secret boxes, there’s something here to spark your interest. Remember, the joy of woodworking is in the process as much as the finished product. So grab your tools, pick a project, and let your creativity run wild. Who knows, you might just discover a new favourite hobby or even a side hustle. Happy crafting!
Frequently Asked Questions
What tools do I need for woodworking?
For most projects, you’ll need a saw, a drill, sandpaper, and a measuring tape. Beginners might also find a hammer and some clamps useful.
Is woodworking safe for kids?
Woodworking with proper supervision and safety gear like goggles and gloves can be safe for kids. Always ensure they use age-appropriate tools.
How do I start a woodworking project?
Choose a simple project, gather your materials and tools, and follow a step-by-step guide. Start with easy projects to build your skills.
What wood is best for beginners?
Softwoods like pine and cedar are great for beginners because they are easier to work with and more forgiving than hardwoods.
Can I make money from woodworking?
Yes, many people sell their woodworking projects online or at local markets. Start with small items like cutting boards or toys to test the market.
How do I finish a woodworking project?
Sanding your project smoothly and applying a finish like paint, stain, or varnish can protect the wood and enhance its appearance.