DIYbrico | Discover, Create, Inspire

10 Creative Woodworking Projects for Beginners to Spark Your Imagination
Explore 10 easy woodworking projects for beginners to ignite creativity and craft functional pieces at home.

Thinking about picking up woodworking? It’s a great way to spend your time and make something cool. You don’t need to be a pro or have a fancy workshop to get started. You can create amazing, fun and helpful projects with just a few tools and some wood. Whether you’re looking to spruce up your home or want to try something new, these beginner woodworking projects are perfect for you. Let’s dive into some simple yet creative ideas to spark your imagination!
Key Takeaways
- Woodworking is accessible for beginners with basic tools.
- Simple projects can be both functional and decorative.
- You don’t need a workshop to start woodworking.
- These projects can enhance home decor.
- Woodworking can be a fun and rewarding hobby.
Floating Shelves
Floating shelves are a fantastic way to add style and function to any room. They seem to “float” on the wall, with no visible supports, creating a clean and modern look. Perfect for displaying your favourite books, plants, or knickknacks, these shelves are as versatile as they are stylish.
Materials Needed:
- Wooden boards (size depends on your space and preference)
- Wall anchors
- Screws
- L-brackets
- Drill
- Level
- Sandpaper
- Paint or wood stain (optional)
Steps to Create Floating Shelves:
- Measure and Plan: Decide where you want your shelves to go. Measure the space and mark the wall where the shelves will be installed.
- Cut and Prepare the Wood: Cut the wooden boards to your desired length. Sand down any rough edges until smooth.
- Finish the Boards: If you want to paint or stain your shelves, now’s the time to do it. Let them dry completely.
- Install the Brackets: Use a level to ensure your brackets are straight. Drill the L-brackets into the wall at your marked spots.
- Attach the Shelves: Place the wooden boards on the brackets and secure them with screws.
- Check Stability: Gently test the shelves to ensure they are secure and can hold the weight you plan to put on them.
“Floating shelves offer a sleek solution for storage and display, transforming any wall into a feature.”
For a more detailed guide on building and installing floating shelves, consider exploring step-by-step instructions that cover everything from choosing the right wood to final touches. It’s a project that can be completed in just a few hours, making it perfect for a weekend DIY adventure.
Key Hanger
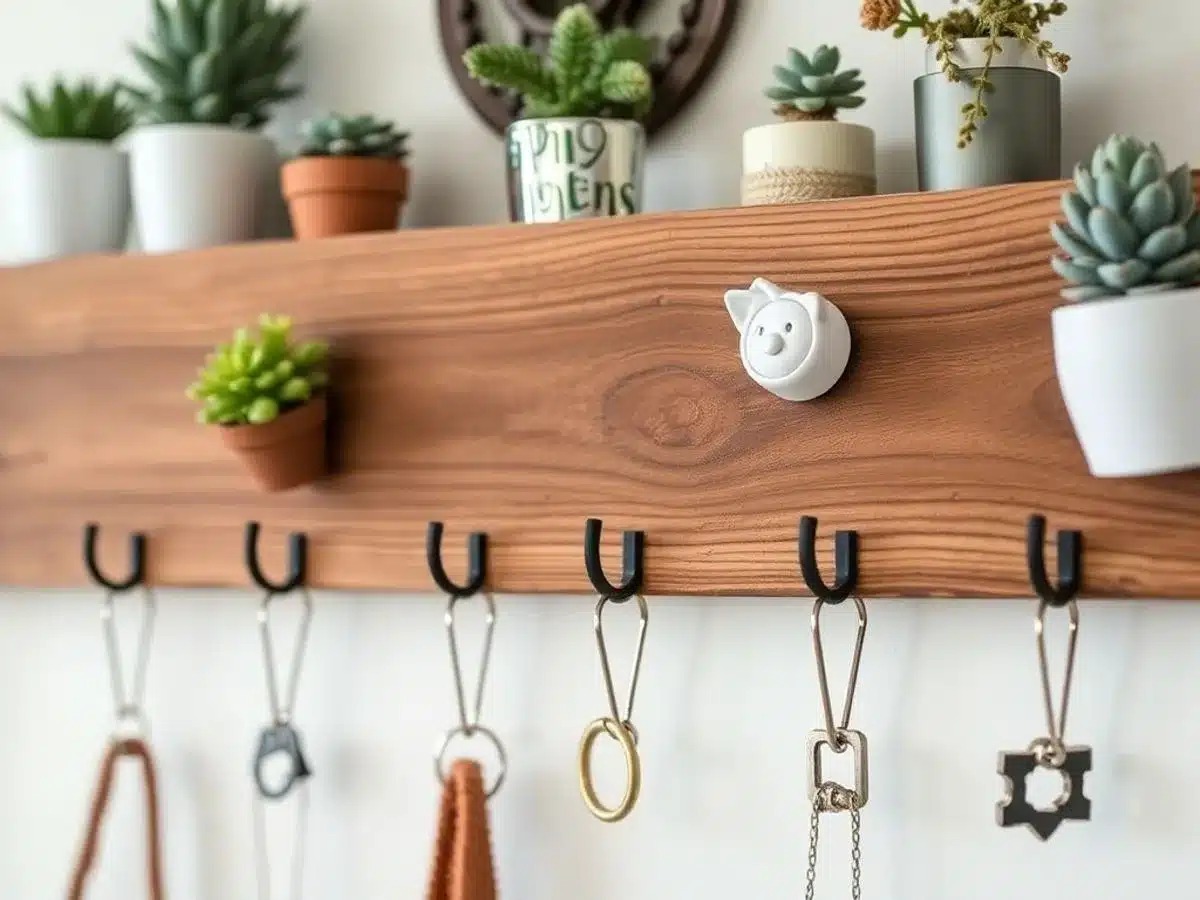
Create Your Own Key Hanger
Building a key hanger is a fantastic beginner project that combines functionality with creativity. You’ll never misplace your keys again! Here’s how you can create a beautiful and functional DIY key holder to keep your keys organized.
Materials Needed:
- A piece of scrap wood (about 12 inches long)
- Sandpaper
- Wood stain or paint (optional)
- Hooks (4-6, depending on your preference)
- Screws and wall anchors
Steps to Build Your Key Hanger:
- Prepare the Wood: Begin by sanding down your piece of wood to smooth out any rough edges. If you want a natural look, you can leave it as is, or add a coat of wood stain or paint for a splash of color.
- Attach the Hooks: Measure and mark where each hook will go, ensuring they are evenly spaced. Drill pilot holes and then screw in the hooks securely.
- Mount the Key Hanger: Decide where you want to hang your key holder. Use wall anchors to ensure it stays put, especially if you’re planning to hang heavier items.
Crafting a key hanger is not just about organizing your keys; it’s about adding a personal touch to your entryway. Each time you hang up your keys, you’ll feel a sense of accomplishment.
Tips for Personalization:
- Add a small shelf on top for placing mail or small plants.
- Use decorative hooks for a unique look.
- Personalize it with your family name or a favourite quote using stencils or decals.
This simple project not only keeps your keys in check but also adds a bit of charm to your home. Happy crafting!
Side Table
Building a side table is an awesome project for beginners. It’s a practical piece of furniture that adds style and function to any room. The best part? You don’t need a ton of tools or experience to get started.
Materials Needed:
- Wooden board (for the tabletop)
- Four wooden legs
- Screws
- Wood glue
- Sandpaper
- Paint or wood stain (optional)
Basic Steps:
- Cut the Wood: Start by cutting your wooden board to your desired size for the tabletop. Ensure it’s large enough to hold a lamp or a few books.
- Prepare the Legs: Cut the legs to your preferred height. If you want a modern look, go for straight legs. For a more traditional vibe, consider tapered legs.
- Assemble the Table: Attach the legs to the underside of the tabletop using screws and wood glue for extra stability.
- Sand the Surface: Smooth any rough edges with sandpaper, ensuring the surface is nice and even.
- Finish It Off: Apply a coat of paint or wood stain to protect the wood and give your table a polished look.
A side table is more than just a piece of furniture; it’s a reflection of your personal style and creativity.
For those looking to explore more beginner-friendly DIY woodworking projects, consider trying different designs and finishes to match your home décor. Remember, the key is to have fun and enjoy creating something unique with your hands.
Step Stool
Building a Step Stool
Creating a step stool is a fantastic project for those just starting out in woodworking. It’s simple and practical and teaches you the basics of cutting and assembling wood. Plus, who doesn’t need a little boost now and then?
Materials Needed
- One 1″x10″ board
- Wood glue
- Sandpaper
- Wood screws
- Finish of your choice (paint, stain, etc.)
Steps to Build
- Cut the Wood: Cut your 1″x10″ board into the necessary pieces. You’ll need two pieces for the sides, one for the top, and a couple for the supports underneath.
- Assemble the Pieces: Use wood glue and screws to attach the sides to the top piece. Make sure everything is square and level.
- Add Supports: For added stability, attach supports underneath the top step. This will help distribute weight evenly.
- Sand and Finish: Sand down any rough edges and apply your chosen finish to protect the wood and give it a nice look.
Building a step stool not only helps you reach those high shelves but also gives you a sense of accomplishment. It’s a great starter project that can be completed in a weekend.
Tips for Success
- Measure twice and cut once to ensure all pieces fit perfectly.
- Use clamps to hold pieces in place while the glue dries.
- Customize your stool with paint or stencil designs to match your home decor.
With these steps, you’ll have a sturdy DIY step stool ready for use. It’s a straightforward project that offers utility and the satisfaction of crafting something with your hands.
Clothes Drying Rack
Why Build a Clothes Drying Rack?
Building a clothes drying rack is not just about having a place to hang your clothes. It’s a step towards a more sustainable lifestyle. By reducing reliance on electric dryers, you save on energy costs and contribute to a greener planet. Plus, it can be a fun weekend project that adds a personal touch to your home.
Materials and Tools Needed
To get started, gather these materials:
- Wooden dowels or slats
- Screws and a screwdriver
- Sandpaper
- Measuring tape
- Saw (if cutting wood to size)
Step-by-Step Guide
- Measure and Cut: First, decide the size of your drying rack. Use a measuring tape to mark your wood and cut to the required lengths using a saw.
- Sand the Edges: Smooth any rough edges with sandpaper to prevent snags on your clothes.
- Assemble the Frame: Using screws, attach the wooden slats or dowels to form a sturdy frame. Make sure it’s stable and can support the weight of wet clothes.
- Add the Crossbars: Securely attach crossbars across the frame. These will hold the clothes.
- Test Stability: Before using, ensure the rack is stable. Adjust any loose parts if necessary.
Crafting your own clothes drying rack not only saves money but also gives you a sense of accomplishment. It’s a perfect project to try if you’re just getting into woodworking.
Tips for Success
- Choose the Right Wood: Opt for a durable wood like cedar or oak that can withstand moisture.
- Customize Your Design: Feel free to add hooks or wheels for added functionality.
- Location Matters: Place your drying rack in a sunny spot to speed up the drying process.
Creating a clothes drying rack is one of those simple projects that can make a big difference. It’s practical, eco-friendly, and a great way to hone your woodworking skills.
Bath Caddy
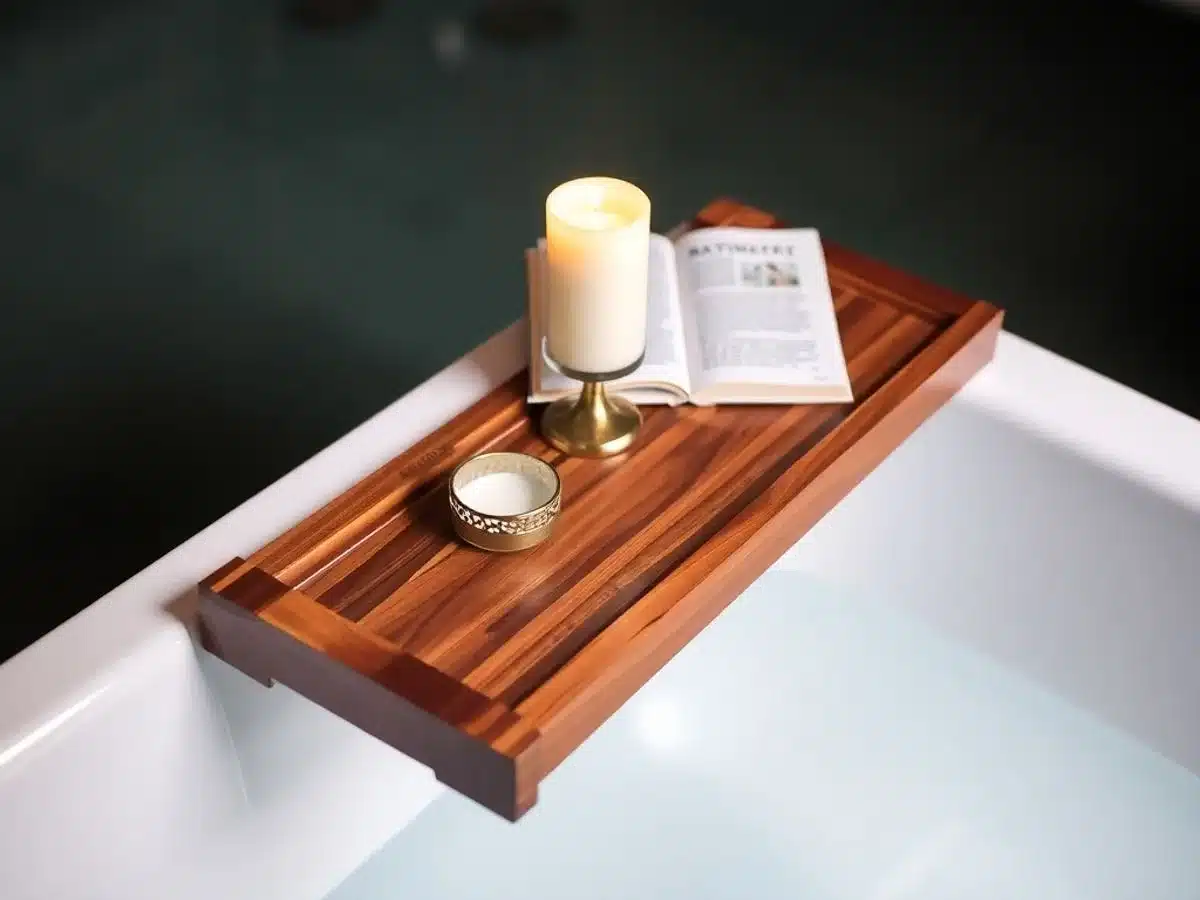
Creating a bath caddy is a perfect woodworking project for those who enjoy a relaxing soak in the tub. This simple yet functional piece can hold your book, a glass of wine, or even a scented candle to enhance your bath time experience.
Materials Needed
- A plank of wood (preferably cedar or teak for water resistance)
- Measuring tape
- Saw
- Sandpaper
- Wood stain or sealant
- Handles (optional)
Steps to Build a Bath Caddy
- Measure and Cut the Wood: First, measure the width of your bathtub. Add a few inches on each side for overhang, then cut your plank to this length using a saw.
- Sand the Edges: Use sandpaper to smooth out any rough edges or splinters on the cut wood. This step is crucial to ensure a comfortable and safe experience.
- Apply Stain or Sealant: A wood stain or sealant protects the wood from moisture. This will also enhance the wood’s natural beauty.
- Attach Handles (Optional): If you want to add a touch of elegance, consider attaching handles to the sides of the caddy.
- Let it Dry: Allow the stain or sealant to dry completely before using the caddy.
A bath caddy is not only practical but also adds a touch of luxury to your bathroom. It’s a wonderful way to make your bath time more enjoyable and personal.
For those looking for more straightforward woodworking projects for beginners, consider making a bath caddy as a starting point. It’s an excellent project for beginners and can be completed in just a few hours.
Garden Planter Box
Building a garden planter box is a fantastic way to kickstart your gardening journey, bringing a touch of nature right to your doorstep. Not only is it a rewarding project, but it also offers a perfect solution for urban gardening or limited space scenarios.
Steps to Build Your Garden Planter Box
- Gather Materials: You’ll need untreated wood, screws, a drill, and a saw. Cedar or redwood is great for outdoor use because they naturally decay-resistant.
- Cut the Wood: Measure and cut your wood pieces to the desired size. A typical planter box might be 4 feet long, 2 feet wide, and 2 feet deep, but you can adjust this based on your space.
- Assemble the Box: Use the screws and drill to attach the pieces together, forming a sturdy box. Make sure the corners are square.
- Add a Bottom: If your planter box will be on a patio or deck, add a bottom with drainage holes to prevent waterlogging.
- Finish and Fill: Sand any rough edges and fill your box with a good-quality soil mix.
Tips for Success
- Location Matters: Place your planter box in a spot with plenty of sunlight, as most plants need at least 6-8 hours of direct sunlight.
- Choose the Right Plants: Consider what you want to grow. Herbs, vegetables, and flowers all have different needs.
- Think About Watering: Ensure the box has adequate drainage and plan for regular watering, especially in hot weather.
A garden planter box can transform your outdoor space, providing a beautiful and functional area for growing your favorite plants. It’s a project that not only enhances your home but also brings the joy of gardening into your life.
Consider transforming empty toilet paper rolls into biodegradable seed pots for more eco-friendly crafting ideas. It’s a fun and sustainable way to start your garden!
Toy Storage Chest
Building a toy storage chest is a fantastic woodworking project that combines practicality with a touch of creativity. It’s a great way to keep the playroom tidy while adding a charming piece of furniture to your home. Here’s a simple guide to get you started on this fun project.
Materials Needed:
- Wooden boards (pine or plywood work well)
- Wood screws
- Hinges
- Sandpaper
- Wood finish or paint
- Tools: Saw, drill, screwdriver, measuring tape
Steps to Build Your Toy Chest:
- Design the Chest: Sketch a basic design for your toy chest. Decide on the dimensions based on the space available and the amount of storage needed.
- Cut the Wood: Use a saw to cut the wooden boards to the desired size. You’ll need pieces for the front, back, sides, bottom, and lid.
- Assemble the Box: Start by attaching the sides to the back piece using wood screws. Then, attach the front and bottom pieces to complete the box.
- Attach the Lid: Secure the hinges to the lid and then attach them to the back of the chest. Make sure the lid opens and closes smoothly.
- Sand and Finish: Sand the entire chest to smooth out any rough edges. Apply a wood finish or paint to protect and beautify the chest.
Making a toy chest not only helps organize clutter but also brings a personal touch to your child’s play area. It’s a rewarding project that showcases your woodworking skills.
For more creative projects that ignite the imagination, explore construction paper crafts that are perfect for sparking creativity in kids. These projects are simple yet engaging, making them ideal for rainy days or quiet afternoons.
Conclusion
So there you have it, nine woodworking projects for beginners that are perfect for beginners. Whether you’re looking to make something practical like a key hanger or something a bit more decorative like a garden planter box, there’s a project here for everyone. The best part? You don’t need a ton of tools or experience to get started. Just a bit of patience and a willingness to learn. Who knows, you might just discover a new favourite hobby. So grab your tools, pick a project, and start creating. Happy woodworking!
Frequently Asked Questions
What tools do I need to start woodworking?
To start woodworking, you’ll need basic tools like a saw, hammer, screwdriver, measuring tape, and sandpaper. As you get more into it, you might want to add tools like a drill, a level, and a square.
Is woodworking hard for beginners?
Woodworking can be easy for beginners if you start with simple projects. It’s all about learning the basics and practicing. With time, you’ll get better and can try more complex projects.
Can I do woodworking without a workshop?
Yes, you can do woodworking without a workshop. Many projects can be done in a small space, like a garage or even outside. Just make sure you have a sturdy table to work on.
What kind of wood is best for beginners?
Pine is a great wood for beginners because it’s soft and easy to work with. It’s also affordable, which is perfect when you’re just starting out and might make a few mistakes.
How do I keep my woodworking projects safe?
Always wear safety gear like goggles and gloves when working on projects. Keep your workspace clean and organized to avoid accidents. Also, make sure to follow instructions carefully.
Can kids help with woodworking projects?
Yes, kids can help with simple woodworking projects. It’s fun for them to learn new skills and be creative. Just make sure to supervise them and choose projects that are safe for their age.