DIYbrico | Discover, Create, Inspire

Creative and Fun Crafts with Paper: 10 Unique Ideas for All Ages
Explore 10 creative crafts with paper for all ages, from origami to kirigami. Fun and easy DIY projects await!

Ever find yourself with a stack of paper and no clue what to do with it? You’re not alone. Crafts with Paper are a fantastic way to get creative without needing a lot of fancy supplies. Whether you’re a kid or just a kid at heart, these projects are a fun way to spend an afternoon. Let’s dive into some unique paper craft ideas that are perfect for everyone.
Key Takeaways
- Paper crafts are versatile and can be enjoyed by all ages.
- You don’t need expensive materials to create beautiful crafts.
- From origami to paper beads, the possibilities are endless.
- These crafts can be both decorative and functional.
- Paper crafting is a great way to relax and express creativity.
1. Crafts with Paper – Origami Animals
Introduction to Origami Animals
Origami animals are a delightful way to explore the art of paper folding. It’s amazing how a simple piece of paper can transform into a cute animal figure. Whether it’s a crane or a frog, origami animals captivate both young and old. This activity is not just fun but also helps in developing fine motor skills and patience.
Basic Supplies Needed
To get started with origami animals, you’ll need a few basic supplies:
- Square sheets of paper (origami paper works best, but any paper will do)
- A flat surface for folding
- Optional: Bone folder for crisp folds
Popular Origami Animals
Here’s a list of some popular origami animals you might want to try:
- Crane – A classic choice and a symbol of peace.
- Frog – Fun to make and even hops if folded correctly.
- Butterfly – Beautiful and can be made in various colors.
Step-by-Step Guide to Making a Paper Crane
Creating a paper crane is a great starting point for beginners. Follow these steps:
- Begin with a square piece of paper, colored side up.
- Fold in half diagonally, then unfold.
- Fold in half diagonally the other way, then unfold.
- Flip the paper over, fold it in half, and unfold it.
- Fold in half the other way, then unfold.
- Collapse the paper into a square base.
- Fold the top layers into the center line.
- Flip and repeat on the other side.
- Fold the top triangle down on both sides, then unfold.
- Pull the top layer up and open the sides, forming a crane base.
- Fold the wings down.
- Pull out the head and tail, then form the beak.
Origami isn’t just about folding paper; it’s a journey of discovery and creativity. Each fold brings you closer to a masterpiece.
Tips for Success
- Practice Makes Perfect: Don’t be discouraged if your first few attempts aren’t perfect.
- Use Thin Paper: It makes folding easier and cleaner.
- Watch Tutorials: Sometimes, seeing the process can help you understand better.
For more creative paper crafting ideas, explore imaginative paper crafts that inspire creativity for all ages.
2. Paper Flowers
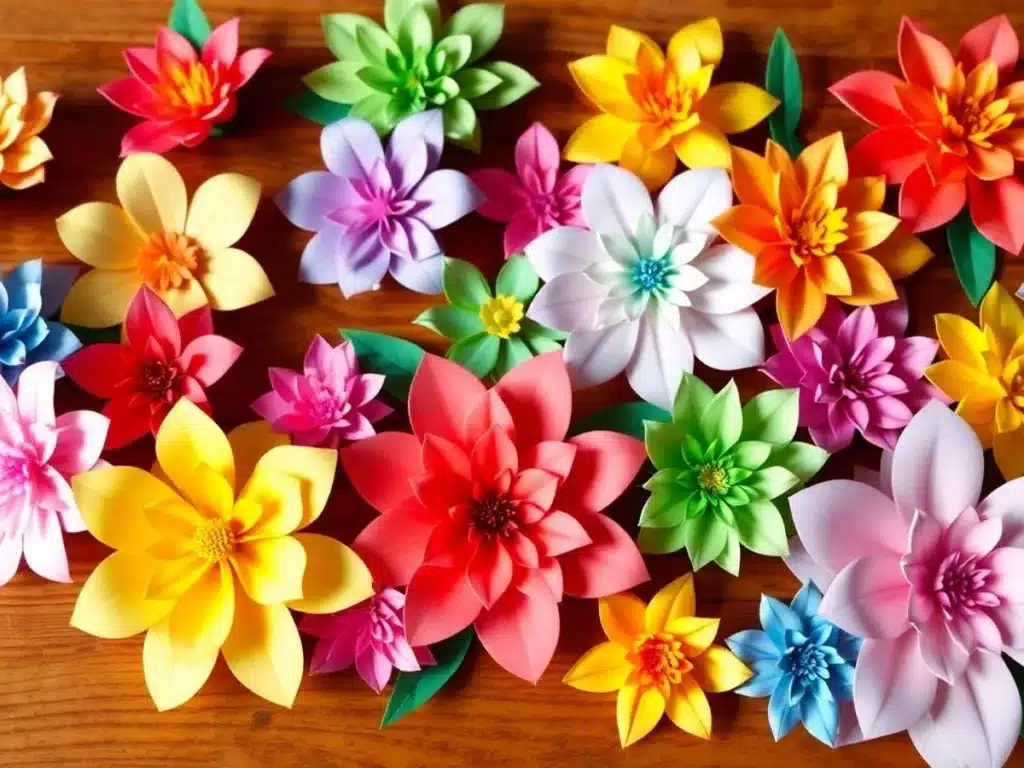
Creating paper flowers is a delightful way to bring a touch of nature indoors without worrying about watering or wilting. These vibrant creations can brighten up any space and are perfect for all skill levels. Whether you’re crafting with kids or looking to add a handmade touch to your home decor, paper flowers are a versatile and fun project.
Materials Needed
- Craft paper in various colors
- Scissors
- Glue or double-sided tape
- Pencil
- Flower templates (optional)
Step-by-Step Guide
- Choose Your Flower Type: Decide on the type of flower you want to make. Roses, daisies, and lilies are popular choices.
- Select Your Colors: Pick vibrant colors that match your decor or the theme you’re working on.
- Cut Out Petals: Use a template or freehand draw petals on your paper. Cut them out carefully.
- Assemble the Flower: Start gluing the petals together, overlapping them slightly to create a natural look. Use a small circle of paper as the base to attach the petals.
- Add Details: Add a center to your flower using a contrasting color, and curl the edges of the petals slightly for a more realistic effect.
Crafting paper flowers is not just about creating something beautiful; it’s about enjoying the process and experimenting with different shapes and colors. Let your creativity flow and see where it takes you!
Tips for Success
- For more elaborate designs, consider using a quilling tool to curl the petals.
- Experiment with different paper types, like tissue or crepe, for varied textures.
- Use a hot glue gun for a sturdier hold, especially if you’re creating a bouquet.
For more ideas on creative construction paper crafts that can spark your imagination, check out our detailed guide! These activities are not only fun but also help in enhancing fine motor skills and self-expression.
3. Paper Beads
Creating paper beads is a delightful craft that transforms simple sheets of paper into beautiful jewelry pieces. Whether you’re a seasoned crafter or just starting, making paper beads is a project that promises fun and creativity.
Materials Needed
- Colored paper or magazine pages
- Scissors
- Wooden skewers or toothpicks
- Adhesive glue
- Modge Podge or clear nail polish
Steps to Create Paper Beads
- Cut the Paper: Begin by cutting your paper into long, narrow triangles. The width of the base will determine the bead’s size.
- Roll the Paper: Starting at the wide end, roll the paper tightly around a skewer or toothpick. This forms the bead’s shape.
- Glue the End: As you near the tip of the triangle, apply a dab of glue to secure the paper.
- Seal the Bead: Once the glue is dry, coat the bead with Modge Podge or clear nail polish for a shiny finish and durability.
- Remove and Repeat: Carefully slide the bead off the skewer and repeat the process to make more beads.
Paper beads are not just visually appealing; they’re also a sustainable craft option. Using recycled paper, like old magazines or leftover wrapping paper, adds an eco-friendly twist to your creations.
This craft is perfect for making necklaces, bracelets, or even earrings. You can experiment with different paper patterns and colors to create unique designs. For a comprehensive guide on making paper beads, including tips on paper types and drying methods, check out this resource. Get creative and let your imagination run wild!
4. Paper Bag Puppets
Paper bag puppets are a classic craft that brings fun and creativity to any age group. With just a few basic materials, you can create a whole cast of characters ready for a puppet show.
Materials Needed:
- Paper bags
- Craft paper
- Scissors
- Glue
Steps to Create Your Puppet:
- Gather Your Materials: Start by collecting all the necessary items. You’ll need a plain paper bag, some colorful craft paper, scissors, and glue.
- Design Your Puppet: Decide what kind of puppet you want to make. It could be an animal, a person, or even a fantasy creature. Use the craft paper to cut out shapes for the puppet’s features like eyes, nose, mouth, and ears.
- Assemble the Puppet: Glue the cut-out features onto the paper bag. The bottom of the bag will be the puppet’s head, and the flap will be its mouth. Be creative with the placement to give your puppet a unique expression.
- Add Details: Use markers or crayons to add extra details such as eyebrows, whiskers, or patterns on the puppet’s “clothes.”
- Let It Dry: Allow the glue to dry completely before using the puppet.
Creating paper bag puppets is a wonderful way to recycle and have fun. Kids love the hands-on activity and the chance to play with their creations afterward.
For those looking for a bit more guidance, there are free printable PDF templates available to help you get started. These templates can make the process even easier, especially for younger kids.
Once your puppets are ready, why not put on a small show? It’s a great way to encourage storytelling and imaginative play. Plus, it’s a fun activity for a rainy day or any time when kids need a creative outlet. Paper bag puppets are not only easy to make but also a fantastic way to engage kids in crafting and performing.
5. 3D Paper Models
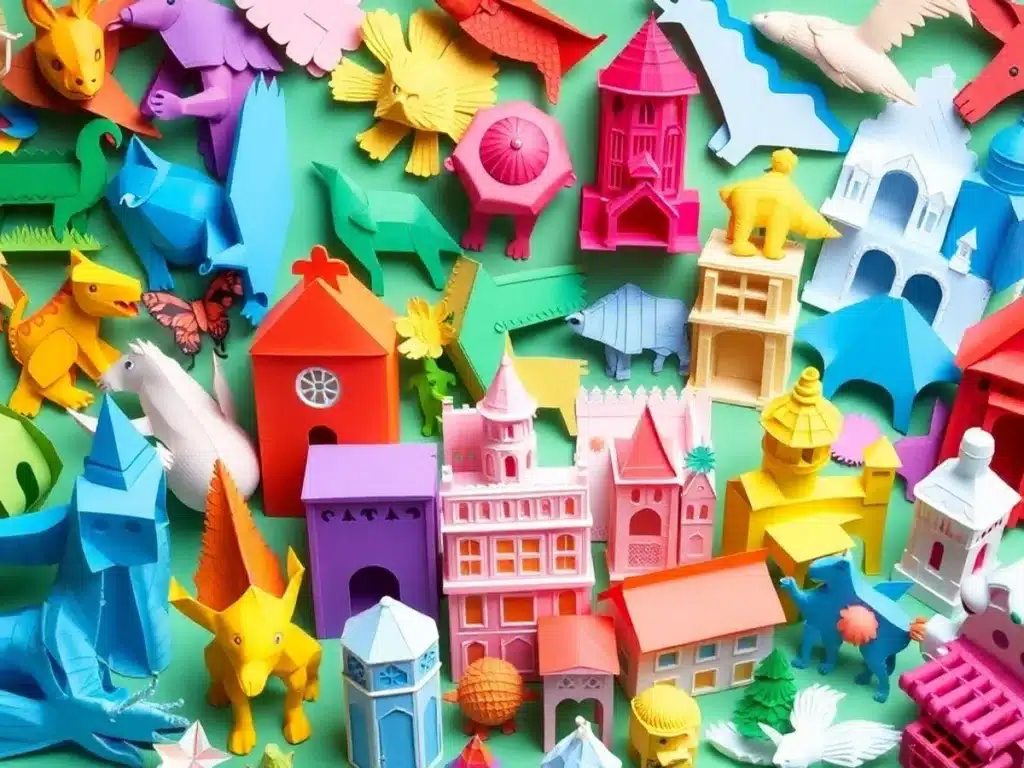
Creating 3D paper models is an adventure in creativity. These models can transform simple paper into stunning sculptures. Whether you’re crafting a majestic animal, a sleek architectural piece, or a whimsical character, the possibilities are endless. Here’s how you can get started:
Materials Needed
- 3D papercraft kit
- Adhesive glue
Steps to Create Your Own 3D Paper Model
- Choose Your Model: Start by deciding what you want to create. There are tons of creative paper crafts available, from simple designs to intricate masterpieces.
- Prepare Your Materials: Make sure you have all the necessary materials. A good 3D papercraft kit will include pre-cut pieces and instructions.
- Assemble with Care: Follow the instructions carefully. Use adhesive glue sparingly to avoid any mess.
- Display Your Creation: Once your model is complete, find a perfect spot to showcase it. These models make excellent centerpieces or unique decorations.
Crafting 3D paper models is not just about the final product. It’s about the joy of creating something from scratch and seeing it come to life with your own hands.
Tips for Success
- Patience is Key: Take your time with each step to ensure precision.
- Keep Extras: Always have spare glue and materials on hand, just in case.
- Experiment: Don’t be afraid to tweak the design or add your own flair.
3D paper models are a fantastic way to express your artistic side and make something truly unique. Whether you’re a beginner or a seasoned crafter, these projects offer a rewarding experience.
6. Torn Paper Collage
Creating a torn paper collage is like turning a pile of old magazines and colorful scraps into a masterpiece. It’s amazing how something so simple can be so expressive. This art form is about ripping and layering paper to create beautiful textures and patterns.
Materials Needed
- Scrap paper (think old magazines, colored paper, or anything with interesting patterns)
- Glue
- A base sheet of paper or card to build your collage on
Steps to Create Your Torn Paper Collage
- Gather Your Paper: Start by collecting a variety of paper scraps. The more colors and textures, the better!
- Rip, Don’t Cut: Tear the paper into different shapes and sizes. The rough edges add character and depth.
- Plan Your Design: Before gluing, lay out your pieces on the base paper to get an idea of your design. Don’t worry about perfection; let your creativity guide you.
- Start Gluing: Begin sticking your paper scraps onto the base. Layer them to create depth and interest.
- Add Finishing Touches: Once everything is glued, step back and see if you want to add any final pieces or adjust anything.
Collage making is a fantastic way to relax and express yourself without needing any fancy art supplies. It’s all about letting your imagination run wild.
For more inspiration, consider exploring creative and budget-friendly paper plate crafts for kids that can also incorporate collage techniques. These projects are perfect for sparking imagination and developing fine motor skills.
7. Paper Dolls
Introduction to Paper Dolls
Paper dolls are a timeless craft that has captured the imaginations of children and adults alike. They’re simple to make and can be as basic or detailed as you like. The beauty of paper dolls lies in their versatility. You can create a simple chain of dolls holding hands or design a fully dressed character complete with outfits and accessories.
Materials Needed
To start crafting your own paper dolls, you’ll need:
- Craft paper
- Scissors
- Glue (optional, for decoration)
Steps to Create Paper Dolls
- Choose Your Paper: Select a sturdy paper like cardstock if you plan to dress up your dolls. Regular craft paper works fine for simpler designs.
- Draw Your Doll: Sketch a basic doll shape on your paper. This can be as simple as a stick figure or as detailed as you like.
- Cut It Out: Carefully cut out your doll shape. If you’re making a chain, fold the paper accordion-style and cut out the doll shape, leaving the hands connected.
- Decorate: Use markers, colored pencils, or fabric scraps to add details like clothes, hair, and facial features.
- Create Outfits: If you’re feeling creative, design different outfits. Cut them out and use small tabs to attach them to your dolls.
Tips for Crafting Paper Dolls
- Experiment with Different Papers: Try using patterned or textured paper for unique effects.
- Personalize Your Dolls: Add names or stories to your dolls to make them more special.
- Use Templates: For those who prefer a guide, there are plenty of templates available online.
Crafting paper dolls is not just about cutting and gluing; it’s about creating stories and characters that come to life in your hands. It’s a perfect way to engage kids in storytelling and imaginative play.
Paper dolls are more than just a craft—they’re a gateway to creativity and fun. Whether you’re making them for decorating your home or as a playful activity with kids, paper dolls offer endless possibilities.
8. Customized Bookmarks
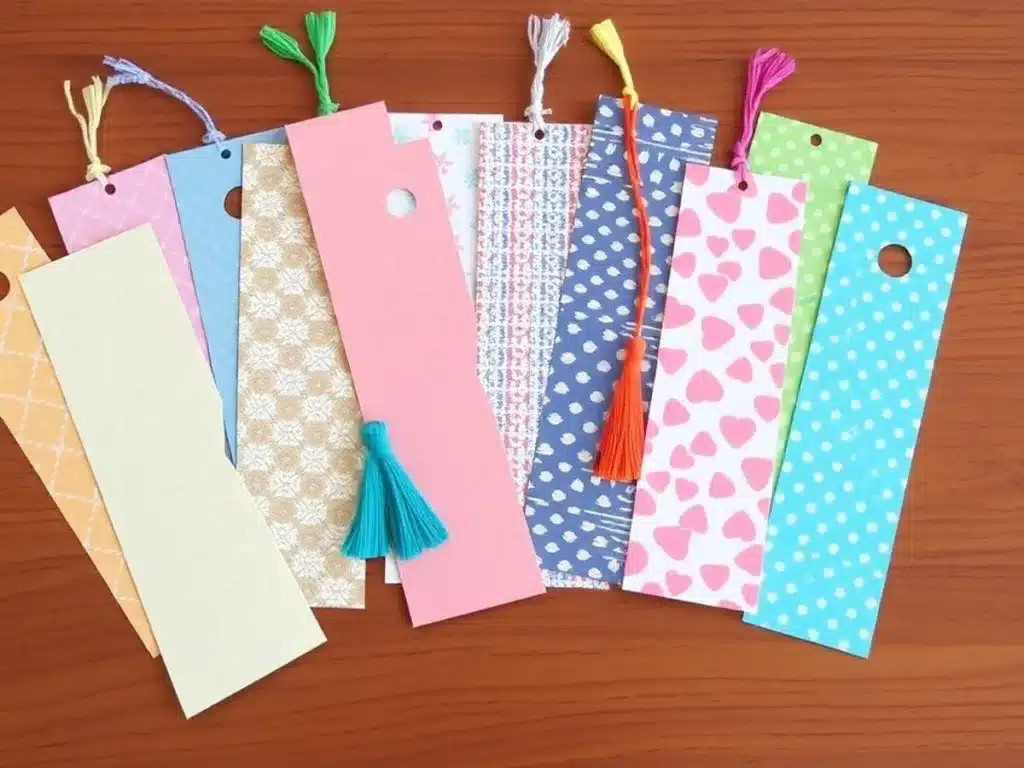
What You Need
Creating your own bookmarks is not just a fun activity, but it’s also a great way to add a personal touch to your reading experience. Here’s what you’ll need:
- Craft paper
- Scissors
- Glue
- Felt tips or colored pencils (optional for decoration)
How to Make Your Own Bookmarks
- Choose Your Design: Start by deciding on the shape and style of your bookmark. It could be a classic rectangle, a quirky shape, or even a themed design like a cat or a rocket.
- Cut and Shape: Use your scissors to cut out the desired shape from your craft paper. If you’re feeling adventurous, try cutting out a unique DIY corner bookmark using a template.
- Add Personal Touches: Use your felt tips or colored pencils to decorate your bookmark. You can draw patterns, add doodles, or write your favorite quotes.
- Assemble: If your design involves multiple pieces, use glue to put them together. Make sure everything sticks well so your bookmark can withstand regular use.
- Let It Dry: Allow your bookmark to dry completely before using it.
Creating customized bookmarks is a simple yet rewarding craft. It combines creativity with practicality, making it a perfect project for book lovers of all ages.
Why Make Your Own Bookmarks?
- Personalization: You get to decide exactly how your bookmark looks, which means it can reflect your personal style or interests.
- Cost-Effective: Making your own bookmarks is cheaper than buying them, especially if you have leftover craft supplies at home.
- Gift Idea: A handmade bookmark makes a thoughtful gift for friends or family who love to read. It’s a small gesture that shows you care.
So, grab your supplies and start crafting! Whether you’re making them for yourself or as gifts, these customized bookmarks will surely add a special touch to any book.
9. Paper Lanterns
Getting Started
Creating paper lanterns is a simple yet rewarding craft that brings a warm glow to any room. You don’t need a lot of materials, just some paper, scissors, and a bit of creativity.
Materials Needed
- Paper (any color you like)
- Scissors
- Ruler
- Pen
- Adhesive glue
- Artificial LED candle or light
Step-by-Step Guide
- Fold Your Paper: Start by folding your paper in half lengthwise. This will be the foundation of your lantern.
- Cut the Strips: With the paper folded, cut strips from the folded edge. Stop cutting about 2 centimeters from the opposite edge.
- From the Lantern: Unfold your paper and roll it into a tube shape. Secure the edges with adhesive glue.
- Add a Handle: If you’d like to hang your lantern, cut a strip of paper to make a handle and attach it to the top.
- Light It Up: Carefully place an LED light inside your lantern to give it that magical glow.
Crafting paper lanterns can be a delightful activity for both kids and adults. It’s amazing how something so simple can add such a cozy touch to your home.
Tips for Customization
- Decorate Your Lanterns: Use markers, stickers, or glitter to personalize your lanterns.
- Experiment with Shapes: Try making different shapes and sizes for a unique display.
- Use Paper Mache Techniques: For a more intricate design, consider layering paper mache over a balloon, then pop the balloon once it’s dry to reveal a stunning lantern.
Creating paper lanterns is not just about the end product but also about enjoying the crafting process. Whether you’re making them for a party or just to brighten up your space, these lanterns are sure to impress.
10. Kirigami (Paper Cutting)
Kirigami is like origami’s cool cousin. While origami is all about folding, kirigami involves both folding and cutting. This craft is perfect for those who love detailed designs and have a steady hand. You can create anything from simple geometric patterns to intricate, lace-like art pieces.
Getting Started with Kirigami
To dive into kirigami, you don’t need much—just some paper and a pair of scissors. That’s the beauty of it! It’s simple yet offers endless creative possibilities. Here’s a quick list of what you’ll need:
- Paper (any kind, but start with something easy to cut)
- Scissors (sharp ones work best for clean cuts)
- A pencil (for sketching your designs)
Basic Steps
- Choose Your Design: Start with something simple, like a star or a snowflake. As you get more comfortable, you can try more complex patterns.
- Fold Your Paper: Depending on your design, you might need to fold your paper before cutting. This helps in creating symmetrical designs.
- Cut Carefully: Follow your design with precision. Take your time—rushing can lead to mistakes.
- Unfold and Admire: Once you’ve made your cuts, unfold the paper to reveal your design. It’s always a surprise!
Tips for Success
- Practice Makes Perfect: Don’t be discouraged if your first few tries aren’t perfect. Each cut is a step towards mastering kirigami.
- Try Different Papers: Experiment with various paper types and colors. Thicker paper can be challenging but offers a sturdier end product.
- Use Templates: If you’re unsure about freehand cutting, use templates to guide your design.
Kirigami is not just a craft; it’s a form of expression. Each cut and fold tells a story, making every piece unique.
If you’re interested in combining kirigami with origami, you can create stunning 2D designs like dolphins or other animals. This mix of techniques can bring a new dimension to your paper crafting adventures.
Kirigami is a wonderful way to relax and let your creativity flow. With just a few tools and a bit of imagination, you can create beautiful art that’s both fun and rewarding. So grab some paper and scissors, and start cutting!
Conclusion
So there you have it, ten awesome paper craft ideas that anyone can try. Whether you’re a kid or just a kid at heart, these projects are a fun way to spend an afternoon. Plus, you don’t need a ton of fancy supplies—just some paper, a bit of glue, and maybe a pair of scissors. It’s all about getting creative and having a good time. So grab some paper and start crafting. Who knows? You might just discover a new favorite hobby. Happy crafting!
Frequently Asked Questions
What types of paper crafts are suitable for kids?
Kids can enjoy making paper bag puppets, paper flowers, and simple origami animals. These crafts are fun and easy for little hands.
How can I start with origami if I’ve never done it before?
Begin with simple shapes like paper cranes or frogs. You can find many tutorials online to guide you step by step.
What materials do I need for paper crafting?
Basic supplies include paper, scissors, glue, and sometimes markers or colored pencils. Specific projects might need extra items like beads or ribbons.
Are there any eco-friendly paper crafts?
Yes! You can recycle old magazines or newspapers for projects like torn paper collages or paper beads.
Can adults enjoy paper crafting, too?
Absolutely! Adults can tackle more complex projects like 3D paper models or intricate kirigami designs.
How do I make paper flowers last longer?
To keep paper flowers looking fresh, avoid direct sunlight and moisture. You can also spray them with a light coat of clear acrylic sealer.