DIYbrico | Discover, Create, Inspire

10 Unique and Cool Paper Crafts to Try This Weekend
Explore 10 cool paper crafts this weekend. From flowers to 3D models, find your next creative project!

Looking for something fun and creative to do this weekend? Paper crafts are a fantastic way to get creative without breaking the bank. Whether you’re a seasoned crafter or just starting out, there’s something about folding, cutting, and gluing paper that brings out the artist in all of us. So, grab some paper and scissors, and let’s dive into ten cool paper crafts you can try right at home.
Key Takeaways
- Paper crafts are affordable and accessible for all skill levels.
- You can make anything from simple flowers to intricate 3D models.
- Most projects require just basic supplies like paper, scissors, and glue.
- Paper crafting is a great way to unwind and express creativity.
- These crafts can be perfect for personalizing gifts or home decor.
1. Paper Flowers
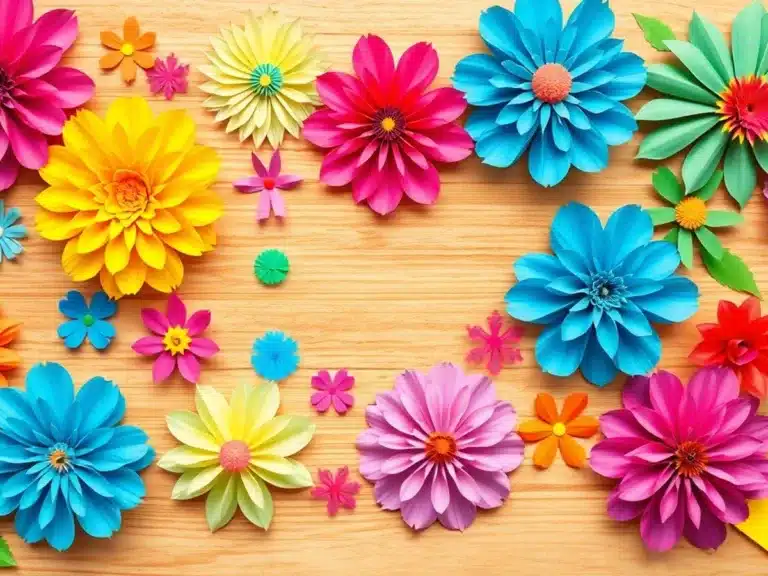
Creating paper flowers is a delightful craft that brings a splash of color and elegance into any space. Whether you’re looking to brighten up your living room or add a personal touch to a gift, paper flowers are your go-to. The best part? They never wilt.
Materials Needed:
- Craft paper (choose your favorite colors)
- Scissors
- Glue
- Pencil
- Flower templates (optional)
Steps to Create Simple Paper Flowers:
- Select Your Paper: Start by picking out the paper. You can use plain colored paper or patterned scrapbook paper for a unique look.
- Cut the Petals: Use a template or freehand to cut out petal shapes. Make sure you have at least five petals for a fuller flower.
- Shape the Petals: Gently curl the edges of each petal using a pencil to give them a more realistic appearance.
- Assemble the Flower: Begin gluing the petals together, starting from the outer layer and working your way in.
- Add the Center: Roll a small piece of paper into a tight coil to form the center of the flower, then glue it in place.
Crafting paper flowers can be a relaxing and rewarding experience. It’s amazing how a few sheets of paper can transform into something so beautiful.
These flowers can serve as wonderful decorations for events or even as a thoughtful handmade gift. For more creative paper craft ideas, consider exploring creative paper crafts that can ignite your imagination and creativity.
2. Paper Beads
Ever thought about turning paper into jewelry? Paper beads are a fantastic way to recycle old magazines, colorful flyers, or even leftover wrapping paper. They’re not only eco-friendly but also bring a personal touch to your accessories.
Materials Needed:
- Multicolored paper (origami paper works great)
- Scissors
- Glue
- Skewer sticks
Steps to Make Paper Beads:
- Cut the Paper: Start by cutting long, narrow triangles from your paper. The base of the triangle will determine the bead’s width, while the length affects the bead’s thickness.
- Roll the Paper: Take a skewer stick and begin rolling the paper from the wide end of the triangle. Keep it tight!
- Secure with Glue: As you reach the tip, apply a small amount of glue to keep it in place.
- Let it Dry: Allow the bead to dry completely before removing it from the skewer.
Creative Uses for Paper Beads:
- Jewelry: String them together to make necklaces or bracelets.
- Decorations: Use them to embellish picture frames or mirrors.
- Keychains: Attach them to keyrings for a pop of color.
“Crafting paper beads is not just a creative outlet; it’s a way to breathe new life into materials that would otherwise be discarded.”
For more fun paper projects, you might want to explore ten imaginative construction paper crafts that can keep your creativity flowing.
3. Paper Mosaics
Creating paper mosaics is an art form that combines precision and creativity, allowing you to transform simple paper into stunning designs. The beauty of paper mosaics lies in their versatility and the endless possibilities they offer. Whether you’re aiming for a simple geometric pattern or an intricate landscape, paper mosaics can be tailored to suit any style or preference.
Getting Started with Paper Mosaics
To begin, gather your materials. You’ll need:
- Colored paper or cardstock
- Scissors or a craft knife
- Glue or a glue stick
- A base, like a canvas or heavy paper
Steps to Create Your Paper Mosaic
- Design Your Pattern: Sketch out your design on a piece of paper. You can use graph paper to plan out more intricate designs.
- Cut Your Pieces: Cut your colored paper into small pieces. These can be squares, triangles, or any shape you prefer.
- Arrange and Glue: Begin arranging your paper pieces onto your base. Start from one corner and work your way across. Once you’re happy with the arrangement, glue each piece down.
- Finishing Touches: Once your mosaic is complete, let it dry. You can add a sealant to protect your work if desired.
Paper mosaics are a fantastic way to explore creative and kid-friendly mosaic art projects that are enjoyable and easy to work on at home. They’re perfect for a rainy day activity or a unique gift idea.
Tips for Success
- Choose a Color Scheme: Decide on a color palette before you start cutting. This will help your mosaic look cohesive.
- Be Patient: Take your time arranging the pieces. The more thought you put into the placement, the better the final result.
- Experiment: Don’t be afraid to try different shapes and sizes. Sometimes the most unexpected combinations create the best designs.
Paper mosaics are more than just a craft; they’re a journey into creativity and patience. So grab your materials and let your imagination guide you!
4. Paper Lanterns
Creating paper lanterns is not just a craft; it’s like a little adventure in creativity. These lanterns can add a soft glow to any room or outdoor space, making them perfect for parties or cozy evenings. With just a few materials, you can transform simple paper into beautiful lanterns. Here’s how to make your own:
Materials Needed
- Colored paper
- Scissors
- Tape or glue
- A ruler
- Pencil
Steps to Create a Paper Lantern
- Fold the Paper: Start by folding your paper in half lengthwise. Make sure the edges line up perfectly.
- Cut the Strips: Using a ruler and pencil, draw a series of lines perpendicular to the folded edge, about 2 cm apart. Stop cutting about 2 cm from the edge.
- Form the Lantern: Unfold the paper and roll it into a tube, securing the edges with tape or glue.
- Add a Handle: Cut a strip of paper to create a handle and attach it to the top of the lantern.
Tips for Personalization
- Decorate: Use markers or stickers to personalize your lanterns.
- Experiment with Sizes: Try making lanterns of different sizes for a dynamic display.
Crafting paper lanterns is a delightful way to spend an afternoon. It’s simple yet rewarding, and the end result is a beautiful decoration that brings light and joy.
For more creative paper craft ideas, you might want to explore fun and creative paper crafts for kids, which include making paper chain garlands and more.
5. Paper Bag Puppets
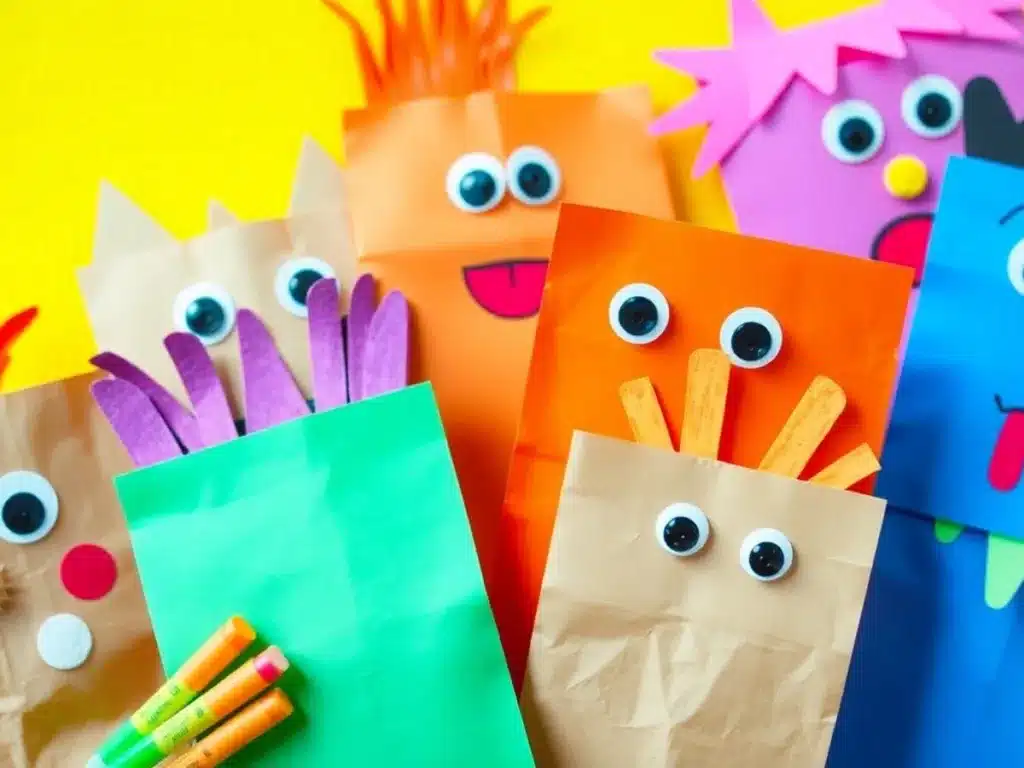
Who would have thought that an ordinary paper bag could turn into a delightful puppet? Paper bag puppets are not only fun to make but also offer an imaginative playtime experience for kids and adults alike. These puppets can be anything you want them to be—animals, people, or even imaginary creatures.
Materials Needed:
- Paper bags
- Craft paper
- Scissors
- Glue
Steps to Create Your Puppet:
- Plan Your Puppet: Decide what character or creature you want to make. Sketch a rough design on paper to guide you.
- Cut and Decorate: Use craft paper to cut out shapes for features like eyes, ears, and noses. Glue them onto the paper bag to bring your puppet to life.
- Add Details: Add any extra details like hair, scales, or clothing using more craft paper or even markers.
- Try It Out: Once your puppet is complete, slip your hand inside the bag and bring your creation to life with a fun puppet show.
Crafting paper bag puppets is a great way to explore 10 adorable paper crafts that spark creativity and fun. It’s a simple yet rewarding project that can be enjoyed by the whole family.
Why not give it a try this weekend? Gather your supplies, let your imagination run wild, and create your own unique puppet theater at home.
6. Kirigami
Kirigami is like origami’s cool cousin. It combines the art of folding paper with cutting to create intricate designs. All you need is some paper and a good pair of scissors. That’s it! You can craft anything from simple geometric shapes to detailed animals and flowers.
Getting Started with Kirigami
- Gather Your Materials: You don’t need much. Just paper and scissors.
- Choose a Design: Start with something simple. Maybe a basic snowflake or a star.
- Fold and Cut: Fold your paper according to the design. Then, carefully cut along the lines.
- Unfold and Reveal: This is the best part. Open up your paper to see the magic you’ve created.
Tips for Success
- Use Sharp Scissors: Dull scissors can make the process frustrating and messy.
- Practice Patience: Some designs can be a bit tricky, so take your time.
- Experiment: Try different types of paper and see how they change your designs.
Kirigami is more than just cutting paper. It’s about transforming a simple sheet into something beautiful. The process is calming, and the results can be stunning.
If you’re interested in learning more, why not try creating a 2D origami dolphin? It’s a fun project that combines folding and cutting techniques, perfect for beginners and seasoned crafters alike.
7. Rolled Paper Sculptures
Ever tried making art out of something as simple as paper? Rolled paper sculptures are a fantastic way to unleash your creativity. These sculptures can transform humble strips of paper into intricate designs that are both eye-catching and unique. Whether you’re into abstract shapes or more detailed figures, there’s something for everyone.
Getting Started
To dive into rolled paper sculptures, you’ll need some basic materials:
- Strips of colored paper
- A rolling tool (like a quilling needle)
- Glue
- A base to mount your sculpture on
Step-by-Step Guide
- Cut Your Strips: Start by cutting your paper into strips. The width and length can vary depending on your design.
- Roll the Paper: Use your rolling tool to tightly roll each strip. If you don’t have a tool, a toothpick can work in a pinch.
- Shape and Glue: Once rolled, shape the paper into your desired form and glue it to hold.
- Assemble Your Design: Attach each piece to your base, building up your sculpture layer by layer.
Rolled paper sculptures are not only a fun craft but also a great way to spark imagination and creativity. They make for stunning home decor or thoughtful gifts.
Tips for Success
- Experiment with Colors: Mix and match different colors for a vibrant look.
- Try Different Shapes: Don’t just stick to circles; experiment with ovals, squares, and triangles.
- Layer Up: Adding layers can give your sculpture more depth and dimension.
With these tips and steps, you’re well on your way to creating your own rolled paper masterpiece. So grab your paper and start rolling!
8. Accordion-Folded Flowers
Create Your Own Accordion-Folded Flowers
Accordion-folded flowers are a delightful and simple paper craft that can brighten up any space or occasion. These flowers are made by folding paper into a series of pleats, giving them a unique and elegant appearance. Whether you’re a crafting novice or a seasoned expert, these flowers are a fun project that anyone can tackle.
Materials Needed
- Colored paper
- Glue
- Scissors
Steps to Make Accordion-Folded Flowers
- Cut Your Paper: Start by cutting a rectangle of paper. The size can vary depending on how large you want your flower to be, but a good starting point is a rectangle about 8 inches by 4 inches.
- Fold the Paper: Begin folding the paper back and forth in an accordion style, making sure each fold is about the same width. This creates a pleated look.
- Secure the Middle: Once your paper is fully folded, pinch the middle tightly and secure it with a piece of string or a small amount of glue.
- Fan Out the Petals: Gently pull apart the edges of the paper to fan out the petals. Be careful not to tear the paper.
- Attach Multiple Layers: For a fuller flower, repeat the above steps with additional pieces of paper and layer them together, securing them with glue.
Creating accordion-folded flowers is not just a craft; it’s a way to add a personal touch to your home decor or gift wrapping. These flowers can be used in scrapbooks, as gift toppers, or even as part of a handmade bouquet.
Feel free to experiment with different sizes and colors to create a variety of folded paper stars and flowers, each with its own unique charm. The possibilities are endless, and the results are always stunning!
9. Customized Bookmarks
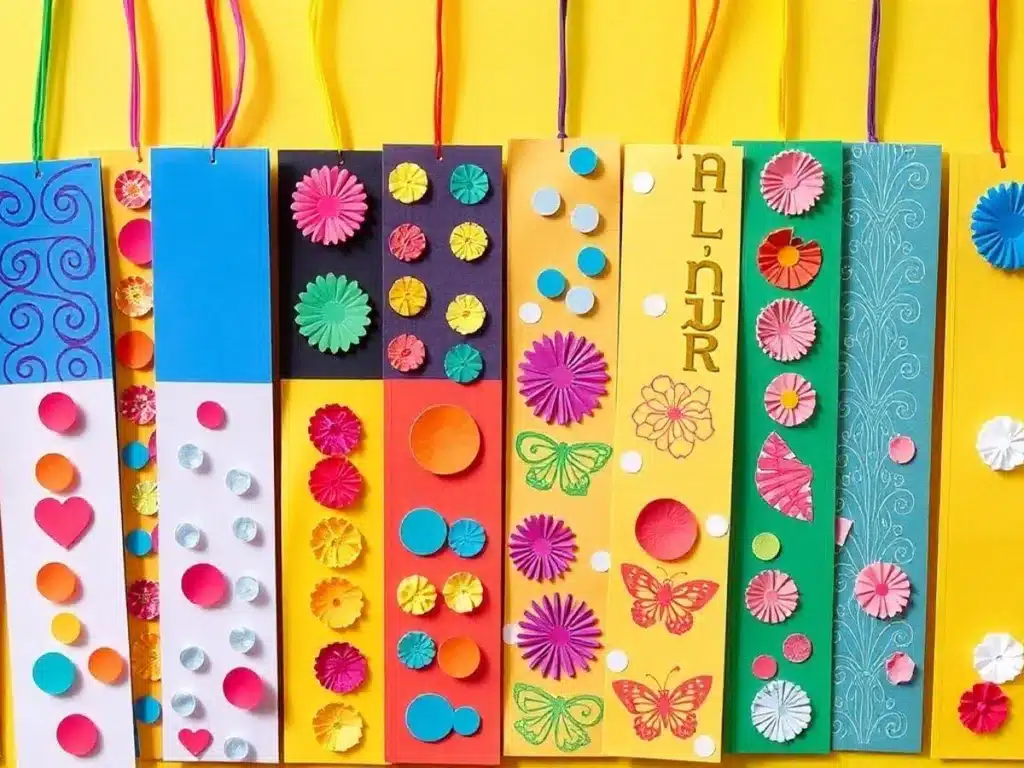
Crafting personalized bookmarks is a delightful way to combine creativity with practicality. Whether you’re a bookworm or know someone who is, these bookmarks make reading even more enjoyable. Plus, they’re a fantastic way to use up scrap paper and unleash your artistic side.
Materials Needed:
- Craft paper
- Scissors
- Glue
- Felt tips or colored pencils (optional for decoration)
Steps to Create:
- Cut the Base: Start by cutting a strip of craft paper to your desired bookmark size. A typical size is about 2 inches wide and 6 inches long, but feel free to customize.
- Design Your Bookmark: Use colored pencils or felt tips to draw patterns, doodles, or even write a favorite quote. This is your chance to get creative!
- Add Embellishments: Glue on small decorations like stickers, buttons, or washi tape to give your bookmark some flair.
- Laminate for Durability: If you want your bookmark to last longer, consider laminating it or covering it with clear contact paper.
- Punch a Hole: For a classic touch, punch a hole at the top and thread a ribbon or yarn through it.
Making bookmarks is not just about marking your page, it’s about creating a little piece of art that brings joy every time you open a book.
Feeling adventurous? Try making themed bookmarks, like transforming empty toilet paper rolls into quirky designs or using seasonal motifs. The possibilities are endless, and each bookmark is a unique reflection of your style.
10. 3D Paper Models
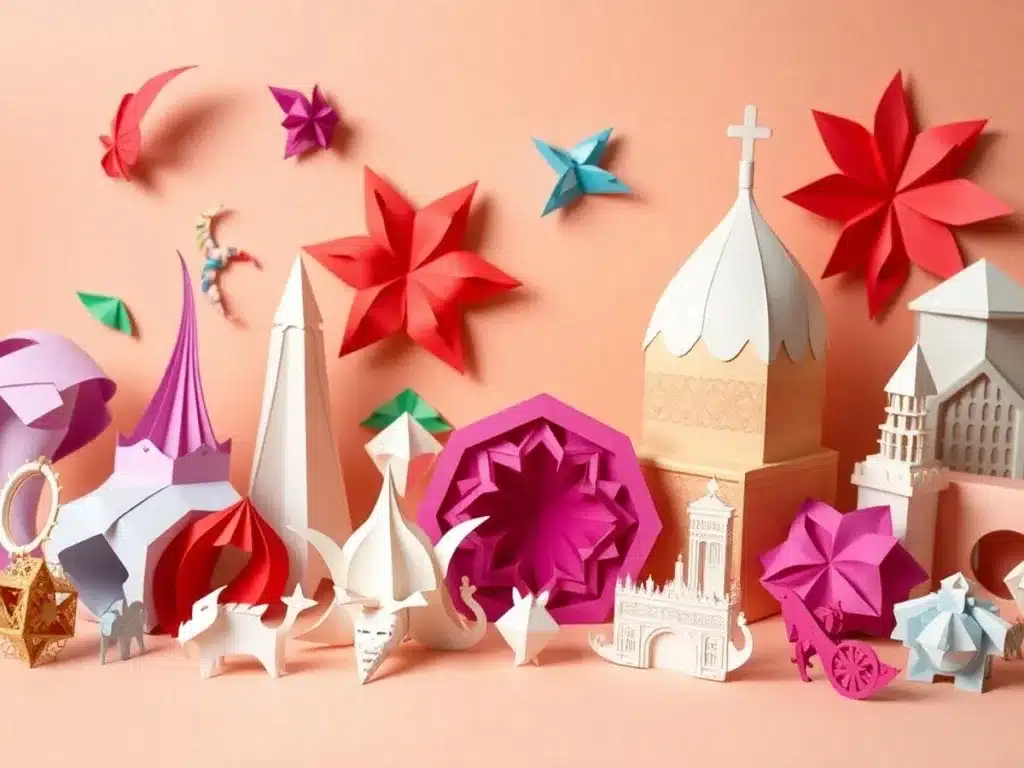
Creating 3D paper models is a fantastic way to spend your weekend if you’re into crafts. These models can be anything from a simple geometric shape to a detailed replica of a famous landmark. The possibilities are endless! Here’s a quick guide on how to get started:
- Choose Your Model: Start by deciding what you want to make. There are plenty of templates available online, or you can design your own.
- Gather Your Materials: You’ll need paper (cardstock works best), a cutting tool (like scissors or a craft knife), and adhesive glue.
- Print and Cut: If you’re using a template, print it out. Carefully cut out each piece following the lines.
- Fold and Assemble: Fold along the dotted lines and start assembling by gluing the tabs to form your 3D shape.
- Add Details: Once your model is assembled, you can paint it or add embellishments to make it unique.
Crafting 3D paper models can turn a few sheets of paper into a beautiful piece of art that you can proudly display.
These models are perfect for decorating your home or as a thoughtful gift. Whether you want to make a paper orb, a star, or a complex architectural model, it’s a great way to challenge your creativity and patience. Plus, it’s a fun activity to do with family or friends!
Conclusion
So there you have it, ten unique paper crafts to dive into this weekend. Whether you’re a seasoned crafter or just starting out, these projects offer something for everyone. From simple bookmarks to intricate 3D models, there’s no shortage of creativity here. Grab your supplies, maybe a cup of coffee, and let your imagination run wild. Who knows, you might just discover a new favorite hobby. Happy crafting!
Frequently Asked Questions
What are some easy paper crafts for beginners?
For beginners, starting with simple projects like paper flowers or customized bookmarks is a good idea. These crafts are easy to make and don’t require many materials.
How can I make paper beads?
To make paper beads, cut strips of colorful paper, roll them around a skewer, and secure with glue. Once dry, you can coat them with clear nail polish for shine.
What’s the difference between origami and kirigami?
Origami involves folding paper into shapes without cutting, while kirigami includes both folding and cutting to create designs.
Can I make paper crafts with recycled materials?
Yes, using recycled materials like old newspapers or magazines is a great way to make eco-friendly paper crafts such as beads or mosaics.
Are paper crafts suitable for kids?
Many paper crafts, like paper bag puppets or accordion-folded flowers, are perfect for kids. They are fun and help improve creativity and fine motor skills.
What tools do I need for paper crafting?
Basic tools include scissors, glue, and paper. For more advanced projects, you might need a craft knife, ruler, or cutting mat.