DIYbrico | Discover, Create, Inspire

10 Creative Small Woodworking Projects for Gifts That Everyone Will Love
Explore 10 small woodworking projects for gifts that are creative and loved by everyone.

Looking to craft something special? Whether for a birthday, holiday or just because, handmade gifts always hit the mark. Small woodworking projects are a great way to show you care without breaking the bank or your back. With some essential tools and a little bit of time, you can create gifts that are both useful and charming. Here’s a list of ten creative woodworking projects that make perfect gifts.
Key Takeaways
- Handmade gifts are personal and thoughtful.
- Small woodworking projects are manageable and budget-friendly.
- Basic tools and materials are often all you need.
- These projects are great for various occasions.
- Woodworking can be a fun and rewarding hobby.
1. Small Woodworking Projects for Gifts – DIY Footrest
Why Make a DIY Footrest?
A DIY footrest is a thoughtful gift that combines practicality with comfort. It’s perfect for anyone who spends long hours sitting at a desk. Not only does it help alleviate pressure on the legs, but it also promotes better posture. Plus, it’s a project that doesn’t require a lot of materials or time, making it ideal for a weekend endeavor.
Materials Needed
- A sturdy piece of wood (like oak or pine)
- Sandpaper (medium and fine grit)
- Wood stain or paint (optional)
- Non-slip pads or rubber feet
- Wood glue or screws
Step-by-Step Guide
- Cut the Wood: Start by cutting your wood to the desired size. A typical footrest might be around 15 inches wide and 10 inches deep.
- Smooth the Edges: Use sandpaper to smooth out any rough edges. Begin with medium grit and finish with fine grit for a polished look.
- Apply Finish: If you want to add a bit of flair, apply wood stain or paint. This step is optional but can enhance the appearance of your footrest.
- Add Non-Slip Pads: Attach non-slip pads or rubber feet to the bottom corners of the wood to prevent slipping and protect floors.
- Assemble (if needed): Depending on your design, you might need to glue or screw pieces together. Ensure everything is secure and stable.
Tips for Personalization
- Engraving: Add a personal touch by engraving a name or a motivational quote.
- Color Choices: Choose colors that match the recipient’s home or office decor.
- Custom Shapes: Experiment with different shapes to suit personal preferences or themes.
A footrest isn’t just a piece of wood; it’s a simple luxury that can transform a workspace. It’s a reminder to take a moment, relax, and enjoy a bit of comfort during a busy day.
For more ideas on quick and easy woodworking projects, check out these simple woodworking projects that can be completed over a weekend.
2. DIY Phone Stand
Creating a DIY phone stand is a fun and practical woodworking project that can be completed in just a few hours. This handy accessory keeps your phone at the perfect angle for viewing, making it an ideal gift for anyone who loves to keep their desk organized.
Materials Needed
- Scrap wood pieces
- Sandpaper
- Wood glue
- Wood finish or paint
Steps to Create Your Phone Stand
- Measure and Cut the Wood: Start by measuring your phone to decide the dimensions of your stand. Use a saw to cut the wood pieces accordingly.
- Sand the Edges: Smooth out any rough edges with sandpaper to prevent splinters and give the stand a polished look.
- Assemble the Stand: Use wood glue to attach the pieces together. Ensure the angle is right for comfortable viewing.
- Finish the Surface: Apply a wood finish or paint to protect the stand and add a personal touch.
This project is not only simple but also incredibly rewarding. You’ll be amazed at how something so small can make a big difference in daily life.
For more creative ideas and projects, check out our innovative woodworking projects for 2025 that inspire creativity and craftsmanship.
3. Modern Pencil Holder
Creating a modern pencil holder is a fantastic way to add a personal touch to your workspace or give as a unique gift. This project is simple yet stylish, perfect for anyone who appreciates a clean, modern design.
Materials Needed
- A small block of wood
- Acrylic sheet
- Wood glue
- Sandpaper
- Saw
- Drill
Steps to Create a Modern Pencil Holder
- Cut the Wood Block: Start by cutting a small block of wood to your desired size. Ensure it’s large enough to hold a decent number of pencils.
- Drill Holes: Using a drill, create several evenly spaced holes on the top surface of the wood block. These holes will hold the pencils, so make sure they are deep enough to provide stability.
- Prepare the Acrylic Sheet: Cut the acrylic sheet to match the dimensions of the wood block. This will serve as a stylish divider or base, adding a modern touch.
- Assemble the Holder: Glue the acrylic sheet to the wood block. Make sure it is centered and aligned properly. Allow it to dry completely.
- Sand and Finish: Smooth out any rough edges with sandpaper. You can also apply a coat of lacquer or paint for a polished finish.
Tip: Consider using different colors of acrylic or experimenting with the size and placement of the holes for a personalized design.
This DIY project is not only practical but also a great way to showcase your creativity. It’s a thoughtful gift that anyone can appreciate, whether for a home office or a study space. Plus, it’s a fun project that can be completed in the afternoon!
4. DIY Wood Tray
Building a wood tray is a fantastic project, especially if you’re looking for something practical yet stylish. This tray isn’t just useful; it also adds a touch of elegance to any room. Whether you’re serving breakfast in bed or using it as a decorative piece, a handmade tray is always a hit.
Materials Needed
- A piece of quality wood (like oak or walnut)
- Sandpaper
- Wood glue
- Varnish or wood stain
- Handles (optional)
Steps to Create Your Wood Tray
- Cut the Wood: Start by cutting the wood to your desired size. A standard size could be 18×12 inches, but feel free to adjust it according to your needs.
- Sand the Edges: Smooth out the edges and surface using sandpaper. This will give your tray a polished look and make it safe to handle.
- Assemble the Tray: Use wood glue to attach the sides to the base. Make sure everything is aligned properly.
- Finish the Surface: Apply a coat of varnish or wood stain to protect the wood and enhance its natural beauty.
- Add Handles: If you want, attach handles to the sides for easy carrying.
Building a wood tray is not just about crafting a useful item; it’s about creating something that brings a bit of handmade warmth into everyday life.
For more beginner-friendly woodworking crafts, check out our comprehensive guide packed with creative ideas and step-by-step instructions. This is a perfect way to explore DIY wood projects and make gifts that everyone will love.
5. DIY Lazy Susan
A Lazy Susan is a fantastic addition to any dining table or kitchen counter. It’s not just functional but also adds a touch of elegance. Creating your own Lazy Susan is a rewarding project that doesn’t require advanced woodworking skills.
Materials Needed
- Plywood (scrap pieces work great)
- Lazy Susan bearing
- Wood glue
- Sandpaper
- Wood stain or paint (optional)
Steps to Create a Lazy Susan
- Cut the Plywood: Start by cutting a circular piece from your plywood. The size depends on your preference, but a 12 to 15-inch diameter works well for most tables.
- Prepare the Surface: Sand the plywood thoroughly to ensure a smooth surface. This step is crucial as it prevents splinters and prepares the wood for staining or painting.
- Attach the Bearing: Center the Lazy Susan bearing on the underside of the plywood. Secure it with screws, ensuring it’s firmly in place to allow smooth rotation.
- Finish the Surface: Apply wood stain or paint according to your taste. You can also add a clear coat for extra protection and shine.
- Assemble and Enjoy: Once dry, place your Lazy Susan on the table and enjoy its functionality.
Crafting a Lazy Susan not only enhances your dining experience but also showcases your creativity. It’s a simple project that makes a big impact, perfect for gifting or personal use.
A Lazy Susan isn’t just a practical kitchen accessory; it’s a chance to spark creativity with different designs and finishes. Whether you keep it simple or add intricate patterns, this project is a delightful way to bring charm to your space.
6. Cutting Board with Brass Inlay
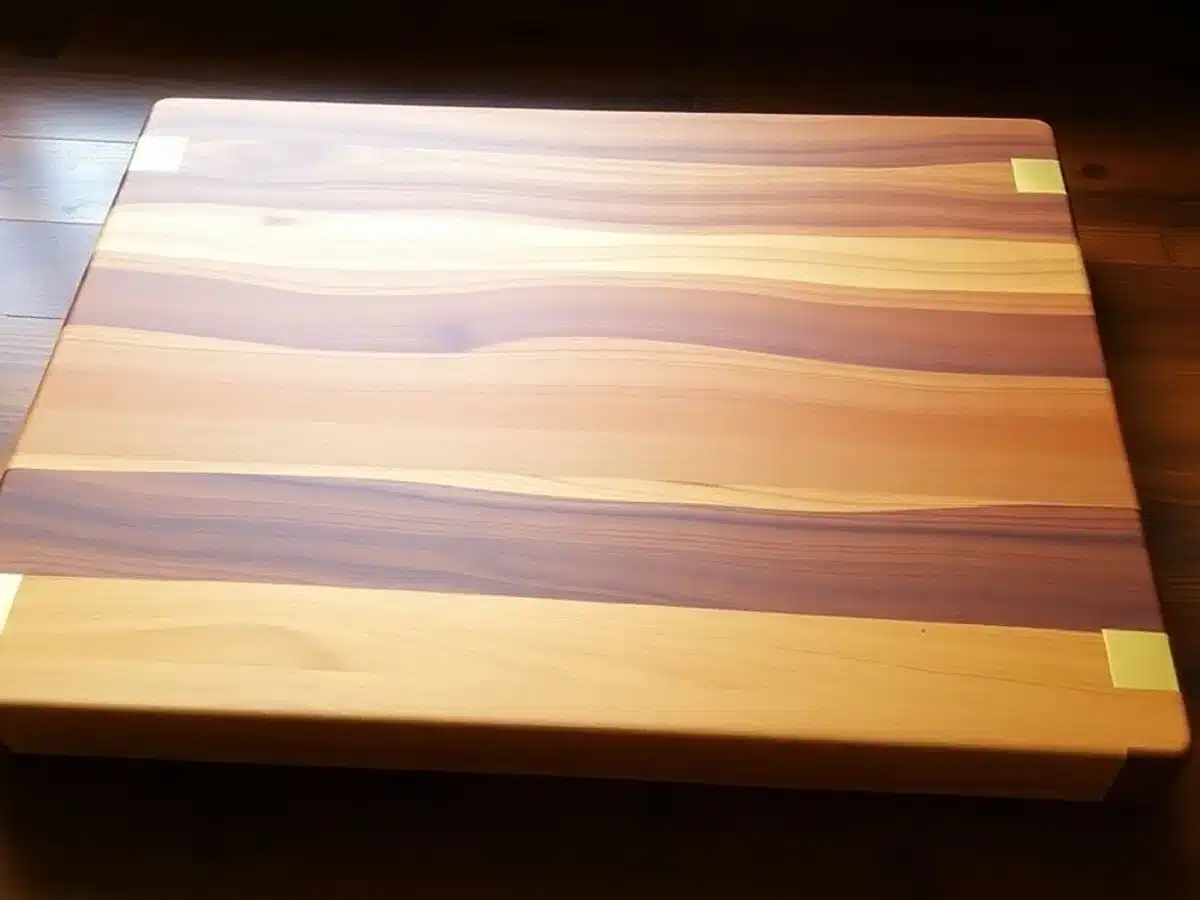
Creating a cutting board with a brass inlay is a project that combines functionality with a touch of elegance. This isn’t just any ordinary kitchen tool—it’s a potential centerpiece for any culinary space. The brass inlay adds a sophisticated flair that takes a simple cutting board to a whole new level.
Materials Needed
- Hardwood of your choice (walnut or maple works great)
- Brass strips
- Wood glue
- Sandpaper (various grits)
- Mineral oil or food-safe finish
Steps to Create Your Cutting Board
- Select Your Wood: Choose a hardwood that suits your taste and kitchen decor. Walnut and maple are popular choices due to their durability and attractive grain.
- Cut and Prepare the Wood: Cut the wood to your desired dimensions. Sand the surface until smooth, starting with a coarser grit and moving to a finer one.
- Create the Inlay Groove: Use a router to carve out a groove for the brass inlay. Ensure the groove is slightly narrower than the brass strip for a snug fit.
- Insert the Brass Inlay: Carefully fit the brass strip into the groove. Apply wood glue to secure it in place.
- Finish the Board: Sand the entire board again to ensure the brass is flush with the wood. Apply mineral oil or a food-safe finish to protect the surface and enhance the wood’s natural beauty.
Making a cutting board with a brass inlay is a rewarding project that results in a beautiful, personalized gift. It’s a piece that’s both practical and decorative, sure to impress anyone who receives it.
For those looking to create a countertop DIY cutting board stand, there are simple tools and easy steps available to complement your handcrafted cutting board. This can be a fantastic addition to your kitchen, providing both utility and style.
7. Custom Picture Frame

Crafting a Custom Picture Frame
Creating a custom picture frame is a delightful project that lets you showcase your woodworking skills while gifting something truly personal. This project is perfect for any occasion, be it a birthday, anniversary, or just because.
Materials Needed
- Wood of your choice (oak, pine, or any scrap wood you have)
- Wood glue
- Saw (miter saw recommended)
- Sandpaper
- Stain or paint (optional)
- Glass or acrylic for the front
- Backing board
- Frame hangers or stands
Steps to Create Your Frame
- Select Your Wood: Choose a type of wood that complements the decor of the person receiving the gift. You can use new wood or repurpose old wood for a rustic look.
- Cut the Wood: Measure and cut the wood to the desired size using a miter saw. Ensure the angles are precise for a perfect fit.
- Assemble the Frame: Use wood glue to join the pieces together. Clamp them in place and let them dry completely.
- Sand the Edges: Smooth out any rough edges with sandpaper. This step is crucial for a polished finish.
- Finish the Frame: Apply a stain or paint to match the recipient’s taste. Let it dry thoroughly.
- Add Glass and Backing: Insert the glass or acrylic and secure the backing board. Attach hangers or a stand as needed.
A handmade picture frame is more than just a holder for photos; it’s a piece of art in itself, reflecting the care and effort you put into making it.
For a detailed guide on crafting a custom wood picture frame from scratch, including material selection and assembly tips, check out this DIY guide. This project not only highlights your craftsmanship but also adds a personal touch to any room.
8. Wood Slice Tray
Introduction
Creating a wood slice tray is a fantastic way to bring a bit of nature into your home. These trays are not only practical for serving but also add a rustic charm to any space. Whether you’re using them for afternoon tea or as a centerpiece, they’re bound to catch the eye.
Materials Needed
- A large wood slice
- Sandpaper (medium and fine grit)
- Food-safe wood finish or mineral oil
- Handles (optional)
- Drill (if adding handles)
Steps to Craft Your Wood Slice Tray
- Select Your Wood Slice: Pick a wood slice that fits the size and thickness you desire. Ensure it’s dry to prevent cracking.
- Sand the Surface: Use medium-grit sandpaper to smooth out the top and bottom surfaces. Follow up with fine-grit sandpaper for a polished finish.
- Apply Finish: Coat the wood with a food-safe finish or mineral oil to protect it and enhance the grain. Let it dry completely.
- Add Handles (Optional): If you want to add handles for easier carrying, mark where you’d like them, drill holes, and attach them.
Tips and Tricks
- Preserve the Bark: If you want to keep the bark intact, handle the tray carefully during sanding and finishing.
- Customization: Feel free to personalize your tray with wood burning or engraving for a unique touch.
Wood slice trays are not just functional; they bring a piece of the outdoors inside, making them a perfect gift for nature lovers.
Conclusion
Crafting a wood slice tray is a simple yet rewarding project. With just a few materials and steps, you can create a beautiful and functional piece that makes an excellent gift or addition to your home decor.
9. Wood Clock with Metal Inlay
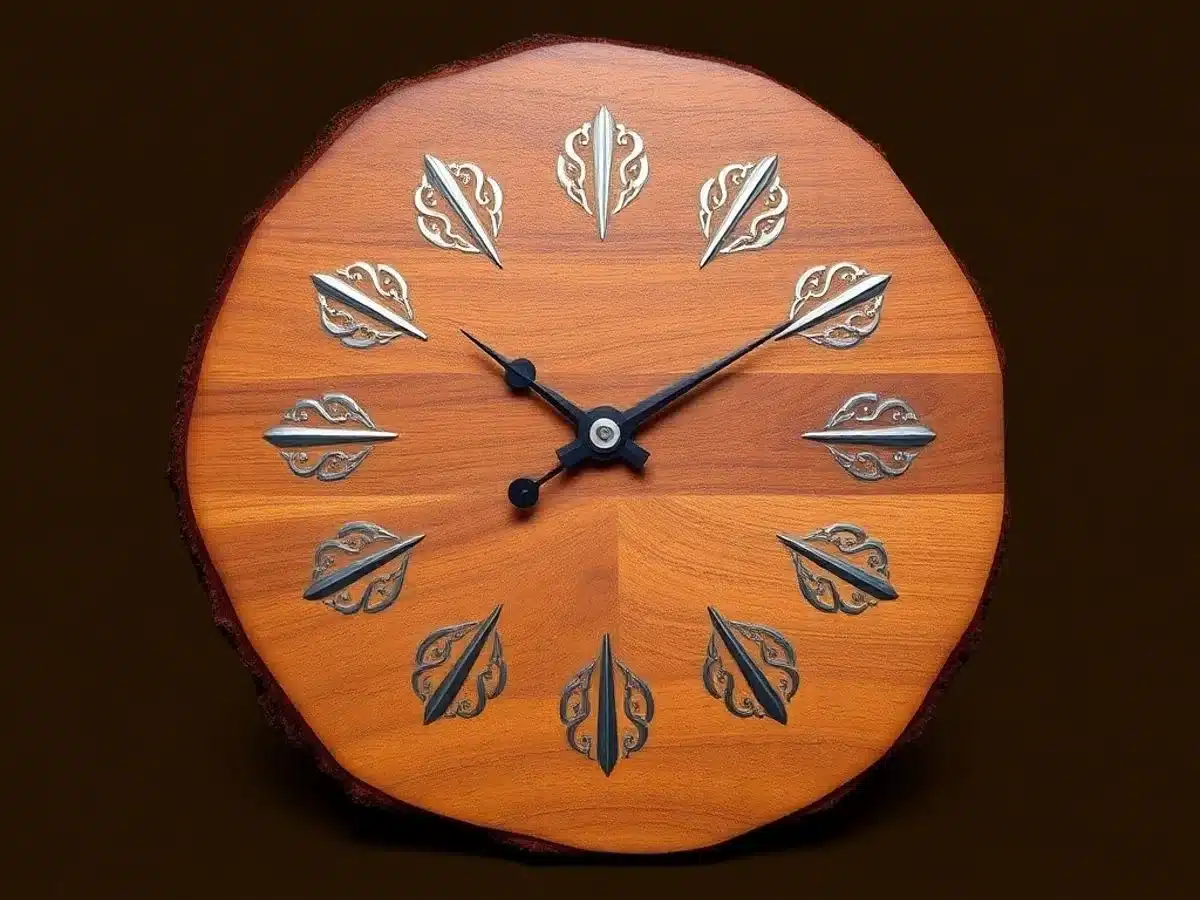
Crafting a wood clock with a metal inlay is a fun project that brings a touch of elegance to any room. This DIY task lets you blend the warmth of wood with the sleekness of metal, creating a unique piece that stands out.
Materials Needed
- Wooden Clock Face: Choose a type of wood that complements your space.
- Metal Inlay: Brass or copper strips work well for a classic look.
- Clock Mechanism Kit: Available at most craft stores.
- Wood Stain or Finish: To protect and enhance the wood’s natural beauty.
Steps to Create Your Clock
- Prepare the Wood: Cut your wood to the desired clock face size. Sand it smooth to remove any rough edges.
- Design the Inlay: Plan your design and carefully carve out the inlay’s path on the wood surface.
- Insert the Metal: Fit the metal strips into the carved path, ensuring they sit flush with the wood.
- Assemble the Clock Mechanism: Drill a hole at the center for the clock hands and attach the mechanism according to the kit instructions.
- Finish the Wood: Apply a wood stain or finish to seal and protect your clock.
Making your own clock allows you to personalize it for the person you are giving it to. It’s not just a functional piece but also a statement of style and creativity.
Consider this project for a thoughtful gift that combines creative woodworking with practical design. Whether it’s for a birthday or a housewarming, a custom clock is sure to impress and delight.
10. Jewelry Holder
Crafting Your Own Jewelry Holder
Creating a jewelry holder is a fantastic way to keep your bling organized and tangle-free. Plus, it’s a thoughtful gift that shows you care. This project is simple enough for beginners yet stylish enough to impress anyone.
Materials Needed
- A piece of driftwood or any reclaimed wood
- Hooks or small nails
- Sandpaper
- Paint or wood stain (optional)
Steps to Create
- Select Your Wood: Choose a piece of driftwood or any wood that has character. It should be long enough to hold several pieces of jewelry.
- Prepare the Wood: Sand down any rough spots to ensure a smooth finish. If you want, you can paint or stain the wood to match the recipient’s decor.
- Attach Hooks: Evenly space out hooks along the wood. These will hold necklaces and bracelets. Use small nails for earrings.
- Mount-It: If you plan to hang it on the wall, attach a picture hanging kit on the back.
Tips for Personalization
- Use colorful hooks or paint them in fun colors.
- Add a personal touch by engraving initials or a small message.
- Consider using decorative knobs instead of plain hooks for a unique look.
A beautifully crafted jewelry hanger using driftwood can transform a simple wall into a stunning display, offering a stylish solution for organizing jewelry while adding a touch of nature to the decor.
This DIY jewelry holder is not only practical but also a great way to add a personal touch to any room. It’s a quick project that you can complete in an afternoon and makes for a heartfelt gift.
Wrapping It Up
So there you have it, ten creative woodworking projects that make perfect gifts. Whether you’re crafting a cozy footrest or a sleek phone stand, these projects are sure to bring a smile to anyone’s face. The best part? You don’t need to be a woodworking pro to pull them off. With a bit of time and effort, you can create something truly special. So grab your tools, pick a project, and start making memories. Happy crafting!
Frequently Asked Questions
What tools do I need for these woodworking projects?
You’ll need basic tools like a saw, drill, and sander. Some projects might need special tools like a chisel or a router.
Can beginners try these woodworking projects?
Yes, these projects are perfect for beginners. They are simple and don’t require advanced skills.
How long does it take to complete a project?
Most projects can be finished in a few hours or over a weekend. It depends on the complexity and your experience.
What type of wood should I use?
You can use any type of wood, but pine and oak are popular choices because they are easy to work with.
Are these woodworking projects expensive to make?
Not really. You can use scrap wood or buy affordable wood from a local store. The cost mainly depends on the materials you choose.
Can I customize these projects?
Absolutely! Feel free to add your own touch with paint, stain, or unique designs.