DIYbrico | Discover, Create, Inspire

10 Inspiring Beginning Woodworking Projects to Kickstart Your Crafting Journey
Explore 10 beginner woodworking projects to start your crafting journey. Perfect for new woodworkers!

Starting in woodworking can be a fun adventure. It’s all about taking simple pieces of wood and turning them into something extraordinary and valuable. Whether you’re looking to spice up your home or try something new, these projects are perfect for beginners. We’ll explore ten easy projects to get you hooked on the craft.
Key Takeaways
- Woodworking is a creative and practical hobby that’s accessible to beginners.
- Simple projects like shelves and picture frames can be a great starting point.
- Creating items like birdhouses and coat racks can enhance your home decor.
- Projects such as planter boxes and serving trays offer both functionality and style.
- Starting with basic tools and materials can make woodworking more approachable.
1. Beginning Woodworking Projects – Two-Tier Live Edge Shelf
Building a two-tier live edge shelf is a fantastic way to bring a bit of nature into your home. This project is all about showcasing the unique beauty of a raw wood slab. The charm of live edge wood is that each piece is a one-of-a-kind creation. You don’t need to be a woodworking expert to pull this off, just a bit of patience and the right materials.
Materials Needed:
- Live edge wood slab
- Metal brackets
- Wood finish (oil or varnish)
- Screws
Steps to Create Your Shelf:
- Select Your Wood: Choose a live edge slab that speaks to you. Look for interesting grains and edges.
- Prepare the Wood: Sand down the surface to remove any rough patches. Apply a wood finish to protect and enhance the natural beauty.
- Attach the Brackets: Secure metal brackets to the wall where you want your shelf to hang. Make sure they are level and spaced appropriately.
- Mount the Shelf: Carefully place the wood slab on the brackets and secure it with screws.
Cost and Value:
- Cost to Make: $2-$10, depending on the wood and materials.
- Retail Price: Up to $120 in stores.
This project is a wonderful way to experiment with woodworking without diving into something overly complicated. You’ll end up with a beautiful and functional piece that adds character to any room.
For a similar project that involves combining a wooden slab with welded metal legs, check out this live-edge slab table project. It’s a great starting point for beginners, offering simplicity and elegance.
2. 3D Wall Art
Creating 3D wall art is a fantastic way to bring depth and character to your home decor. This project is perfect for those who love to experiment with textures and dimensions. The beauty of 3D wall art lies in its ability to transform a plain wall into a stunning visual masterpiece.
Getting Started
To start, gather your materials. You’ll need wooden panels, paint, and some basic tools like a saw and sandpaper. The choice of wood and paint colors can dramatically influence the final look, so take your time selecting them.
Step-by-Step Guide
- Design Your Art: Sketch your design on paper. Think about the layers and how they will interact.
- Cut the Wood: Carefully cut the wood into the desired shapes. Use a saw for precision.
- Assemble the Layers: Begin assembling the pieces, layering them to create the 3D effect.
- Paint and Finish: Once assembled, paint the pieces. Consider using multiple colors to highlight the depth.
- Mount on the Wall: Finally, securely mount your art on the wall using appropriate fixtures.
Tips for Success
- Experiment with Colors: Don’t shy away from bold colors; they can make your art pop.
- Play with Depth: Vary the thickness of the layers for a more dynamic look.
- Use Different Materials: Combine wood with other materials like paper or metal for added texture.
Creating 3D wall art is not just about following instructions; it’s about letting your creativity flow and unleashing creativity with layered 3D wood art to enhance your home decor. Embrace the process and enjoy the transformation of your space.
This project is not only a testament to your crafting skills but also a unique addition to your home that will surely impress your guests.
3. Condiment Holder Picnic Table
Imagine hosting a barbecue and having a miniature picnic table just for your condiments. This quirky creation is not only functional but also a great conversation starter. Made from affordable materials, it’s a project that combines simplicity with charm, perfect for those who enjoy outdoor entertaining.
Materials Needed
- Wood (choose your type based on durability and appearance)
- Wood glue
- Sandpaper
- Wood finish or paint (optional)
Steps to Build
- Cut the Wood: Start by cutting the wood into pieces for the tabletop, legs, and benches of the mini picnic table.
- Assemble the Tabletop: Glue the pieces together to form the tabletop. Ensure it’s sturdy and let it dry completely.
- Attach the Legs and Benches: Secure the legs and benches to the tabletop. Make sure everything is level.
- Sand and Finish: Once assembled, sand the entire piece to ensure smooth edges. Apply a coat of finish or paint if desired.
Cost and Comparison
| Item | Cost to Make | Big Box Store Price |
|---|---|---|
| Condiment Holder Picnic Table | Less than $2 | $57 |
Crafting your own condiment holder picnic table is a delightful way to add a personal touch to your gatherings. It’s a small project with a big impact, offering both utility and a dash of whimsy.
For more beginner-friendly woodworking crafts, explore our extensive collection of ideas and step-by-step guides. These projects are designed to inspire and help you create beautiful, handmade wooden items.
4. Napkin Holder Picnic Table
Crafting a Whimsical Napkin Holder
Creating a napkin holder shaped like a picnic table is a fun and quirky project that adds charm to your dining setup. This project is not only practical but also a delightful conversation starter.
Materials Needed
- Small wooden planks or scraps
- Wood glue or small nails
- Sandpaper
- Wood finish or paint
Steps to Build
- Cut the Pieces: Start by cutting the wood into small pieces. You’ll need four legs, a tabletop, and a small bench for each side.
- Assemble the Table: Use wood glue or nails to attach the legs to the tabletop. Ensure everything is aligned properly.
- Add the Benches: Attach the small benches to each side of the table, making sure they are secure.
- Smooth the Surface: Sand down any rough edges to make the surface smooth and safe.
- Finish It Off: Apply a wood finish or paint to protect the wood and add a polished look.
Cost and Time
| Item | Cost Range | Time Estimate |
|---|---|---|
| Materials | $2 – $10 | 1 hour |
| Pre-made Option (Store) | Up to $120 | N/A |
Building this napkin holder is a simple yet rewarding project that can be completed in an afternoon. It’s a great way to practice basic woodworking skills and add a touch of whimsy to your home.
For more beginner-friendly projects, check out these beginner woodworking projects that are perfect for enhancing your skills and creativity.
5. Wooden Planter Box
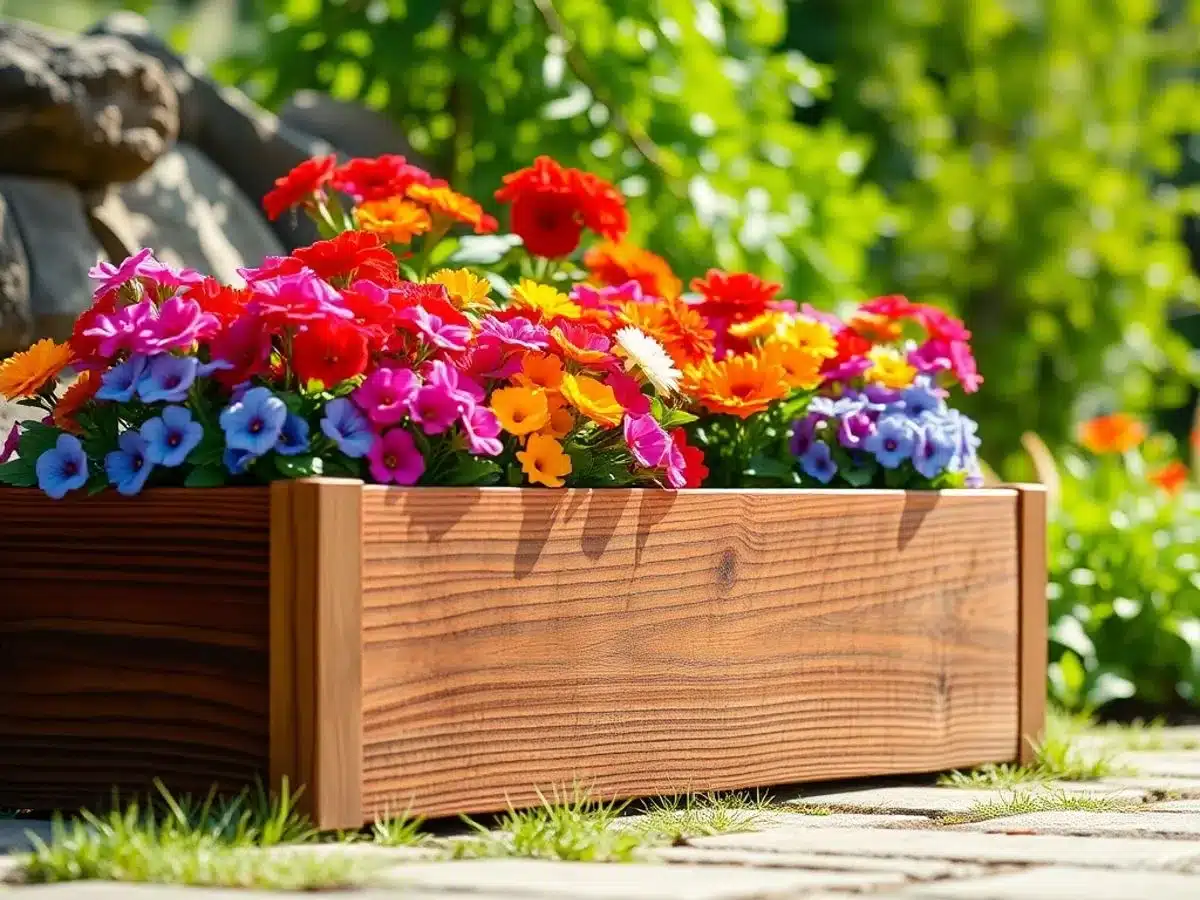
Building a wooden planter box is a fantastic woodworking project for beginners. It’s not only a great way to practice basic woodworking skills but also a chance to create something functional and beautiful for your garden or patio. A wooden planter box can add a touch of nature to any space.
Materials Needed
- Wood planks (cedar or redwood recommended for durability)
- Wood screws
- Sandpaper
- Wood stain or paint (optional)
- Waterproof liner (optional)
Steps to Build
- Cut the wood: Measure and cut the wood planks to your desired size. Typically, you’ll need four pieces for the sides and one for the bottom.
- Assemble the box: Use wood screws to attach the sides to the bottom piece. Ensure the corners are square for a neat finish.
- Sand the edges: Smooth out any rough edges with sandpaper to prevent splinters.
- Finish the box: Apply a wood stain or paint if desired. This step is optional but can help protect the wood from the elements.
- Line the box: If you’re placing the planter outdoors, consider adding a waterproof liner to protect the wood.
Wooden planter boxes are perfect for growing herbs, flowers, or small vegetables. They’re versatile and can be customized to fit any space, making them a great addition to your outdoor decor.
For those interested in detailed guidance, consider exploring this digital plan that includes step-by-step instructions and templates to create a beautiful DIY garden planter.
6. Simple Bookshelf
Building a simple bookshelf is a fantastic way to dip your toes into woodworking. It’s not just functional but also a rewarding project that lets you showcase your skills and creativity. Crafting your own bookshelf can be both satisfying and practical.
Materials Needed
- Wooden planks (pine or oak are good choices)
- Wood screws
- Sandpaper
- Wood stain or paint
Tools Required
- Drill
- Saw (hand or power)
- Measuring tape
- Screwdriver
Step-by-Step Guide
- Measure and Cut: Start by measuring the space where you plan to place the bookshelf. Cut the wooden planks to your desired length and width.
- Assemble the Frame: Use the drill to attach the sides to the top and bottom shelves, forming a rectangular frame.
- Add Shelves: Decide how many shelves you want and evenly space them within the frame. Secure them with screws.
- Sand and Finish: Sand the entire bookshelf to smooth out any rough edges. Apply a wood stain or paint to protect the wood and match your decor.
Building a bookshelf from scratch allows you to customize the size and style to perfectly fit your space and taste. It’s a project that not only enhances your woodworking skills but also adds a personal touch to your home.
For more simple woodworking projects that can be completed over a weekend, check out these ideas to expand your crafting repertoire.
7. Picture Frame
Creating a picture frame is a fantastic woodworking project for beginners. It’s not only simple but also incredibly rewarding. You’ll get to showcase your favorite photos or artwork in something you crafted with your own hands.
Materials Needed:
- Wood of your choice (oak, pine, or even reclaimed wood)
- Wood glue
- Sandpaper
- Saw (hand saw or miter saw)
- Clamps
- Glass or acrylic sheet
- Backing board
- Hanging hardware
Steps to Make a Picture Frame:
- Measure and cut the wood: Decide on the size of the frame and cut four pieces of wood at 45-degree angles to form a rectangle or square.
- Assemble the frame: Apply wood glue to the corners and use clamps to hold them in place until the glue dries.
- Sand the edges: Once the glue is set, sand the edges to ensure they’re smooth and even.
- Insert glass and backing: Cut the glass or acrylic sheet to fit inside the frame, followed by the backing board. Secure them with small nails or clips.
- Attach hanging hardware: Add hooks or wire to the back so you can hang your frame on the wall.
Starting with a picture frame is a great way to explore creative woodworking projects that can be both functional and decorative. It’s a project that helps you practice precision and attention to detail while offering a personal touch to your home decor.
Tips for Success:
- Choose wood that complements the decor of the room where the frame will be displayed.
- Consider adding a finish or paint to enhance the wood’s natural beauty or match your interior style.
- Experiment with different shapes and sizes to create a unique gallery wall.
8. Birdhouse
Building a birdhouse is one of those classic woodworking projects that never goes out of style. It’s a fantastic way to bring a bit of nature to your backyard and provide a safe haven for your feathered friends. Plus, it’s a project that combines creativity with functionality.
Getting Started
Before you dive into crafting your birdhouse, you’ll need to gather some basic materials and tools. Here’s what you’ll need:
- Wooden planks (cedar or pine work best)
- Saw (hand saw or power saw)
- Hammer and nails or a drill and screws
- Sandpaper
- Wood glue
- Paint or wood stain (optional)
Step-by-Step Guide
- Cut the Wood: Start by cutting your wooden planks into the necessary pieces. You’ll typically need six pieces: a front, a back, two sides, a bottom, and a roof.
- Assemble the Base: Use wood glue and nails or screws to attach the sides to the back piece. Then, attach the bottom.
- Create the Entrance: Drill a hole in the front piece for the entrance. Make sure it’s the right size for the birds you want to attract.
- Attach the Front: Secure the front piece to the sides and bottom.
- Add the Roof: Finally, attach the roof pieces. You can either create a flat roof or a sloped one, depending on your design preference.
- Finishing Touches: Sand down any rough edges and apply paint or stain if desired.
Tips for Success
- Choose the Right Location: Hang your birdhouse in a quiet, sheltered spot away from predators.
- Proper Ventilation: Ensure there are small holes for ventilation and drainage to keep the interior dry.
- Regular Maintenance: Clean out the birdhouse after each nesting season to prevent disease.
Crafting a birdhouse is not just about creating a home for birds; it’s about connecting with nature and adding a personal touch to your outdoor space.
This project is perfect for beginners and can be completed in just a weekend. Whether you’re looking to attract colorful songbirds or simply add a charming feature to your garden, a birdhouse is a rewarding woodworking project. Plus, with so many creative DIY birdhouse plans available, you can customize your design to suit your style. Happy building!
9. Serving Tray
Crafting a Functional and Stylish Serving Tray
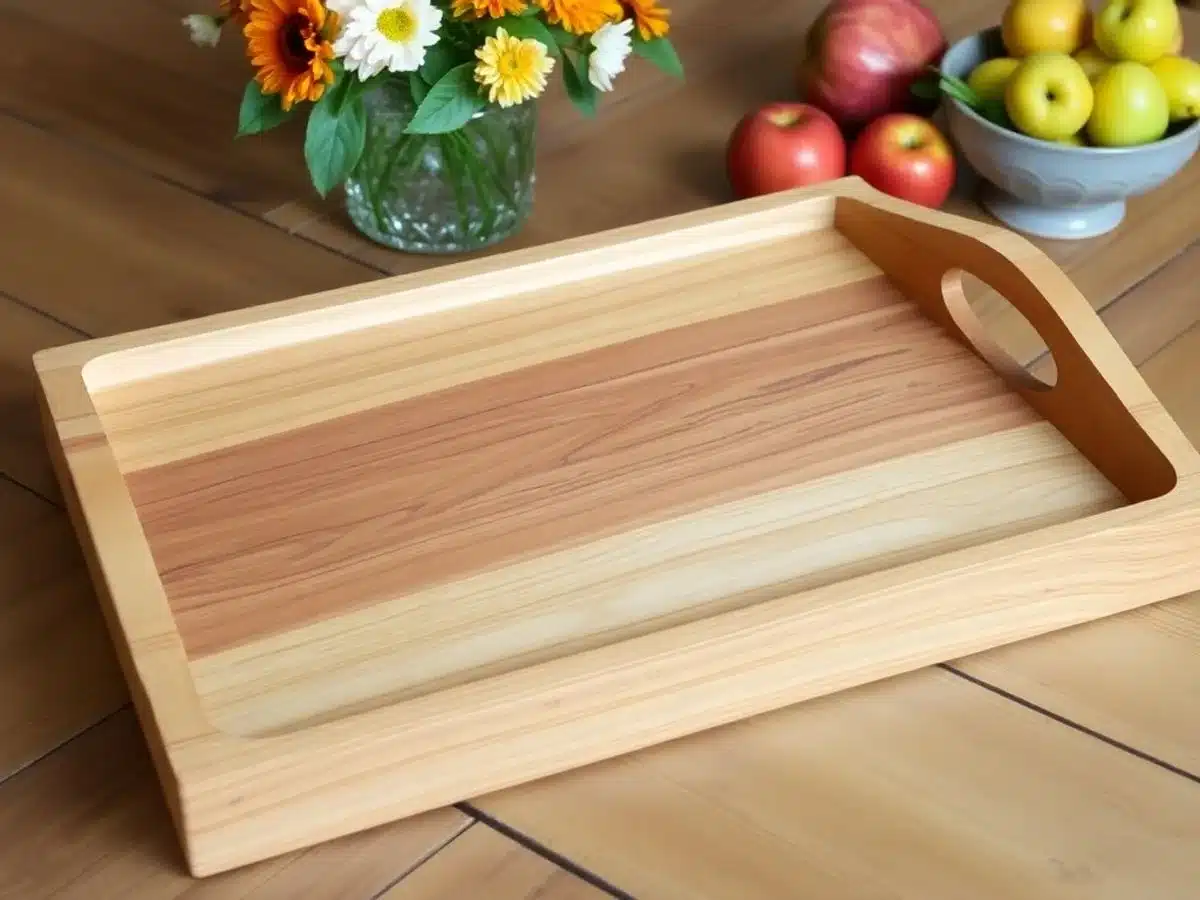
Creating a serving tray is a fantastic project for beginners in woodworking. It’s simple yet allows room for creativity. The beauty of a serving tray lies in its dual role as both a functional item and a decorative piece. Here’s how you can make one that’s uniquely yours.
Materials Needed
- A wooden board (size depends on your preference)
- Handles (metal or wood)
- Wood glue
- Sandpaper
- Wood finish (oil, stain, or paint)
Step-by-Step Guide
- Select Your Wood: Choose a piece of wood that fits your style. Whether it’s rustic or polished, the choice of wood can define the look.
- Cut to Size: Determine the size of your tray and cut the wood accordingly. A standard size might be around 18″ x 12″, but feel free to adjust.
- Sand the Surface: Smooth out the surface and edges with sandpaper. This step is crucial to ensure there are no splinters.
- Attach Handles: Decide on the placement of your handles and secure them with screws. Ensure they are firmly attached to support weight.
- Apply Finish: Protect and enhance the wood with your chosen finish. This not only adds beauty but also durability to your tray.
Crafting a serving tray is not just about utility; it’s about infusing a piece of your personality into something that will be used and admired in everyday life.
Tips for Personalization
- Engrave a Design: Use a wood-burning tool or a stencil to add a personal touch.
- Mix Materials: Consider incorporating metal or glass elements for a modern twist.
- Experiment with Colors: Paint the tray in vibrant colors for a pop of fun or stick with natural tones for elegance.
For more innovative woodworking projects that inspire creativity, explore the diverse handmade wooden creations perfect for both beginners and experienced woodworkers.
10. Coat Rack
Building a coat rack is a fantastic project for beginners. It’s not just practical but also a great way to add a personal touch to your home. A coat rack can transform a cluttered entryway into an organized and welcoming space. Here’s a simple guide to crafting your own:
Materials Needed
- Wooden board (size depends on your space)
- Hooks (as many as you need)
- Sandpaper
- Wood stain or paint
- Screws and wall anchors
Steps to Build
- Select Your Wood: Choose a sturdy piece of wood. Pine or oak works well for this project.
- Cut to Size: Trim the board to fit your desired length. Consider the number of hooks you plan to use.
- Sand the Surface: Smooth out the wood with sandpaper to remove any rough edges.
- Finish the Wood: Apply a stain or paint to match your decor. Let it dry completely.
- Attach the Hooks: Evenly space the hooks along the board and secure them with screws.
- Mount the Rack: Use screws and wall anchors to attach the rack to the wall securely.
Creating your own coat rack not only saves money but also allows you to embark on an inspiring DIY journey that sparks creativity and enhances your crafting skills.
Tips
- Consider adding a shelf on top for extra storage.
- Use decorative hooks for a unique look.
- Experiment with different wood finishes to suit your style.
Wrapping Up Your Woodworking Adventure
So there you have it, ten projects to get your woodworking journey off the ground. Whether you’re crafting a simple shelf or a quirky napkin holder, each project is a step toward mastering the craft. Remember, it’s not just about the end product but the joy of creating something with your own hands. Mistakes will happen, and that’s okay—it’s all part of the learning process. Keep experimenting, stay patient, and most importantly, have fun. Who knows? You might just find your new favorite hobby or even a side hustle. Now, grab your tools and start building!
Frequently Asked Questions
What tools do I need to start woodworking?
To start woodworking, you’ll need some basic tools like a saw, hammer, measuring tape, and sandpaper. As you get more experienced, you might want to add tools like a drill and a sander.
Is woodworking an expensive hobby?
Woodworking can be as affordable or costly as you make it. Start with basic tools and inexpensive wood. As you improve, you might choose to invest in better tools and materials.
How do I choose the right wood for my project?
Choosing the right wood depends on your project. Softwoods like pine are great for beginners, while hardwoods like oak are durable for furniture. Consider the wood’s grain and color too.
Can I do woodworking in a small space?
Yes, you can do woodworking in a small space. Just make sure you have a clear area to work and store your tools. You can start with small projects that don’t need much room.
How do I ensure safety while woodworking?
Always wear safety gear like goggles and gloves. Keep your workspace tidy, follow tool instructions, and never rush your work. Safety should always come first.
What are some easy projects for beginners?
Beginners can try making simple items like a birdhouse, picture frame, or planter box. These projects help you learn basic skills and build confidence.