DIYbrico | Discover, Create, Inspire

10 Creative and Simple Woodworking Projects for Kids to Spark Their Imagination
Explore 10 simple woodworking projects for kids to boost creativity and fun. Perfect for young builders!

Woodworking with kids is a blast. It’s like mixing fun with a bit of learning. You don’t need fancy tools or skills, just a few bits of wood and some imagination. These projects are all about keeping it simple and letting the kids take the lead. From toy cars to crayon holders, there’s something here that’ll spark creativity and maybe even teach a thing or two. Let’s dive into these ten easy projects that kids will love.
Key Takeaways
- Woodworking projects for kids can be both fun and educational without needing complex tools.
- Simple projects like wooden toy cars or building blocks can spark creativity and imagination in children.
- DIY dollhouses and miniature furniture allow kids to personalize their play spaces.
- Wooden puzzles and memory blocks can boost cognitive skills while being entertaining.
- Creating a crayon holder can teach kids about organization and crafting basics.
1. Simple Woodworking Projects for Kids – Wooden Toy Cars
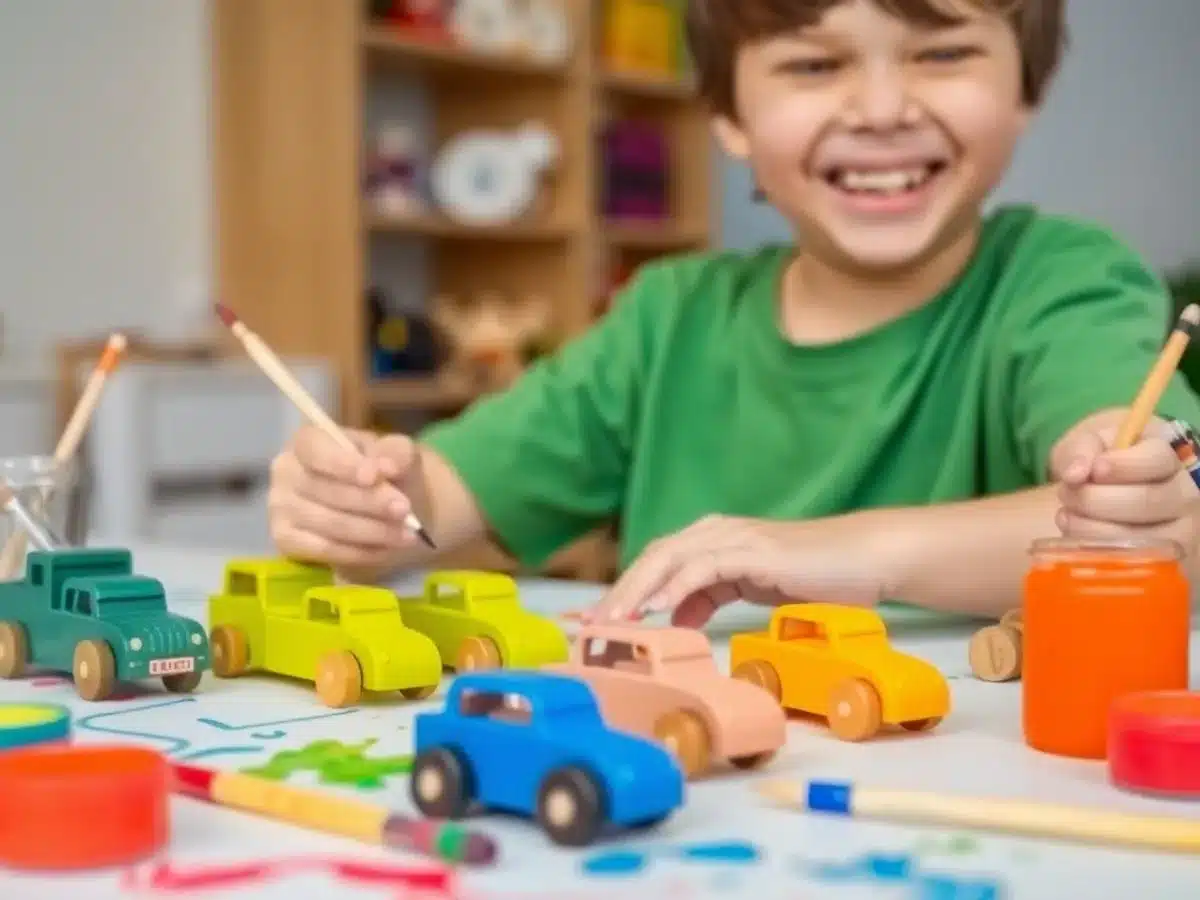
Creating wooden toy cars is a delightful project that blends creativity with hands-on learning. Kids can design their own miniature vehicles, choosing the shape, size, and color. This activity not only sparks imagination but also teaches basic woodworking skills.
Steps to Make Wooden Toy Cars
- Select Your Wood: Start with a piece of softwood, like pine, which is easy for kids to work with.
- Design the Car Shape: Sketch out the car’s design on the wood. Keep it simple to make cutting easier.
- Cut the Wood: Using a small hand saw, carefully cut along the lines of your design.
- Sand the Edges: Smooth the edges with sandpaper to make the toy safe for little hands.
- Paint and Decorate: Use non-toxic paints to add color and personality to your car.
- Attach Wheels: Drill small holes for the axles and attach the wheels, ensuring they spin freely.
Watching a child play with a toy they’ve made themselves is incredibly rewarding. It’s not just about the finished product, but the joy of the process.
Benefits of Building Wooden Toy Cars
- Enhances Creativity: Designing and decorating encourages artistic expression.
- Builds Fine Motor Skills: Cutting, sanding, and painting improve hand-eye coordination.
- Encourages Problem-Solving: Figuring out how to assemble the car teaches basic engineering concepts.
For more beginner-friendly woodworking projects, consider exploring these creative ideas that are perfect for sparking imagination and enhancing home decor.
2. Simple Building Blocks
Building blocks are a timeless and engaging project that encourages creativity and hands-on learning for kids. These simple wooden blocks are more than just toys; they’re the building blocks of imagination. With a few basic materials and some creativity, you can create a set of blocks that will provide endless hours of fun.
Materials Needed
- Wood scraps: Choose softwoods like pine or cedar, which are easy to cut and sand.
- Sandpaper: Ensure all edges are smooth to keep the blocks safe for small hands.
- Non-toxic paint or wood stain: Add color or keep them natural for a classic look.
Steps to Create
- Gather Your Supplies: Start by collecting wood scraps, sandpaper, and paint. Make sure your wood is free from nails and other hazards.
- Cut the Blocks: Use a saw to cut the wood into various shapes and sizes. Consider squares, rectangles, and triangles for versatility.
- Smooth the Edges: Sand each block thoroughly. This step is crucial for safety, ensuring no sharp edges remain.
- Decorate: Paint the blocks with non-toxic paint. You could also leave them natural or add patterns with a wood stain.
- Let Them Dry: Allow the paint or stain to dry completely before handing them over to the kids.
Simple building blocks are a fantastic way to introduce children to the basics of construction and design. Watching them stack, balance, and build with their own smooth pine pieces is not only rewarding but also an excellent way to enhance their problem-solving skills.
These blocks can be customized to match your child’s interests, whether that means painting them in bright colors or leaving them plain for a more rustic feel. With just a few tools and a bit of effort, you’ll have a set of building blocks that can be passed down through generations.
3. DIY Dollhouse
Building a DIY dollhouse is a fantastic woodworking project that can ignite a child’s creativity and provide hours of imaginative play. The process is not only fun but also educational, teaching kids basic woodworking skills and the joy of creating something with their own hands.
Materials Needed
Before starting, gather the essential materials to ensure a smooth building process:
- Plywood: Forms the main structure for walls and floors.
- Wood glue: Secures joints and components together.
- Sandpaper: Smooths out edges and surfaces.
- Paint or wood stain: Adds the finishing touches for aesthetics.
- Craft foam or felt: Used for creating soft furnishings and carpets.
- Miniature furniture: Adds character and realism.
- Decorative paper: Ideal for wallpapering the interior.
Step-by-Step Construction Guide
- Cut the Base and Walls: Start by measuring and cutting the plywood for the base and walls. Precision is crucial here as it forms the foundation of your dollhouse.
- Assemble the Structure: Use wood glue and screws to attach the walls to the base. Make sure everything is square and sturdy.
- Create Roof Panels: Cut and attach the roof panels. You can choose between a gable or flat style depending on your vision.
- Add Windows and Doors: Cut out spaces for windows and doors. This is where creativity shines, allowing you to design openings that invite play.
Building a dollhouse is more than just an art project; it’s a way to explore creativity and craftsmanship. Each step, from cutting to assembly, invites a new level of imagination.
Personalization and Decoration Ideas
Once the basic structure is complete, it’s time to personalize and decorate. This is the most exciting part, where you can let your imagination run wild. Consider these ideas:
- Paint the Exterior: Choose bright colors or pastels to give your dollhouse a unique look.
- Add Furniture: Use miniature furniture to make the dollhouse feel like a real home.
- Decorate the Interior: Use decorative paper as wallpaper or add small rugs made from craft foam.
Creating a DIY dollhouse not only provides a special keepsake for your child but also encourages them to explore their artistic side. It’s a project that combines learning with fun, making it a perfect woodworking activity for kids.
4. Wooden Animal Puzzles
Let’s dive into the world of wooden animal puzzles, a fantastic project for kids that combines fun with learning. These puzzles are not just toys; they are tools that help kids develop essential skills while having a blast.
Crafting wooden animal puzzles is a rewarding experience that offers both educational and creative benefits for children.
Benefits of Animal Puzzles
Wooden animal puzzles are more than just engaging playthings. They offer a range of benefits that can enhance a child’s development:
- Cognitive Skills: As children piece together each part of the puzzle, they improve their problem-solving abilities and spatial awareness.
- Fine Motor Development: Handling and fitting the pieces together helps boost hand-eye coordination and dexterity, which are crucial for tasks like writing.
- Creativity and Imagination: These puzzles encourage kids to invent stories and scenarios, sparking their creativity.
- Social Interaction: Working on puzzles together promotes teamwork and communication, helping kids learn to collaborate and share ideas.
Materials Needed Overview
To create your own wooden animal puzzles, you’ll need a few essential materials:
- Plywood or Hardwood: Serves as the base for cutting puzzle pieces.
- Wood Glue: Used to bond pieces securely.
- Sandpaper: For smoothing the edges.
- Non-toxic Paint: Adds color and finish to the puzzles.
You’ll also need some basic tools like a jigsaw for cutting shapes, a drill for making holes, and a paintbrush for applying finishes. Remember to wear protective eyewear and gloves to ensure safety while crafting.
Step-by-Step Assembly Guide
Creating wooden animal puzzles is a fun project that you can enjoy together with your kids. Here’s how to get started:
- Design the Puzzle: Begin by sketching your chosen animal on paper. Think about vibrant colors and interesting shapes that will captivate young minds.
- Cut the Pieces: Carefully cut out the shapes from the wood using a jigsaw for smooth curves, ensuring each piece fits snugly together.
- Sand the Edges: Once cut, sand down the edges of each piece. This not only smooths out rough spots but also makes them safe for little hands.
- Paint and Finish: Finally, unleash your creativity by painting the pieces. Use non-toxic paints for a safe finish, and seal it with a clear coat to protect your artwork.
By choosing to craft these engaging toys, you’re not only making learning fun but also preparing your children for a future that values creativity and critical thinking. Let’s embrace the joy of play and support their growth with these delightful animal puzzles!
5. Toy Tool Set
Building a toy tool set is a fantastic way to engage kids in imaginative play while teaching them about different tools and their uses. This project not only brings joy but also helps in developing motor skills and hand-eye coordination.
What’s in the Set?
Creating a basic set of wooden tools can be both fun and educational. Here’s a list of tools you might include:
- Hammer: Perfect for pretend pounding and building.
- Screwdriver: Great for “tightening” and “loosening” screws.
- Saw: Safe for pretend cutting and crafting.
Crafting the Tools
When crafting these tools, consider the following steps to ensure they are safe and enjoyable for kids:
- Design: Start by sketching each tool on paper. Simple shapes work best for young children.
- Cutting: Use a 4-in-1 woodworking station to cut out each tool’s shape from softwood. This station typically includes a jigsaw, lathe, drill, and sander, all designed with safety in mind.
- Sanding: Smooth out any rough edges to make sure the tools are safe to handle.
- Painting: Use non-toxic paints to add vibrant colors, making the tools more appealing.
Crafting a toy tool set together with your kids can be a rewarding experience. Not only do they learn about the tools, but they also get to enjoy the process of making something with their own hands. It’s a wonderful way to spend quality time together and spark their creativity.
6. Miniature Furniture
Creating miniature furniture is a delightful woodworking project that invites kids to explore their creativity. These tiny replicas not only spark imagination but also teach valuable skills. Let’s dive into some fun ideas:
- Mini Chairs: Simple yet elegant, these chairs can be made to fit any doll or action figure. Kids can paint them or add fabric cushions for a personalized touch.
- Tiny Tables: Whether it’s a coffee table or a dining table, the options are endless. Encourage kids to decorate them with paint or small tablecloths.
- Bookshelves: Crafting a miniature bookshelf is a fantastic way to inspire organization and a love for books. Kids can arrange their favorite tiny stories on these shelves.
- Dressers: Building a small dresser allows kids to play with functionality in design. It’s a perfect spot for storing their doll’s clothes or small treasures.
Miniature furniture projects are a wonderful way for kids to express themselves while learning about design and craftsmanship. Each piece they create becomes a cherished part of their play world.
This project not only encourages creativity but also helps develop fine motor skills and patience. As kids measure, cut, and assemble these tiny pieces, they gain confidence in their abilities. Plus, it’s a great opportunity for parents and kids to bond over a shared activity. For more weekend woodworking projects that are both simple and rewarding check out these nine simple woodworking projects that can be completed over a weekend.
7. Stacking Ring Toy
Creating a stacking ring toy is a fantastic project for kids that combines fun with learning. This classic toy not only entertains but also helps develop hand-eye coordination and problem-solving skills. Here’s how you can make one:
- Gather Materials: Start by collecting colorful wood dowels and rings of various sizes. You might want to use this classic ring stacker pattern for detailed instructions on creating rings that fit perfectly over the post.
- Cut the Base: Cut the dowel to the desired height for a sturdy base. Make sure it’s tall enough to hold all the rings comfortably.
- Design the Rings: Create rings in different sizes and colors. This variety will help children learn about size differentiation and sequencing.
- Paint and Finish: Use non-toxic paint or natural stains to ensure safety. Once painted, sand all pieces smoothly to avoid any sharp edges.
- Assemble the Toy: Finally, stack the rings onto the dowel, and your toy is ready!
This project is not just about crafting a toy; it’s about crafting memories and learning experiences that last a lifetime. The joy of making something with your own hands is unmatched.
So, gather your tools and materials, and let’s get crafting! This stacking ring toy will surely be a hit with the little ones, offering endless fun and learning possibilities.
8. Pull-Along Animals
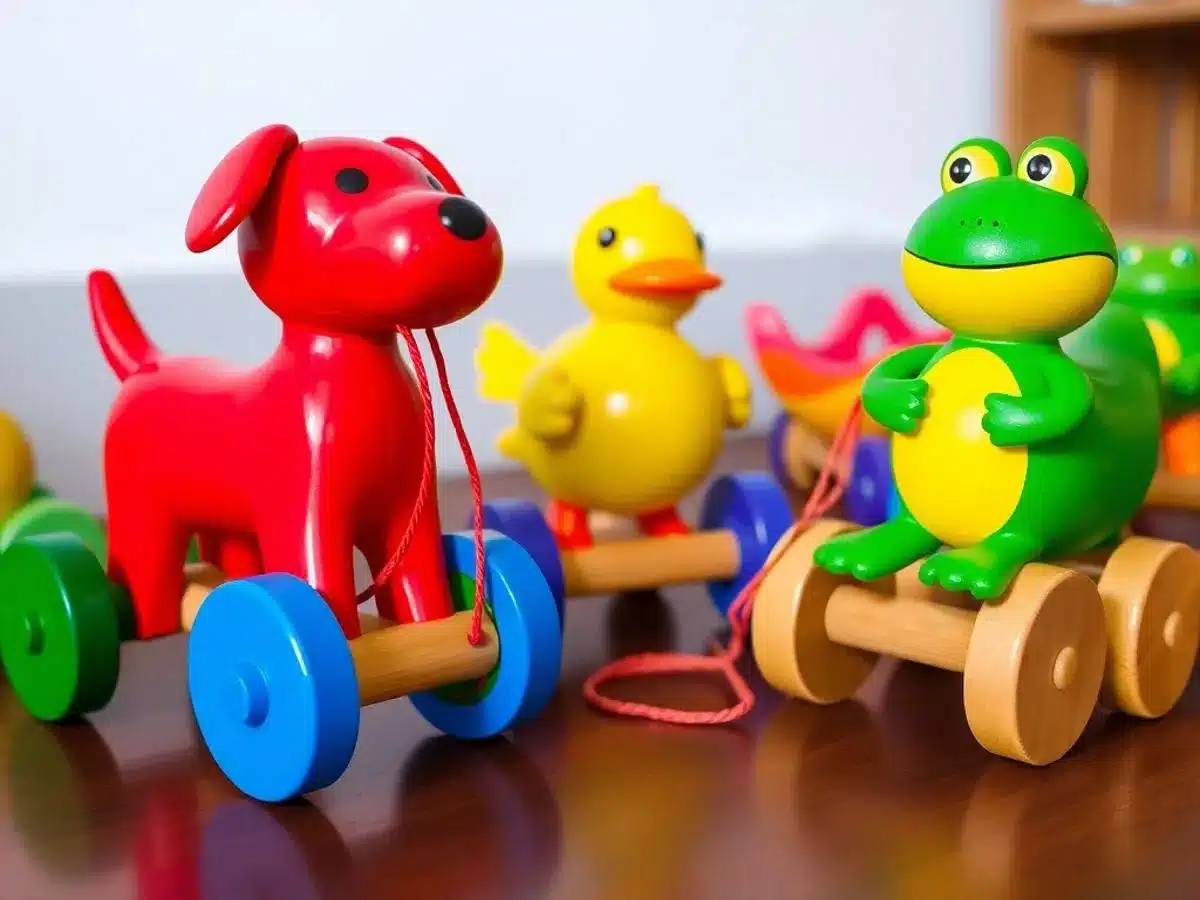
Creating pull-along animals is a delightful woodworking project that combines creativity with play. These charming toys not only spark imaginative play but also encourage kids to explore movement and coordination. Together, we can design a wide variety of pull-along animals that will capture the hearts of young ones.
How to Make Pull-Along Animals
- Choose a Theme: Decide on which animal to create—be it a whimsical elephant, a playful puppy, a cheeky cat, or a colorful bird. The choice of animal can make the toy more personal and engaging for the child.
- Gather Materials: Collect wood pieces, wheels, paint, and rope. It’s important to use non-toxic finishes to keep it safe for little hands. You might also want to add some felt or fabric for extra texture.
- Craft the Body: Cut and shape the wood into your desired animal form. This is where creativity really shines. You can get creative with colors and textures to bring your animal to life.
- Assemble and Decorate: Attach wheels and rope, then decorate with paint or decals. This step is all about bringing your pull-along animal to life. Kids will love adding their personal touch.
Pull-along animals are a fantastic way to combine creativity and play. They not only entertain but also help develop fine motor skills, making them a perfect addition to any child’s playtime.
For more creative ideas, you can check out fun and easy paper crafts for kids, which are perfect for sparking creativity and imagination on a rainy day.
9. Memory Game Blocks
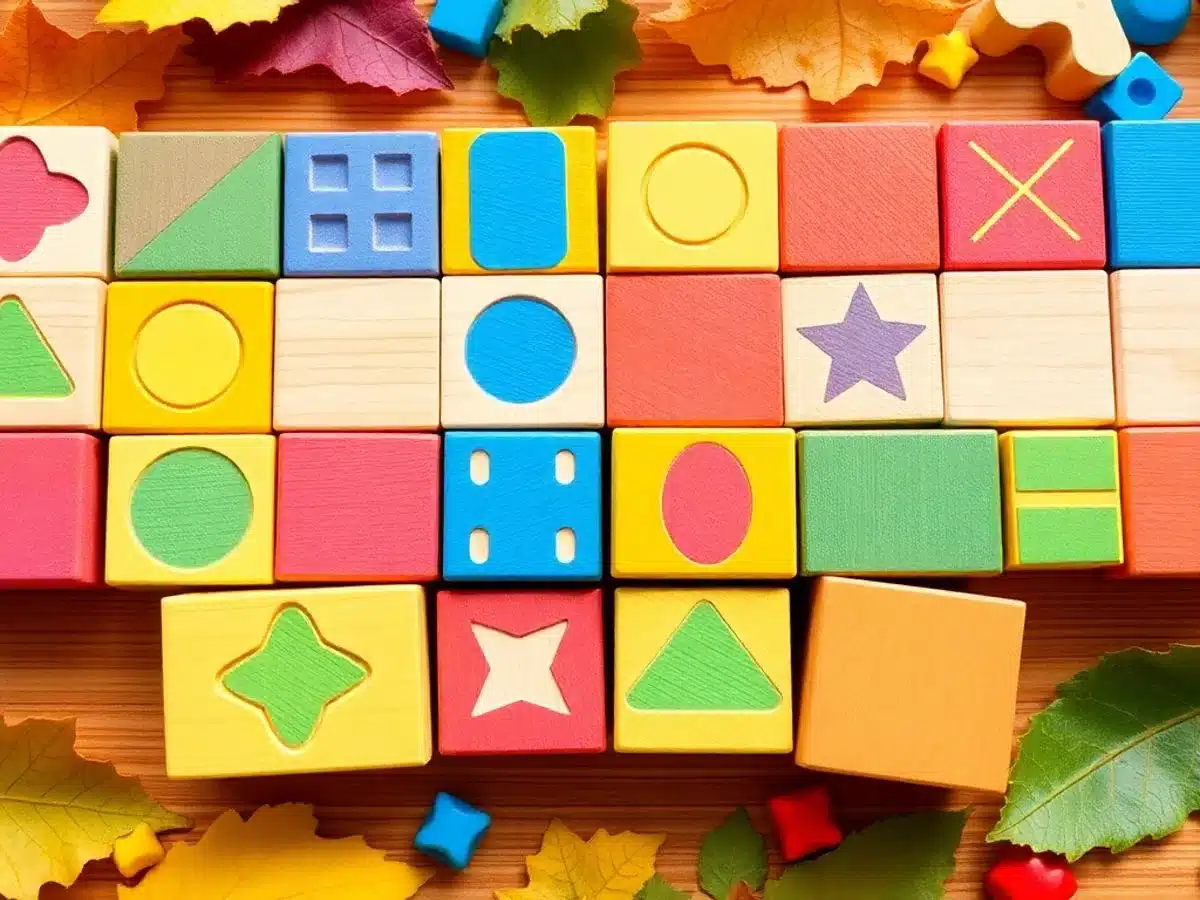
Creating memory game blocks is a fun and educational woodworking project for kids. This activity not only stimulates creativity but also helps improve memory skills. Here’s how you can make your own memory game blocks at home.
Materials Needed
- Wood Blocks: You can either purchase pre-cut blocks or cut your own from larger pieces of wood. Ensure they are of uniform size for consistency.
- Sandpaper: Use fine-grit sandpaper to smooth the edges and surfaces, making them safe for children.
- Non-toxic Paint or Markers: Choose vibrant, non-toxic paints or markers to decorate the blocks. This is where the creativity shines!
- Sealant: A child-safe sealant will protect the artwork and ensure the blocks last through many play sessions.
Step-by-Step Instructions
- Cut the Blocks: If you’re starting with larger wood pieces, cut them into 2-inch cubes.
- Sand the Edges: Smooth out the edges and surfaces with sandpaper to make them kid-friendly.
- Paint the Blocks: Let your creativity flow! Paint each side of the blocks with different colors or patterns.
- Create Pairs: Ensure each design has a matching pair to make the memory game functional.
Crafting memory game blocks offers a unique chance for kids to engage in imaginative play while developing their cognitive skills. It’s a project that promises fun and learning in equal measure.
Consider incorporating elements from a high-quality pattern-matching board game to enhance the experience. This could add an extra layer of challenge and enjoyment for the whole family.
10. Crayon Holder
Creating a crayon holder is a fantastic woodworking project for kids that combines functionality with creativity. This project not only helps organize crayons but also encourages kids to personalize their workspace.
Materials Needed
- Wood: Opt for a lightweight wood like pine; it’s easy to work with and perfect for young hands.
- Paint or Stain: Choose vibrant colors or natural finishes to enhance the holder’s appearance.
- Sandpaper: Essential for smoothing edges to ensure safety and comfort.
- Drill and Bits: Used to create holes for the crayons, making sure they fit snugly.
Step-by-Step Instructions
- Cut the Wood: Begin by cutting the wood to your desired size. A standard size might be around 8 inches long and 4 inches wide.
- Sand the Edges: Smooth out all the edges with sandpaper to prevent any splinters.
- Drill the Holes: Carefully drill holes into the wood, spacing them evenly. The holes should be deep enough to hold crayons securely.
- Paint or Stain: Let your child choose colors and paint or stain the wood. This is where their creativity can shine!
- Personalize: Encourage your child to add their name or designs to make it truly their own.
Crafting a crayon holder not only sparks creativity but also teaches essential woodworking skills. It’s a simple yet rewarding project that kids will love.
Benefits of the Project
- Organization: Keeps crayons neatly stored and easily accessible.
- Creativity: Allows kids to express themselves through design and color choices.
- Skill Development: Introduces basic woodworking techniques in a fun and engaging way.
For more creative ideas, check out 10 unique and engaging paper craft ideas that are perfect for sparking imagination in kids. These projects are excellent for family activities or individual exploration.
Wrapping Up Our Woodworking Adventure
So, there you have it! Ten fun and easy woodworking projects that are perfect for kids. These activities aren’t just about building things; they’re about building memories and skills. From making toy cars to crafting puzzles, each project is a chance for kids to learn and grow. Plus, it’s a great way to spend time together, away from screens. So grab some wood, gather your tools, and let the creativity flow. Who knows? You might just inspire the next generation of builders and creators. Happy crafting!
Frequently Asked Questions
What is the right age for kids to start woodworking?
Kids can start simple woodworking projects around 5 or 6 years old. Begin with easy tasks and basic tools, and as they grow, introduce more complex projects.
Which tools are safe for children to use in woodworking?
Hand tools like a small hammer, child-safe saw, and sandpaper are great for kids. They are safe and help kids learn without the risks of power tools.
How can I ensure my child’s safety during woodworking activities?
Always supervise children, use age-appropriate tools, and teach them to wear safety gear like goggles and gloves. A clean, organized workspace is also important.
Can woodworking projects be done indoors?
Yes, with proper ventilation and dust control, small woodworking projects can be safely done indoors. Choose projects that are manageable in size to reduce mess.
Where can I find free woodworking plans for kids?
Websites like Pinterest, Instructables, and Ana White offer free plans. Local libraries and community forums are also great resources for ideas and tips.
What are the benefits of woodworking for kids?
Woodworking helps kids develop creativity, problem-solving skills, and hand-eye coordination. It also teaches patience and gives them a sense of accomplishment.