DIYbrico | Discover, Create, Inspire

Mastering the Crochet Magic Ring: A Step-by-Step Guide for Beginners
Learn to crochet a magic ring with this beginner-friendly guide, ensuring a tight, gap-free start to your projects.

Table of Contents
If you’re new to crochet, you’ve probably heard of the magic circle technique. It’s a handy method for starting projects that need a tight, gap-free center, like amigurumi or hats. While it might sound a bit tricky, once you get the hang of it, you’ll wonder how you ever crocheted without it. This guide will walk you through everything you need to know about the crochet magic ring, from what it is to how to master it. Let’s get started!
Key Takeaways
- The crochet magic ring creates a tight center for your projects.
- It’s great for starting items like hats and amigurumi without gaps.
- Practice makes it easier to maintain tension and avoid mistakes.
- Choose the right yarn and hook size to match your project.
- Using stitch markers can help keep track of your rounds.
Understanding the Crochet Magic Ring
What Is a Magic Circle in Crochet?
Okay, so you’ve probably heard about this thing called a magic circle, or magic ring, in crochet. What’s the deal? Well, it’s basically a way to start crochet projects that are worked in the round, like hats, amigurumi (those cute little stuffed toys), or even blankets. The cool thing about it is that it lets you close up the center super tight, so you don’t end up with that annoying hole in the middle. It’s like magic, hence the name!
Benefits of Using a Magic Circle
Why bother with a magic circle when you could just chain a few stitches and join them into a ring? Good question! Here’s why the magic circle is often the better choice:
- No more gaping holes: Seriously, that’s the biggest win. It gives your projects a much cleaner, more professional look.
- Adjustable size: You can pull the tail to make the center tighter or looser, which is great for getting the exact size you need.
- Versatility: It works for all sorts of projects, big or small.
I remember when I first started crocheting, I always struggled with those center holes. Then I learned about the magic circle, and it was a total game-changer. My amigurumi looked so much better, and I felt like a real crochet pro!
Common Uses for the Magic Ring
So, where can you use this magical technique? Here are a few ideas:
- Amigurumi: Perfect for starting the head, body, or any other round part of your little creatures. You can master the half-double crochet stitch to make the perfect base for your amigurumi.
- Hats: Keeps the top of your hat nice and snug.
- Coasters: Make a flat, even base for your drinks.
- Granny squares: A great way to start a granny square with a solid center.
- Mandalas: Ideal for creating intricate, circular designs.
Essential Tools for the Crochet Magic Ring
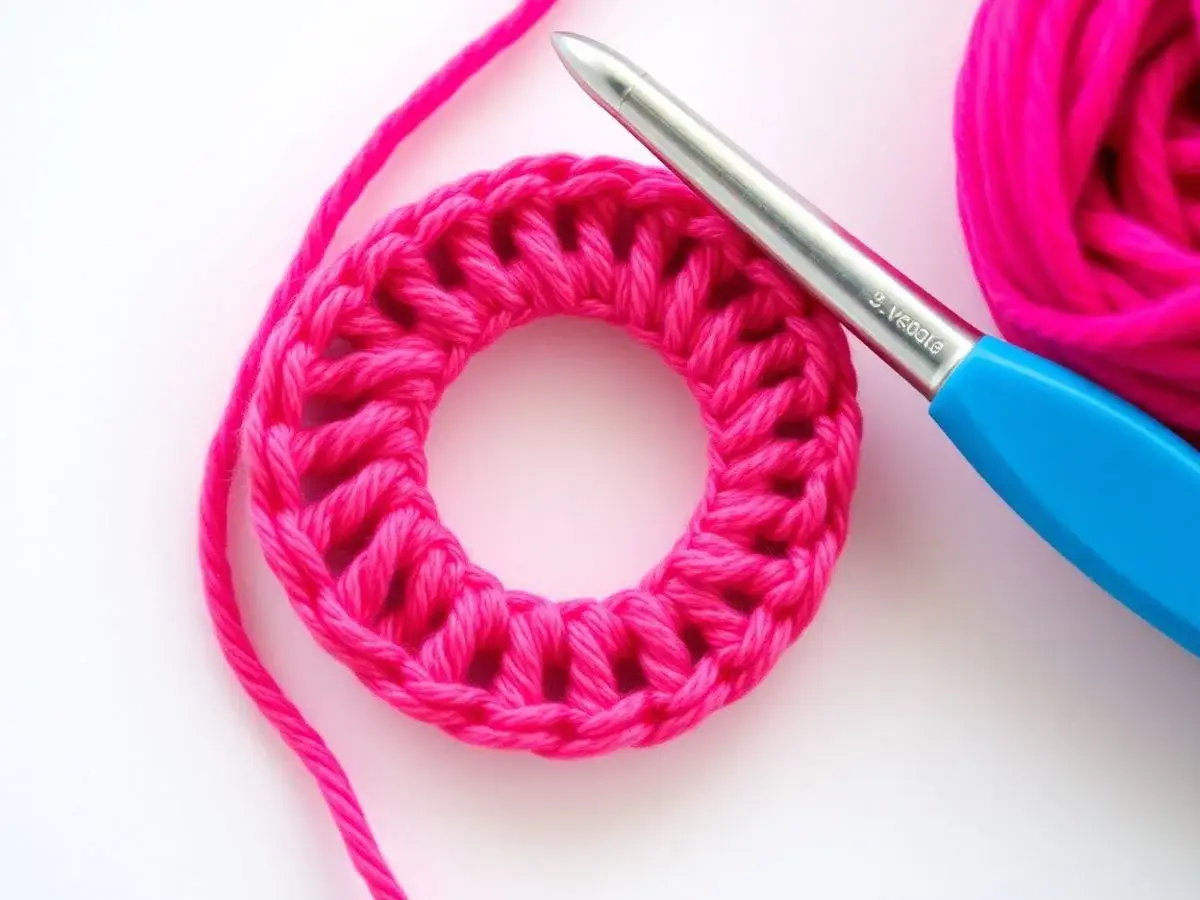
Alright, so you’re ready to tackle the magic ring? Awesome! Before you jump in, let’s make sure you have all the right tools. Having the right stuff can really make a difference, trust me. It’s like trying to bake a cake without a mixing bowl – possible, but way harder than it needs to be. Let’s break down what you’ll need.
Recommended Yarn Types
Okay, yarn. This is where things get interesting. For beginners, I always suggest sticking with a medium-weight yarn, sometimes called worsted weight. It’s easy to handle, and you can really see your stitches. Light colors are also great when you’re starting out because they make it easier to see what you’re doing.
Here’s a quick rundown:
- Worsted Weight Yarn: A solid choice for beginners. Easy to find and work with.
- DK Yarn: A bit lighter than worsted, good for smaller projects.
- Cotton Yarn: Great for washcloths and other items that need to be durable.
Don’t be afraid to experiment with different fibers once you get the hang of it. Wool, acrylic, even blends can give your projects a unique look and feel. Just remember to adjust your hook size accordingly!
Choosing the Right Hook Size
Now, about hooks. The hook size you need really depends on the yarn you’re using. The yarn label will usually tell you what size hook is recommended. If you’re using worsted weight yarn, a size H/8 (5.0 mm) hook is a good starting point. If you’re using a thicker yarn, you’ll need a bigger hook, and vice versa. It’s all about finding the right balance so your stitches aren’t too tight or too loose. You can find a crochet kit online if you don’t have one already.
Additional Tools You Might Need
Okay, so yarn and a hook are the biggies, but there are a few other things that can come in handy:
- Scissors: For cutting yarn, obviously.
- Tapestry Needle: This is for weaving in those pesky ends when you’re done. Nobody likes loose ends!
- Stitch Markers: These are super helpful for keeping track of your rounds, especially when you’re working in the round. Trust me, you’ll thank me later.
- Measuring Tape: To make sure your project is the right size.
Having these tools will make your crocheting experience much smoother. Happy crocheting!
Step-by-Step Instructions for the Crochet Magic Ring
Okay, let’s get into the nitty-gritty of actually making a magic ring. It might seem a little tricky at first, but trust me, with a bit of practice, you’ll be whipping these out like a pro. I remember when I first started, it took me ages to get it right, but now it’s second nature. So don’t get discouraged if it doesn’t click right away!
Creating the Initial Loop
Alright, first things first, you gotta make that initial loop. This is where the “magic” starts, so pay attention! Don’t pull it too tight, you need a nice, loose loop to work with.
Here’s how I usually do it:
- Hold the yarn in your hand, leaving a tail of about 4-6 inches. This tail is important, so don’t make it too short!
- Form a loop with the yarn, making sure the tail end is lying over the working yarn (the yarn coming from the skein).
- Cross the working yarn over the tail, creating a loop. This is your magic ring foundation.
Inserting Your Hook and Yarn Over
Now for the fun part – getting that hook in there! This step is crucial for securing the loop and setting you up for your first round of stitches. It’s like laying the groundwork for a house; you want to make sure it’s solid.
- Hold the loop you just made with your thumb and middle finger to keep it from unraveling. Seriously, don’t let go!
- Insert your crochet hook into the loop. You’re going under both strands of yarn that form the loop.
- Yarn over (wrap the working yarn around your hook) and pull through the loop. You should now have one loop on your hook.
- Chain 1. This chain doesn’t count as a stitch, it’s just there to secure the ring. Think of it as a little knot to hold everything in place.
Completing Your First Round of Stitches
Okay, you’ve got your loop, you’ve got your hook, now it’s time to actually crochet something! This is where your project starts to take shape, so get ready to see some progress. We’re going to work our first round of stitches into that magic ring we created. The number of stitches you need will depend on your pattern, but for this example, let’s say we’re doing 6 single crochet stitches.
- Work your desired number of stitches (in this case, 6 single crochet stitches) into the magic ring. Make sure you’re crocheting over both strands of yarn that form the loop. This is important for closing the ring later.
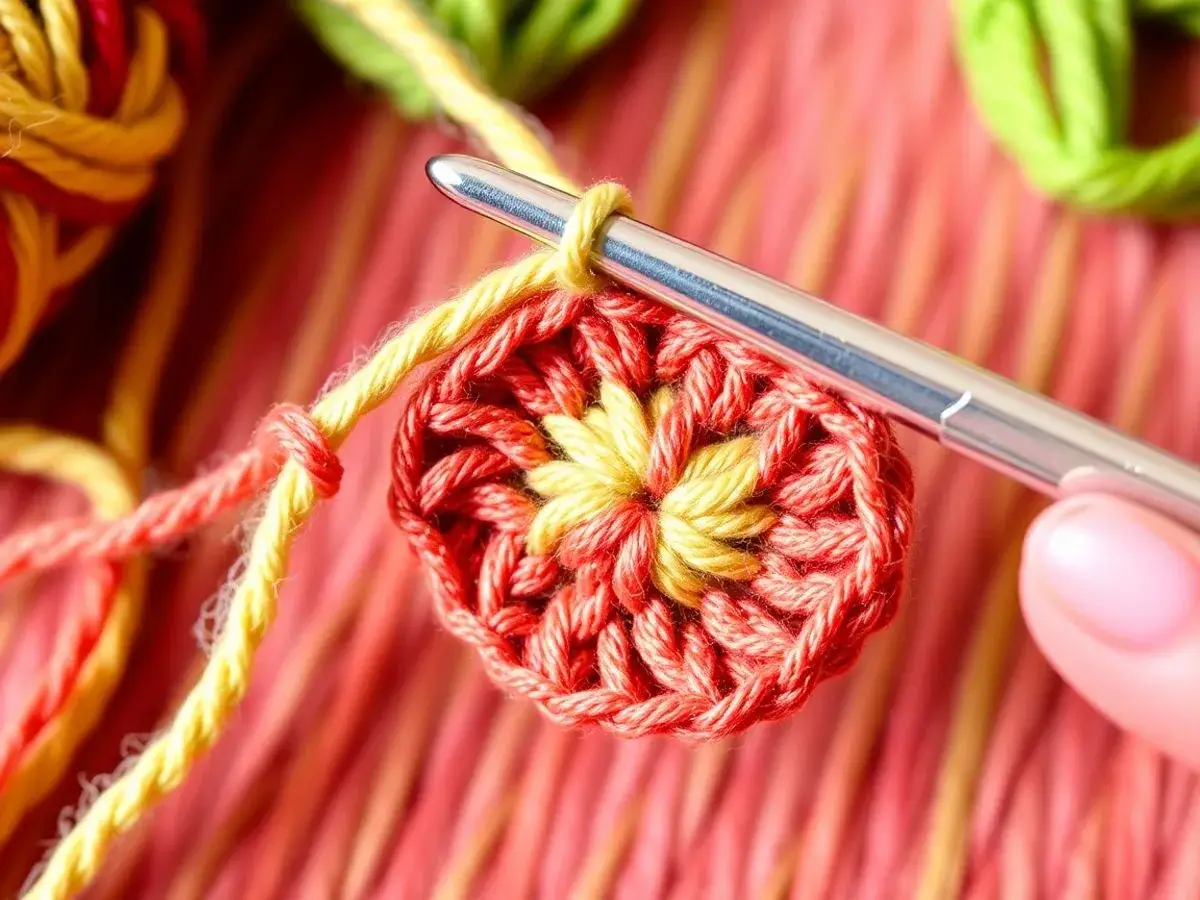
- Once you’ve completed your stitches, gently pull the yarn tail to tighten the magic ring. You’ll see the center of the ring close up. Keep pulling until it’s nice and snug. This is the “magic” part! You’ve eliminated that pesky hole that you often get with other starting methods. If you are having trouble with the magic ring technique, there are other methods to try.
- To join the round, slip the stitch into the first stitch you made. This creates a seamless circle. Now you’re ready to move on to the next round of your project!
The magic ring can be a bit fiddly at first, but don’t give up! Keep practicing, and you’ll get the hang of it. And remember, even if your first few attempts aren’t perfect, they’re still practice. Every crocheter starts somewhere!
Tips for Perfecting Your Magic Circle
Maintaining Tension
Tension is super important! Consistent tension is key to a neat and even magic circle. If your tension is too tight, it’ll be hard to pull the circle closed. Too loose, and you’ll end up with a gappy center. Try to keep your yarn flowing smoothly as you crochet. It might take a few tries to find what works best for you, but it’s worth it. Think of it like Goldilocks and the Three Bears – not too tight, not too loose, but just right!
Avoiding Common Mistakes
Okay, so we all make mistakes, especially when we’re learning something new. Here are a few common magic circle mishaps and how to dodge them:
- Forgetting to pull the tail tight: This is a biggie! If you don’t pull that tail, you’ll have a hole in the middle of your project. Make sure you give it a good tug once you’ve finished your first round.
- Crocheting over the tail: You want to crochet around the loop created by the magic circle, not through the tail. This keeps the circle adjustable.
- Using the wrong hook size: A hook that’s too big can make your stitches loose and gappy. A hook that’s too small can make it hard to work the stitches. Check your yarn label for the recommended hook size.
It’s easy to get frustrated when you’re learning, but don’t give up! Every crocheter has been there. Just keep practicing, and you’ll get the hang of it. And remember, even if your first few magic circles aren’t perfect, they’re still handmade with love!
Practicing with Different Yarn
Don’t be afraid to experiment with different types of yarn. Each yarn has its own texture and thickness, which can affect the look and feel of your magic circle. Here’s a quick rundown:
- Worsted weight yarn: A good all-around choice for beginners. It’s easy to work with and shows stitch definition well.
- Bulky yarn: Creates a thicker, more textured magic circle. Great for projects like hats and scarves.
- Fingering weight yarn: Can be a bit trickier to work with, but it creates a delicate, lightweight magic circle. Perfect for amigurumi or other small projects. You can crochet a magic circle with any yarn, so don’t be afraid to try new things!
Here’s a table showing how different yarns might affect your magic circle:
| Yarn Weight | Recommended Hook Size | Effect on Magic Circle |
|---|---|---|
| Worsted Weight | H/8 (5mm) | Good stitch definition, easy to work with |
| Bulky | K/10.5 (6.5mm) | Thicker texture, closes quickly |
| Fingering | C/2 (2.75mm) | Delicate, lightweight, may require more stitches to close |
Troubleshooting Common Issues with the Magic Ring
Okay, so you’re trying out the magic ring, and it’s not exactly magical, right? Don’t worry, it happens to everyone. Let’s look at some common problems and how to fix them. It can be frustrating when things don’t go as planned, but with a little patience, you’ll get the hang of it.
Identifying Gaps in the Center
That pesky hole in the middle? Super annoying. This usually happens when the tail isn’t pulled tight enough after you’ve completed your first round. Make sure you give it a good, firm tug. Sometimes, even after pulling tight, a small gap remains. In this case, try weaving the tail multiple times around the center to close it up completely. You can also try using a smaller hook for the first round to make the stitches tighter.
Fixing Loose Stitches
Loose stitches can make your project look uneven and sloppy. The key here is tension. Are you keeping the yarn taut as you work? If not, that’s likely the culprit. Try to maintain a consistent tension throughout your project. If you notice loose stitches after you’ve already worked a few rounds, you can sometimes gently tighten them by pulling on the working yarn or the tail. However, prevention is better than cure, so focus on maintaining even tension from the start. If you’re still struggling, consider using a formula for creating a flat crochet circle to help maintain even stitches.
Adjusting Tension for Better Results
Tension is everything! Too tight, and your project will be stiff and difficult to work with. Too loose, and you’ll end up with gaps and an uneven texture. Finding that sweet spot takes practice. Here are a few tips:
- Experiment with different hook sizes. A smaller hook can help tighten up loose stitches, while a larger hook can loosen up tight stitches.
- Pay attention to how you’re holding the yarn. Are you gripping it too tightly? Try to relax your hand and let the yarn flow more freely.
- Practice, practice, practice! The more you work with the magic ring, the better you’ll become at judging and maintaining consistent tension.
It’s also worth noting that different yarns behave differently. Some yarns are more prone to stretching or loosening than others. If you’re having trouble with tension, try switching to a different type of yarn to see if that makes a difference.
Exploring Variations of the Magic Circle
Alternative Methods for Starting in the Round
Okay, so you’ve got the basic magic circle down. Awesome! But did you know there are other ways to kick off a crochet project in the round? Sometimes, the magic circle just isn’t the right fit, or maybe you’re looking for a different texture or a more secure start. Let’s look at a couple of alternatives.
- Chain and Join: This is the classic method. You chain a few stitches, then slip stitch to join the first and last chain, forming a ring. It’s simple but can leave a noticeable hole in the center.
- Adjustable Ring (Slip Knot Method): Similar to the magic circle, but you create a slip knot and work your stitches into the loop. It’s a bit bulkier than the magic circle, but some find it easier to manage.
- Double Magic Ring: For extra security, especially with slippery yarns, try wrapping the yarn around your fingers twice instead of once when creating the initial loop. This makes the center super tight.
Using the Magic Circle in Different Patterns
The magic circle isn’t just for amigurumi! It’s a super versatile technique that can be used in all sorts of crochet patterns. Think about using it for:
- Hats: Starting a hat with a magic circle gives you a nice, closed crown.
- Granny Squares: You can use a magic circle to start a granny square, especially if you want a solid center.
- Mandalas: The magic circle is perfect for creating the center of a mandala.
Experiment with different stitch patterns within the magic circle. Try using different numbers of stitches in the first round, or try different increase patterns to see how it affects the final shape. You might be surprised at the cool effects you can achieve!
Combining Techniques for Unique Designs
Now, let’s get a little crazy! Who says you have to stick to just one technique? Try combining the magic circle with other methods to create unique and interesting designs. For example:
- Magic Circle + Invisible Join: Start with a magic circle, then use an invisible join to close the round for a seamless finish.
- Magic Circle + Surface Crochet: Use a magic circle to create a small motif, then attach it to a larger project using surface crochet.
- Magic Circle + Adjusting Stitch Placement: Modify where the stitches are worked into a single stitch to achieve a true circular shape in your crochet projects. This can help create a flatter circle.
Don’t be afraid to experiment and see what you can come up with! The possibilities are endless when you start mixing and matching different crochet techniques. You can even check out a crochet kit to get you started.
When to Use the Crochet Magic Ring
Okay, so you’ve learned how to do the magic ring. Now, when do you actually use it? It’s not always the best choice, but in many cases, it’s a total lifesaver. Let’s break down when this technique really shines.
Best Projects for the Magic Circle
The magic circle is fantastic for projects that need a completely closed center. Think about it: no more unsightly holes! This makes it ideal for:
- Amigurumi: Those cute little crocheted toys? The magic circle is almost essential for starting the head and body. You don’t want stuffing poking out!
- Hats: Starting a hat from the top down? A magic circle ensures a snug fit and no weird gaps on the crown. It’s a game changer for hat making.
- Mandalas and Coasters: Anything where a flat, seamless center is key. The magic circle helps you achieve that professional, polished look.
- Granny Squares: While not always necessary, using a magic circle for the center of a granny square can give it a cleaner start, especially if you’re using multiple colors.
Understanding Project Requirements
Before you automatically reach for the magic circle, consider what the pattern actually calls for. Some patterns are specifically designed around a traditional chain-and-slip-stitch start. Also, think about the yarn you’re using. Super bulky yarn might make the magic circle a bit awkward, while finer yarns work beautifully. If you’re working on a project like half double crochet, the starting method might be less critical, but for amigurumi, it’s almost a must.
Deciding Between Magic Circle and Traditional Methods
So, magic circle or traditional chain? Here’s a quick rundown to help you decide:
- Magic Circle: Use when you need a completely closed center, want a seamless look, and are working with a yarn that’s easy to manipulate.
- Chain-and-Slip-Stitch: Use when the pattern calls for it, you’re working with a very bulky yarn, or you find the magic circle too fiddly. It’s also a good option if you’re going for a more rustic or textured look.
Ultimately, the best method depends on your personal preference and the specific needs of your project. Don’t be afraid to experiment and see what works best for you! Sometimes, the traditional method of chaining works just fine, especially if you’re making something like a basket where a super tight center isn’t as important. But for those projects where a flawless start is key, the magic circle is your best friend. It might take a little practice to get the hang of it, but trust me, it’s worth it!
Wrapping It Up
So, there you have it! The magic ring is a handy technique that can really change how you start your crochet projects. It might feel a bit tricky at first, but with some practice, you’ll get the hang of it. Remember, the key is to keep your tension even and not rush through the steps. Before you know it, you’ll be whipping up hats, amigurumi, and more with a perfect, gap-free start. Keep practicing, and soon enough, you’ll be a pro at the magic ring. Happy crocheting!
Frequently Asked Questions
What is the magic ring in crochet?
The magic ring is a special technique used to start crocheting in a round. It creates a tight loop that prevents holes in the center of your work.
Why should I use a magic ring instead of a traditional method?
Using a magic ring helps you achieve a neat, closed center, which is especially important for projects like hats and stuffed animals.
How do I make a magic ring?
To make a magic ring, create a loop with your yarn, insert your hook, yarn over, and pull through. Then, crochet your stitches into the loop.
Can I practice the magic ring with any type of yarn?
Yes, but it’s easier to practice with medium-weight yarn. It helps you see your stitches clearly and makes the process smoother.
What if I accidentally leave a gap in the center of my magic ring?
If you see a gap, you can adjust the tension by pulling the tail of the yarn tighter to close it up.
Are there any projects that are better suited for the magic ring technique?
Yes! The magic ring is great for projects like amigurumi, hats, and any circular designs where a tight center is needed.